DIY Galvanized Bucket for Fall
Please note that this post contains affiliate links. As an Amazon Associate, Rewards Style influencer and Jane Influencer, we earn from qualifying purchases and any sales made through such links will reward us a small commission – at no extra cost for you.
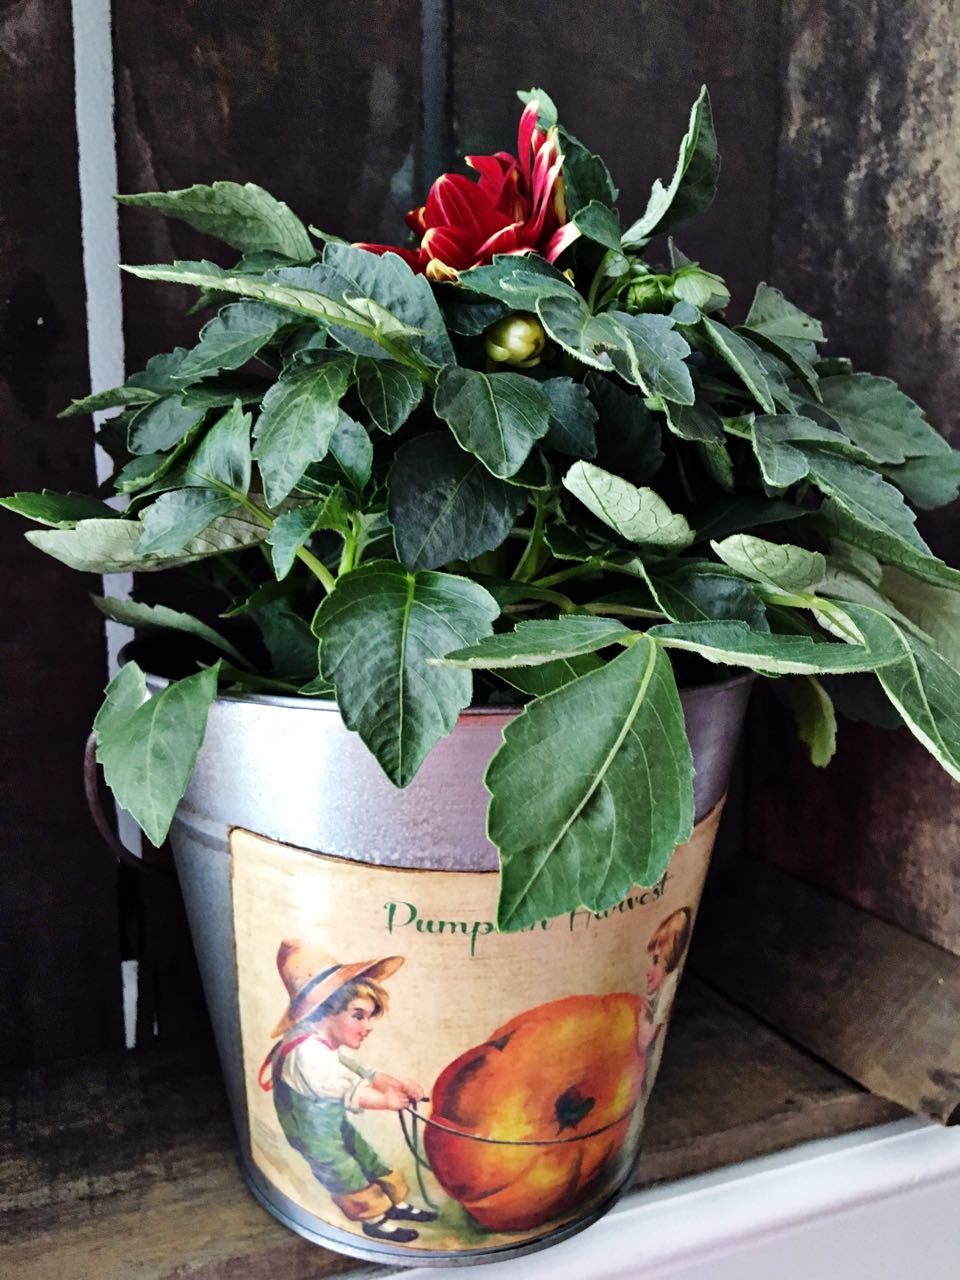
Sometimes I am struck with inspiration when I least expect it. Like this project today. I was in a dollar store and saw this tin bucket. I wasn’t even looking for one, but there it was sitting pretty and shiny on top of a shelf. The one dollar price tag is a sweet deal too. Right then and there I knew exactly what I wanted to do. Here’s how I made my DIY Galvanized Bucket for Fall. (This post contains affiliate links.)

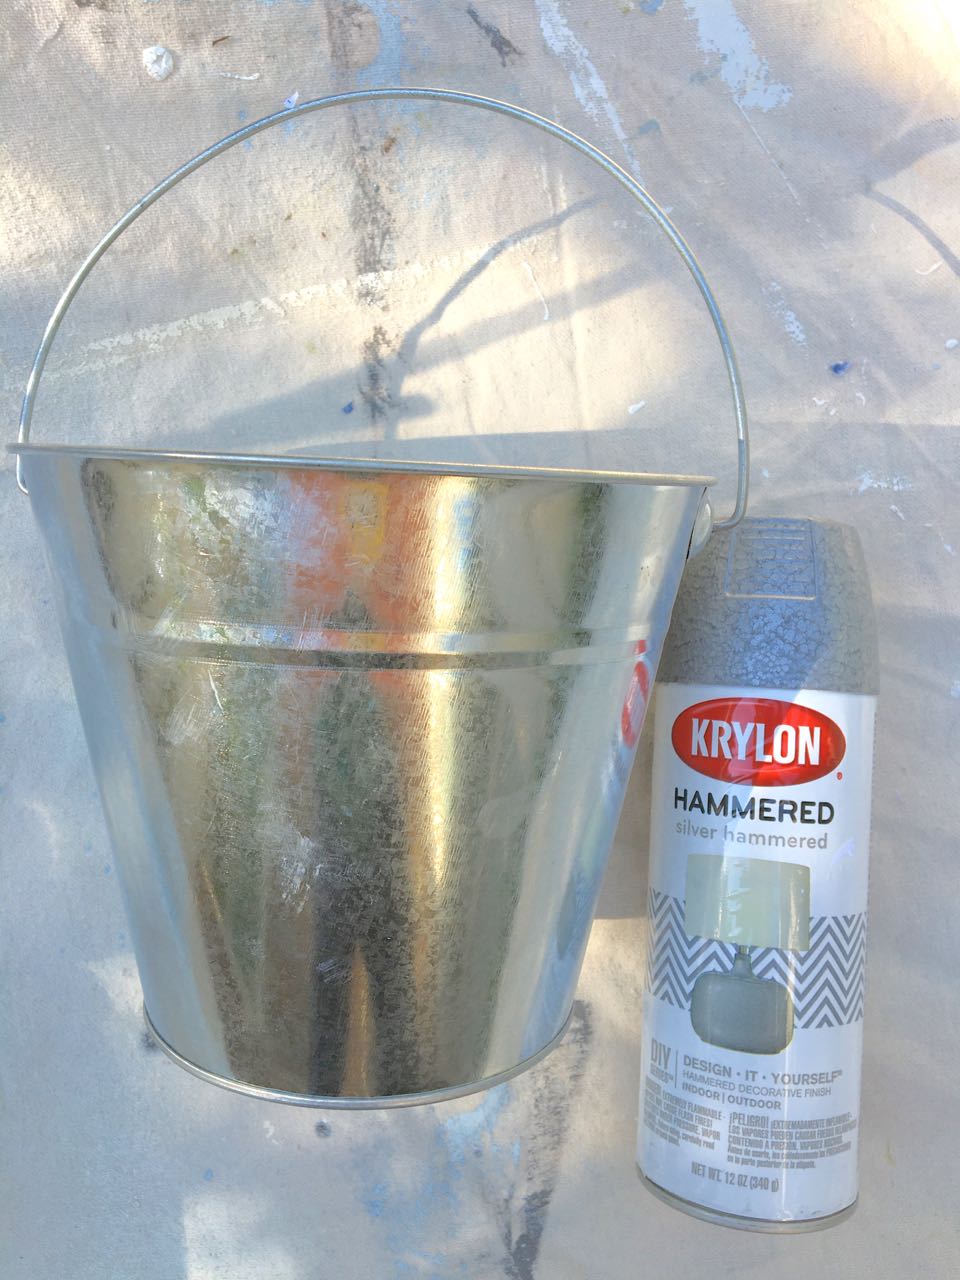
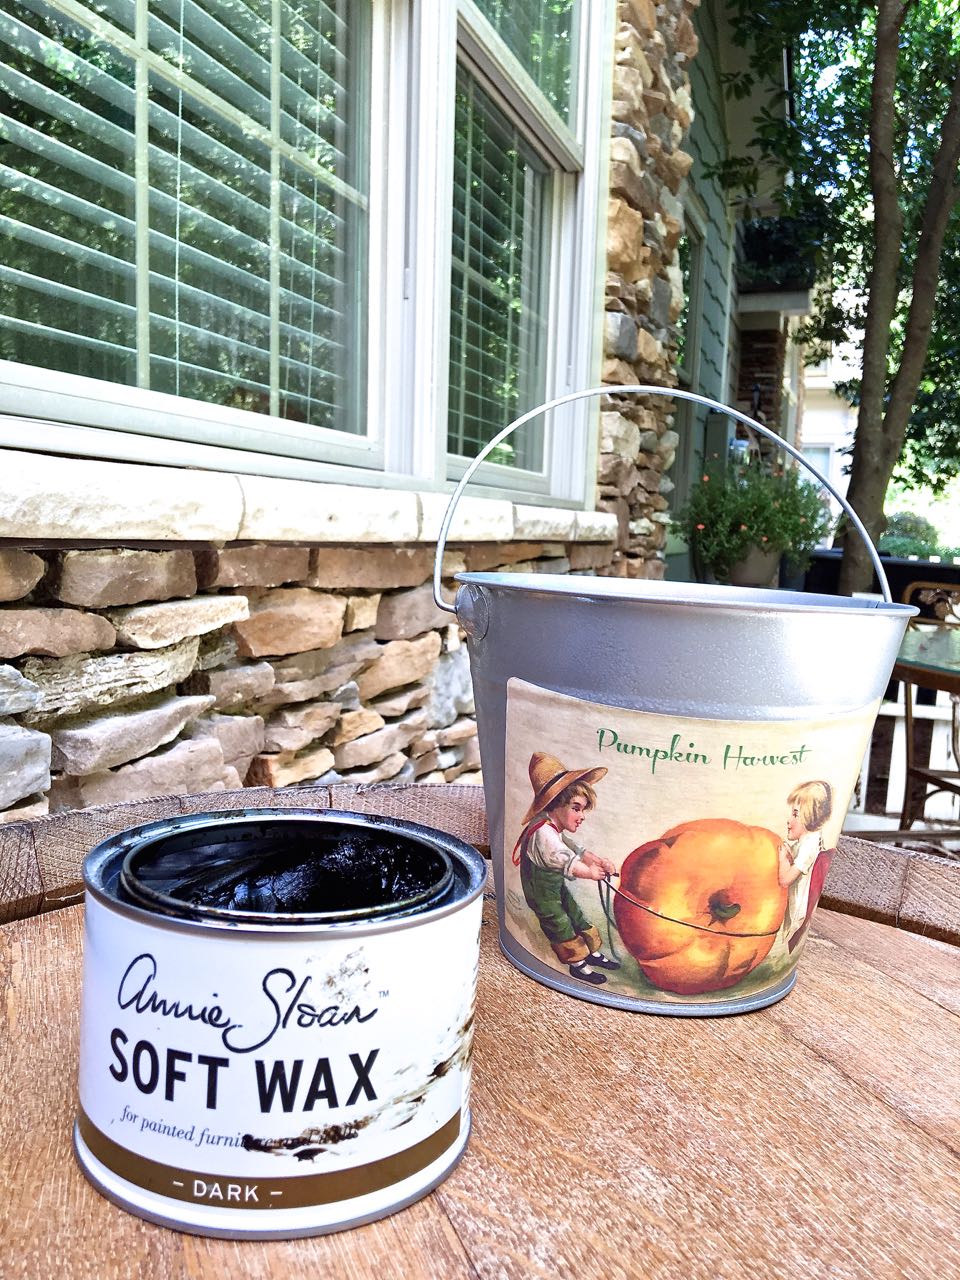
This bucket was a bit too new and shiny for my taste. You can purchase a similar bucket here. I wanted to create a vintage look of a galvanized finish. I dug through my paint stash and found this leftover hammered silver spray paint, which you can get here
. Then, I gave the bucket one quick coat.
The finish already looked much better. For the vintage fall fabrics, I searched the website of Graphics Fairy. If you are in need of inspiration please head to her site. She has tons of graphics that are free for you to use.
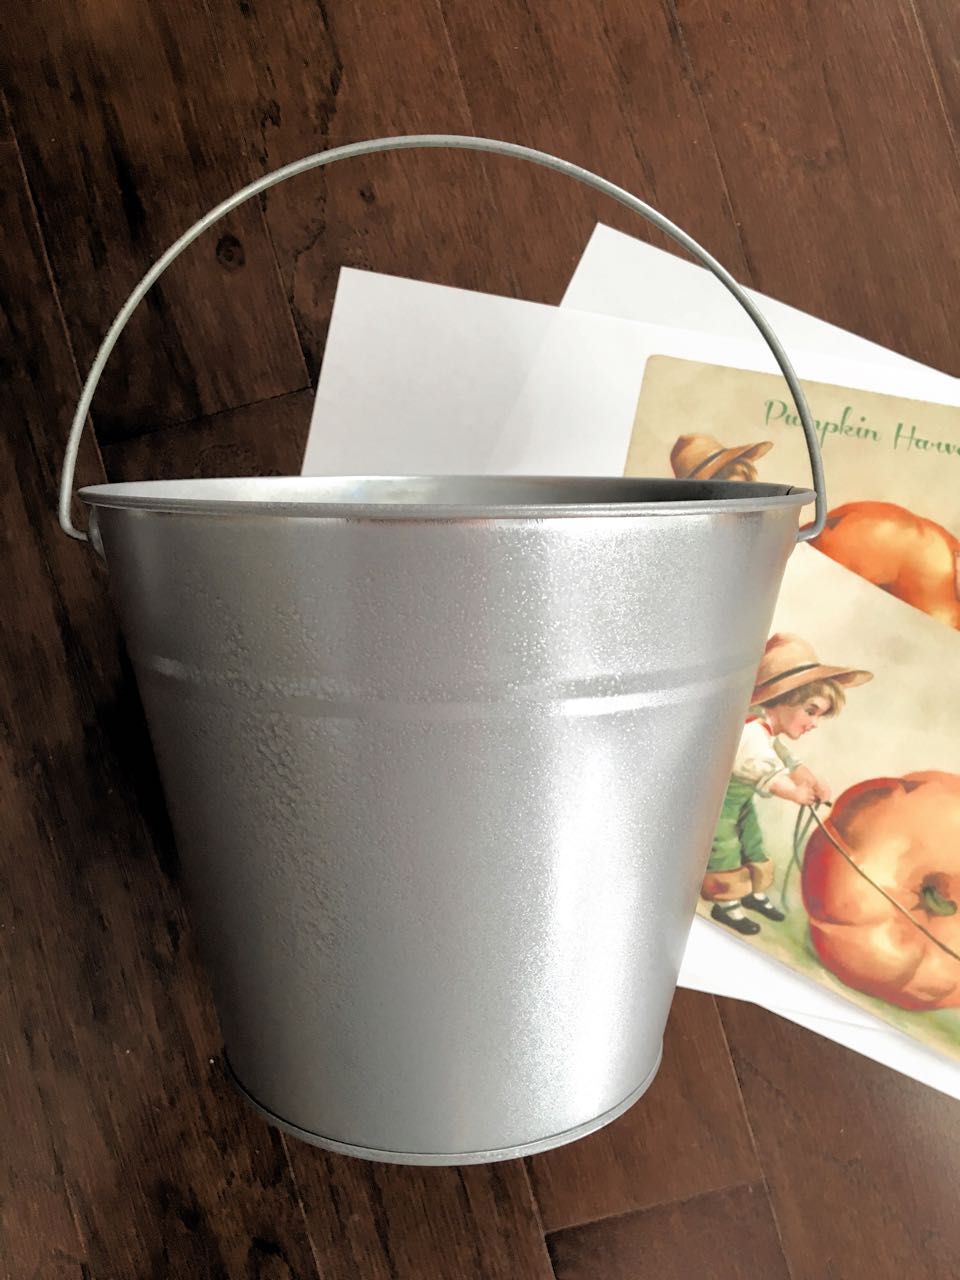
I chose this sweet antique postcard. I changed the wording and printed in a 5×7 size.
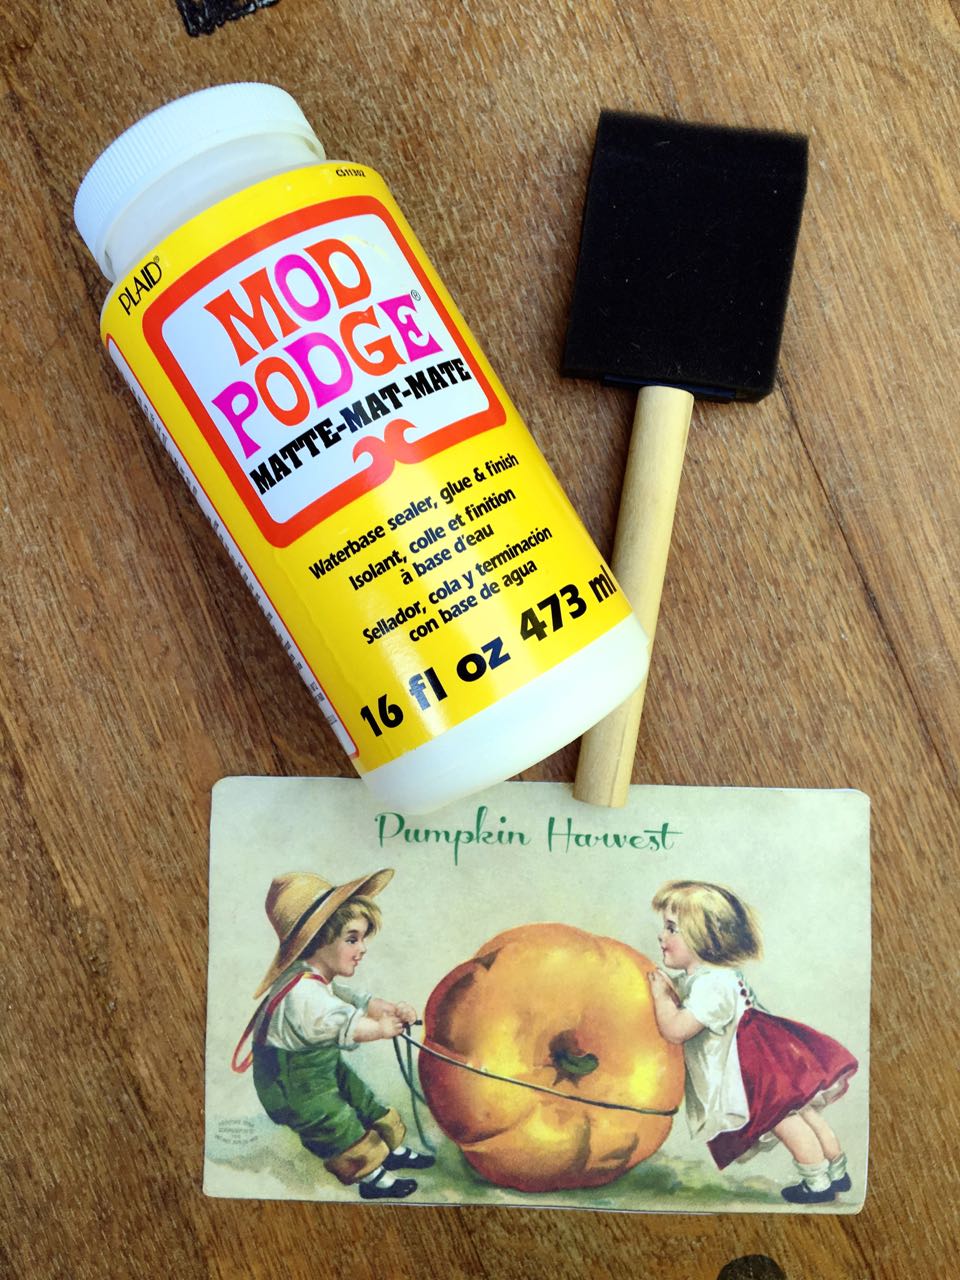
I used Mod Podge in a matte finish and spread it onto the back of the graphic and adhered it to the galvanized bucket.
After it dried completely, I added another coat of Mod Podge to the front of the graphic. I was very careful not to get any of the adhesive onto the galvanized bucket.
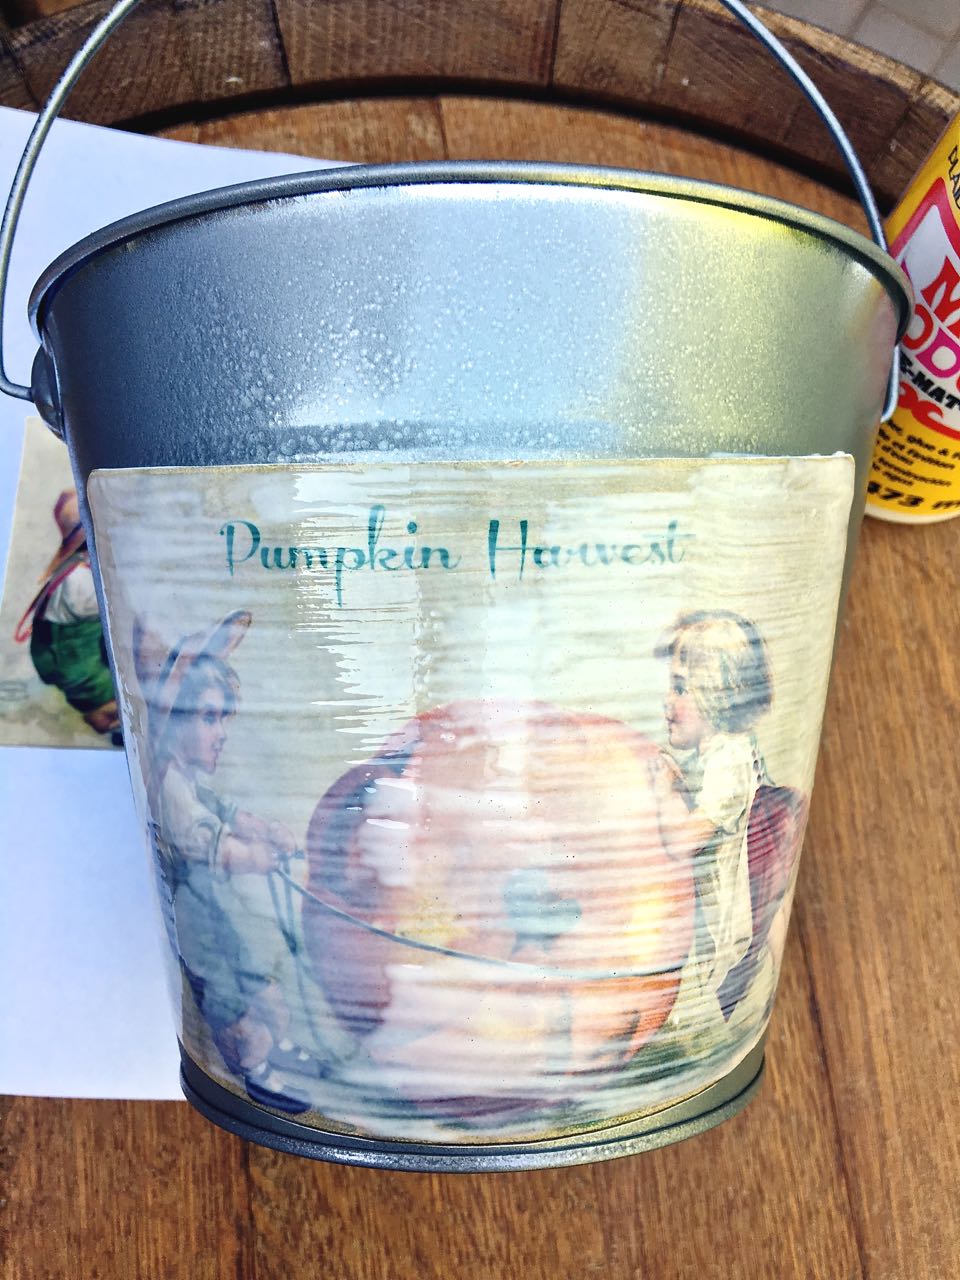
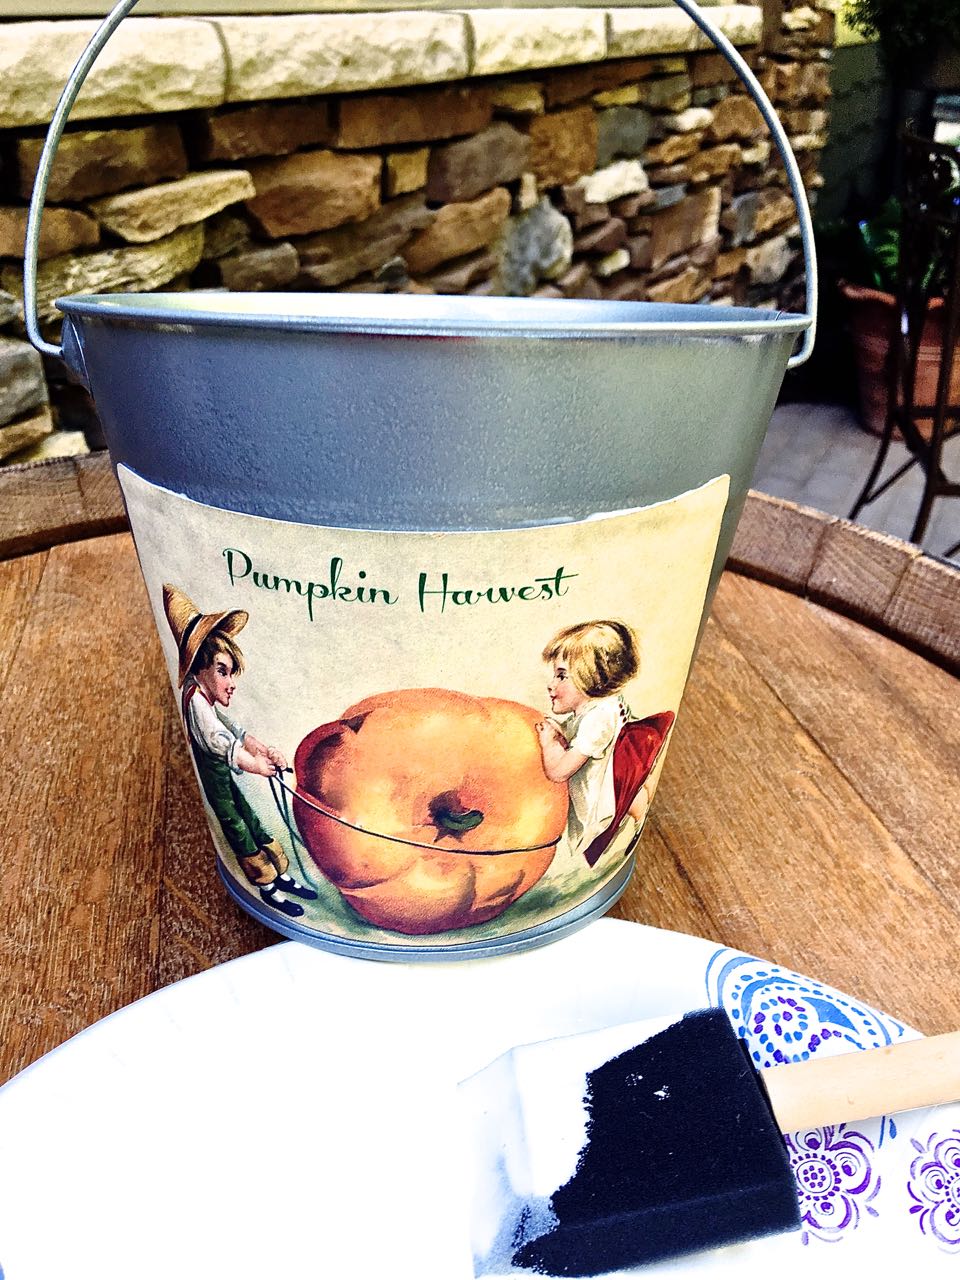
When this coat dried completely I added a small amount of dark wax to the graphic. You can find a similar dark wax here.
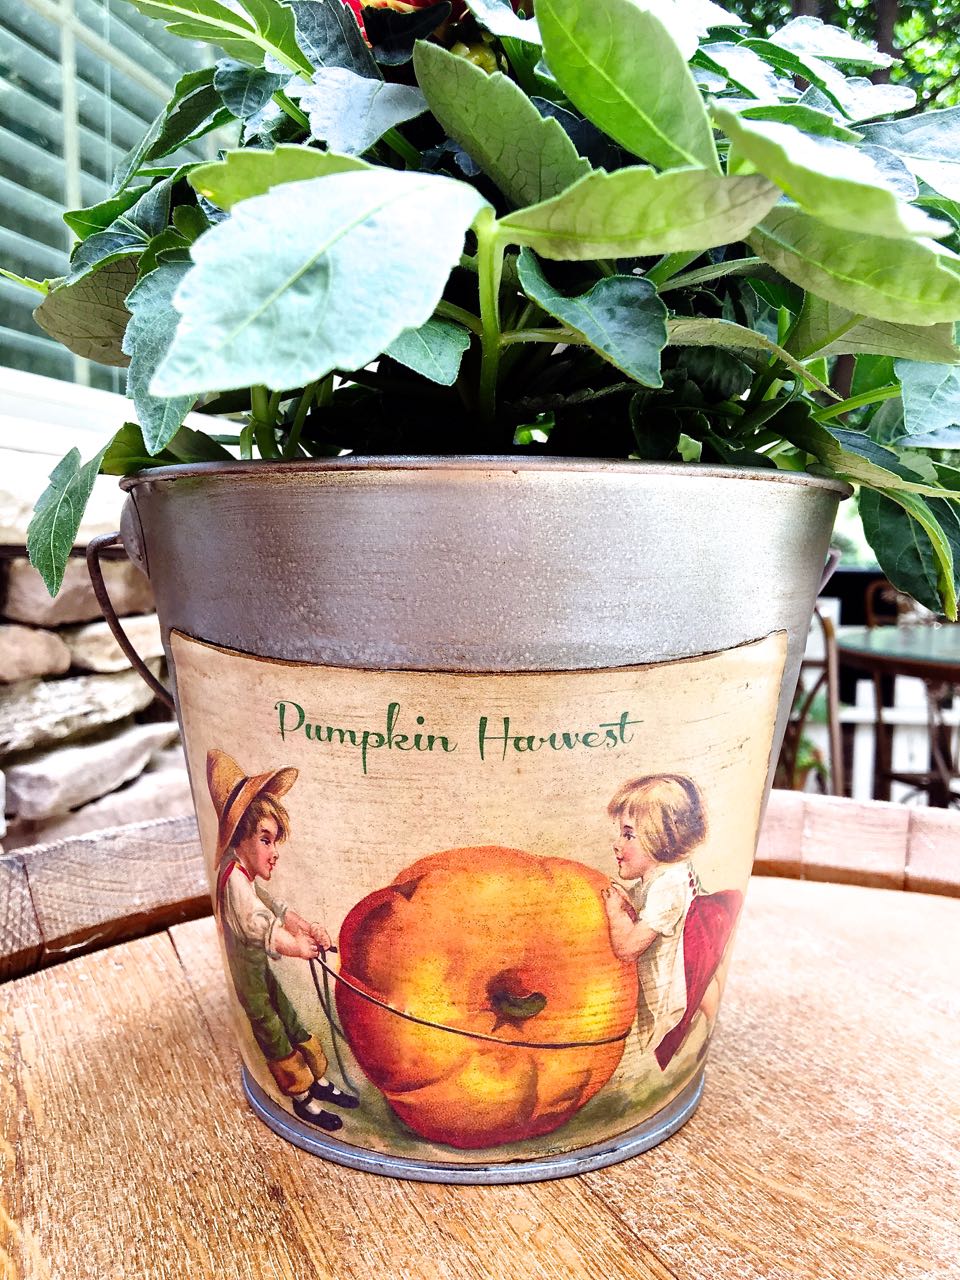
This was blended in very well. I then added a generous coat of dark wax to the entire bucket. It really made the bucket look authentically galvanized.

Love, love, love how this turned out!
This project set me back a whole dollar! I already had the paint and wax on hand and the graphic was free.
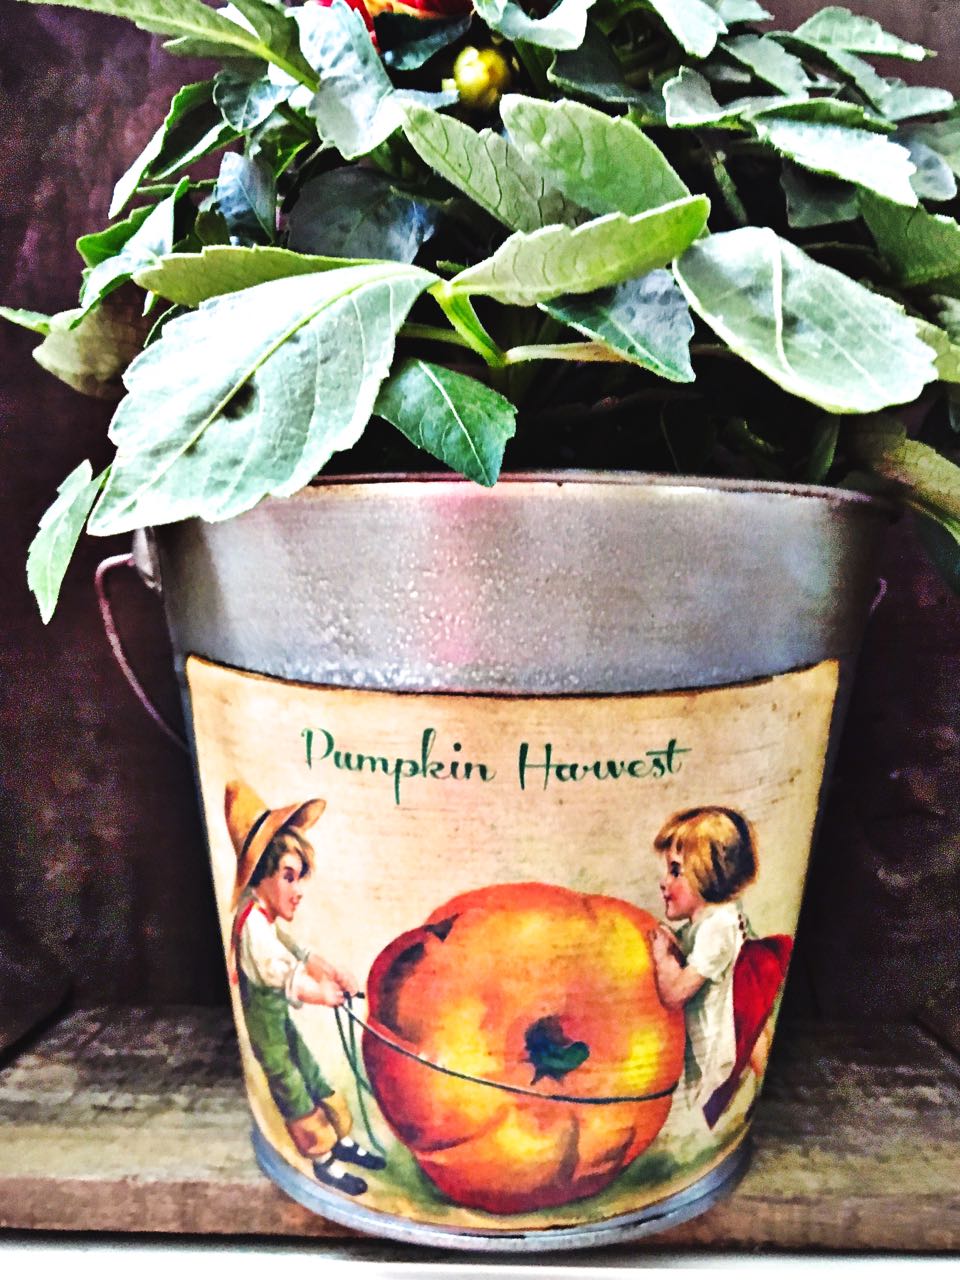
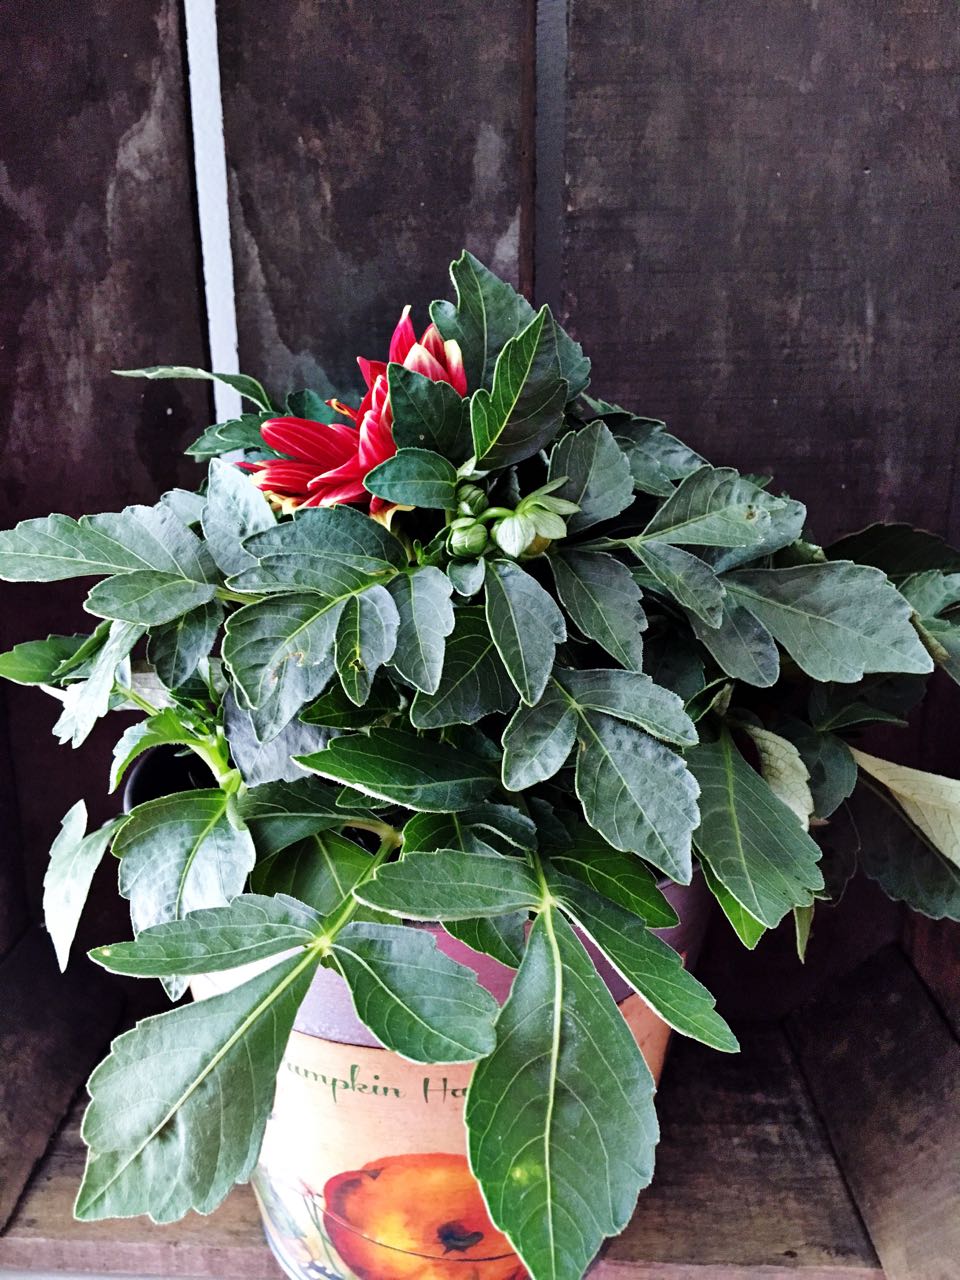
This bucket is going to get a lot of use in my Fall decor. I can’t wait to showcase it in vignettes with different displays.
Have you found anything fun and interesting at the dollar store recently?
Until tomorrow…
XO~Vicki
Let’s be Pin Pals. Don’t forget to Pin this to your favorite Pinterest board…


So cute!! I love that sweet postcard. Sounds like I need to take a trip to the dollar store! Have a great day ladies!!
This is so cute Vicki! I love how it has a nostalgic feel. It reminds me of cane grinding, homemade apple butter and pumpkin patches. Bring on the hayrides! hugs, CoCo
Hi ladies… Where do you find the dark wax? Recently I painted 2 nightstands cream and I think they would look terrific with the dark wax overlay… do you have pics of furniture with it used? AND is it hard to work with? I’m not so crafty so easy is best for me. Thanks Marsha R 🙂
Inspirational!
Adorable!! I love how the dark wax made it look aged. Perfect for fall!
Just adorable!!!
Bambi