Fall Painted Neutral Pumpkins
Please note that this post contains affiliate links. As an Amazon Associate, Rewards Style influencer and Jane Influencer, we earn from qualifying purchases and any sales made through such links will reward us a small commission – at no extra cost for you.
I hope you are doing well in your neck of the woods. I have extended my stay at the lake a little bit longer. It is so peaceful and quiet here that I am able to get more work done than I would back in the city. I will pack up and head home tomorrow with a carload of projects that I have created, like these fall painted neutral pumpkins.
Budget Friendly
I try really hard to keep budget in mind when I decorate whether it be a craft or redoing an entire room. This project is no different. I wanted to make a Fall display for the coffee table. Yesterday I made a visit to the local thrift store where I was able to purchase 2 bags of these plastic pumpkins for just $2.oo. I was surprised at all of the Fall decor items they had for very little money. These pumpkins and gourds would have sold in the store for upwards of $6.00 per bag.


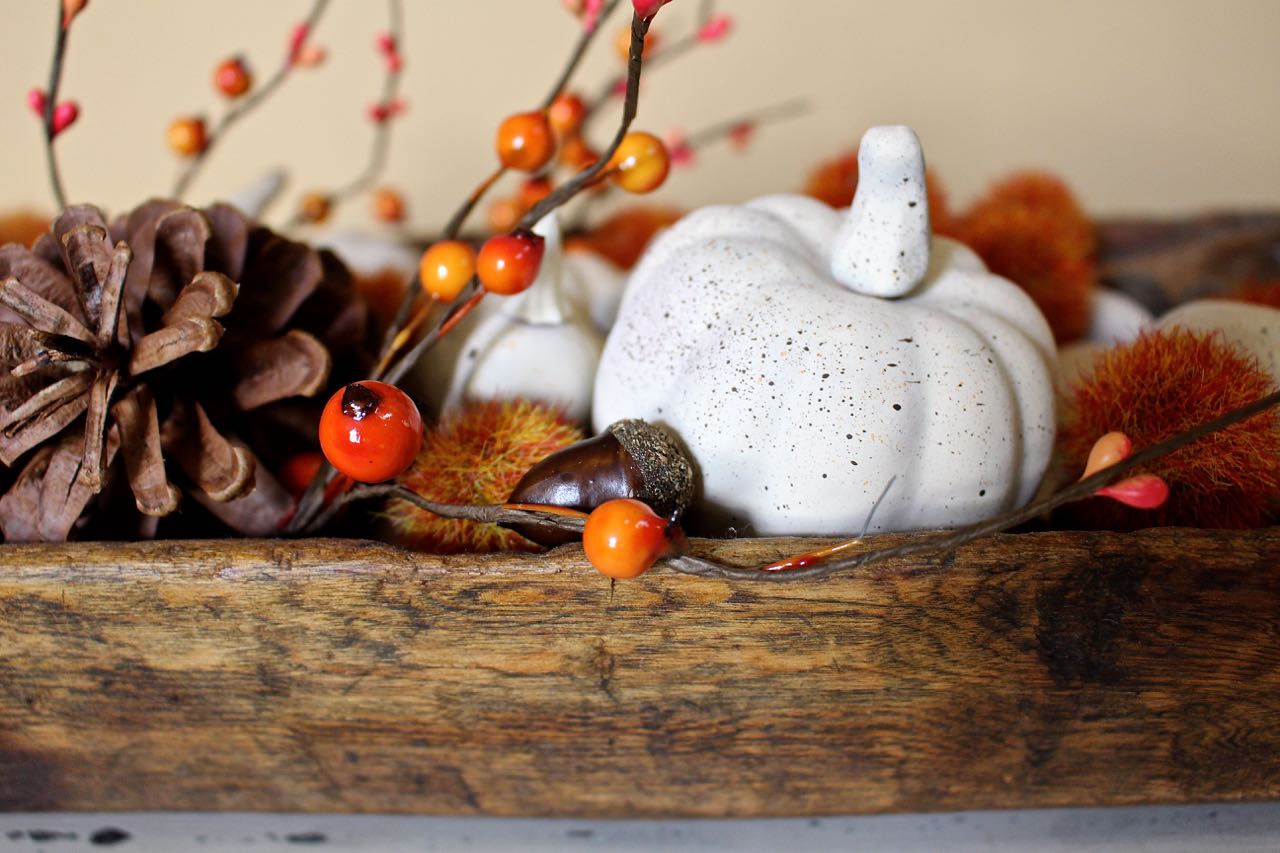
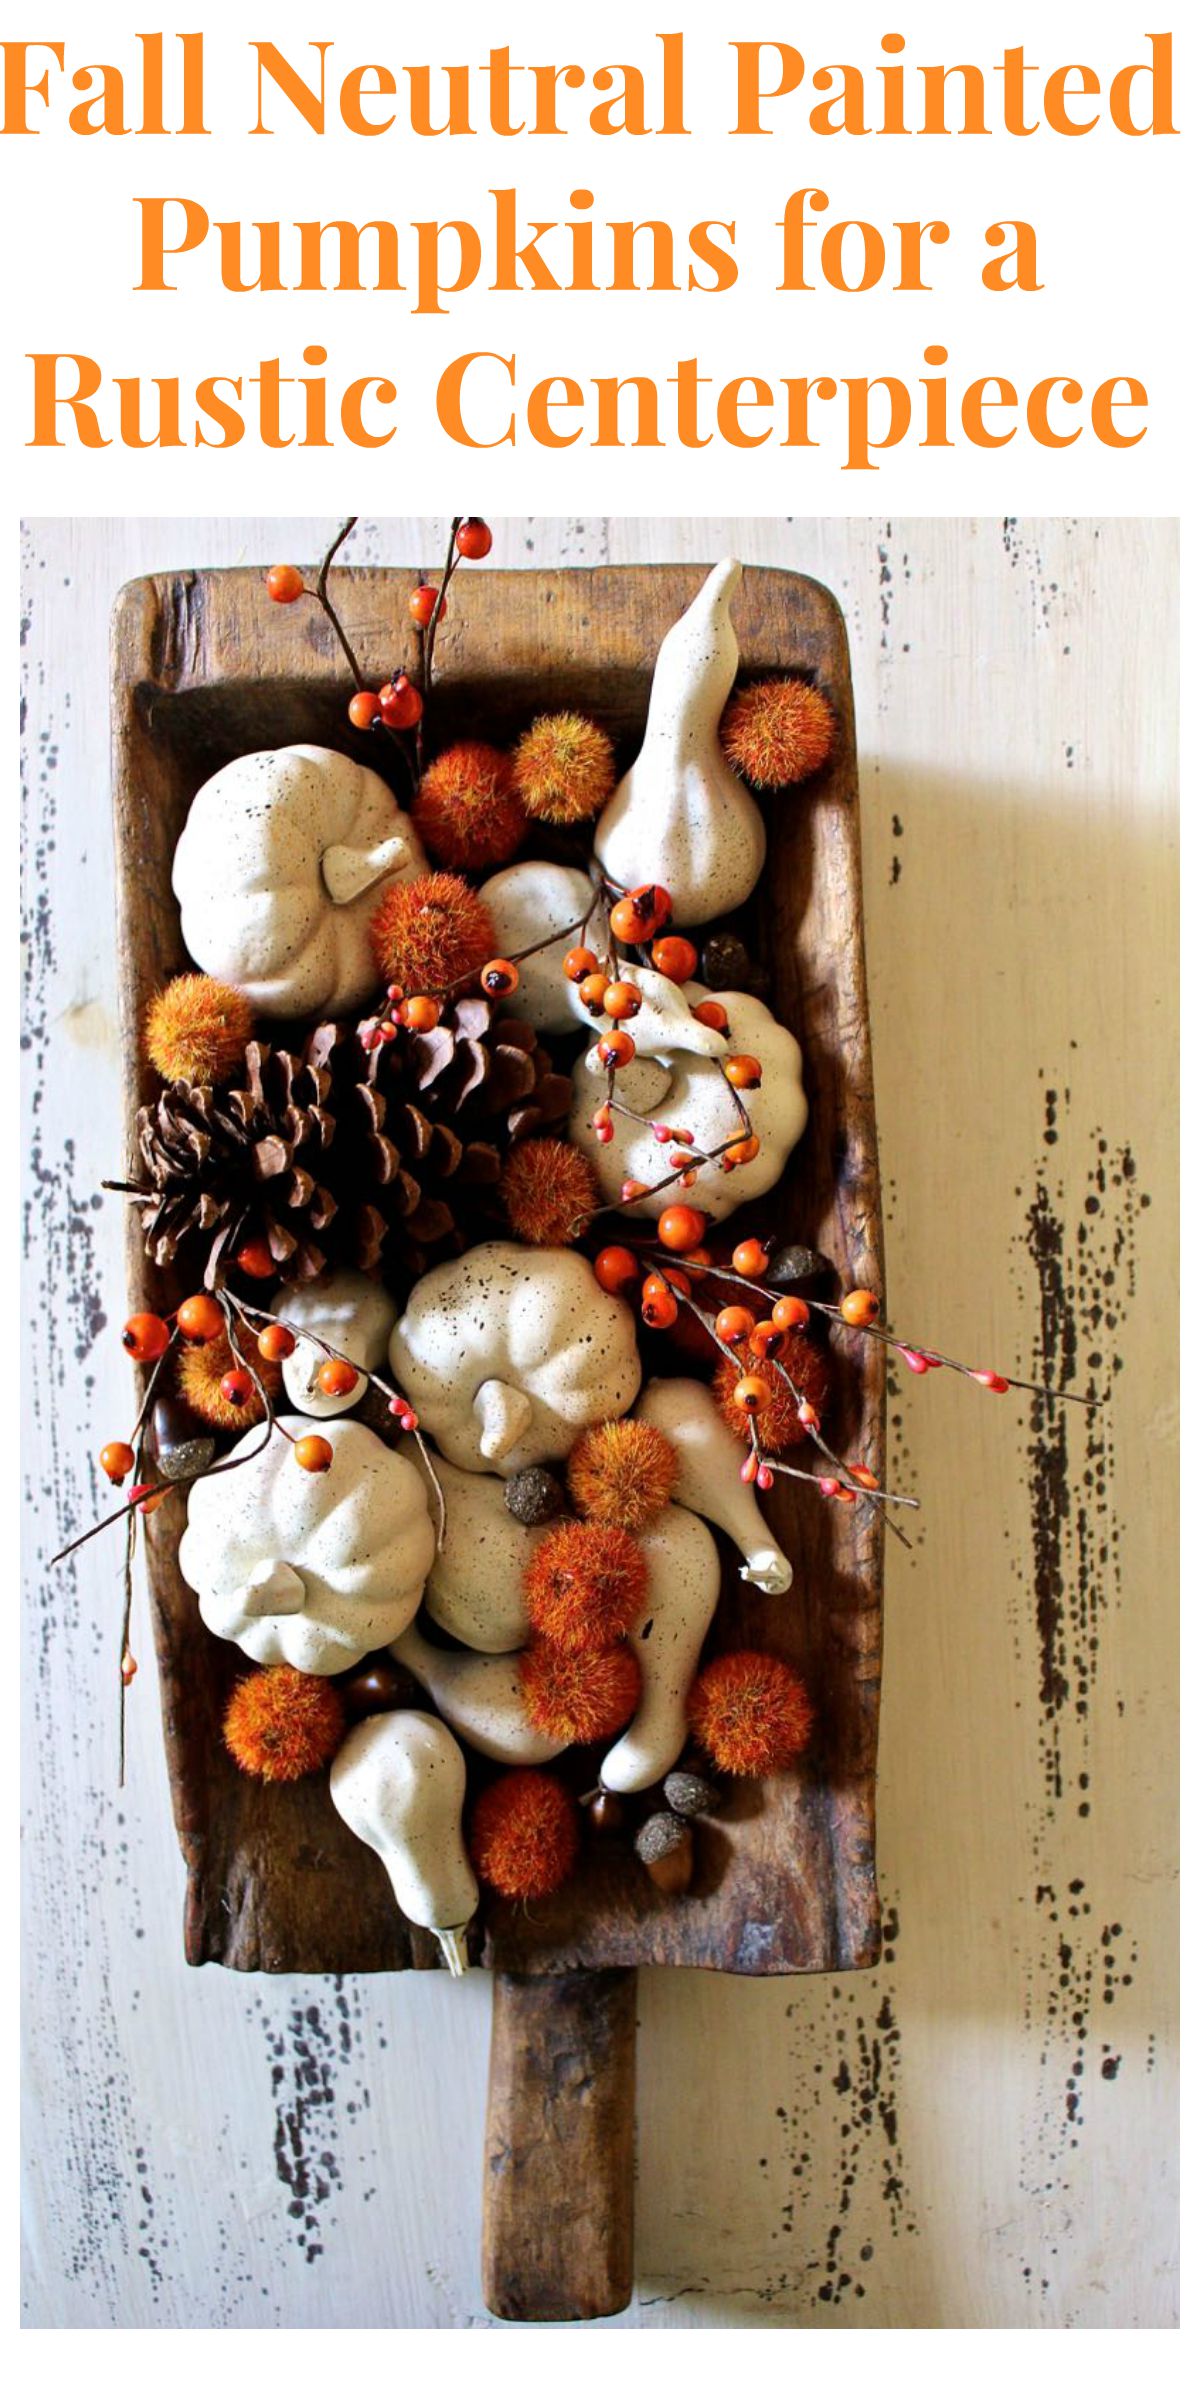
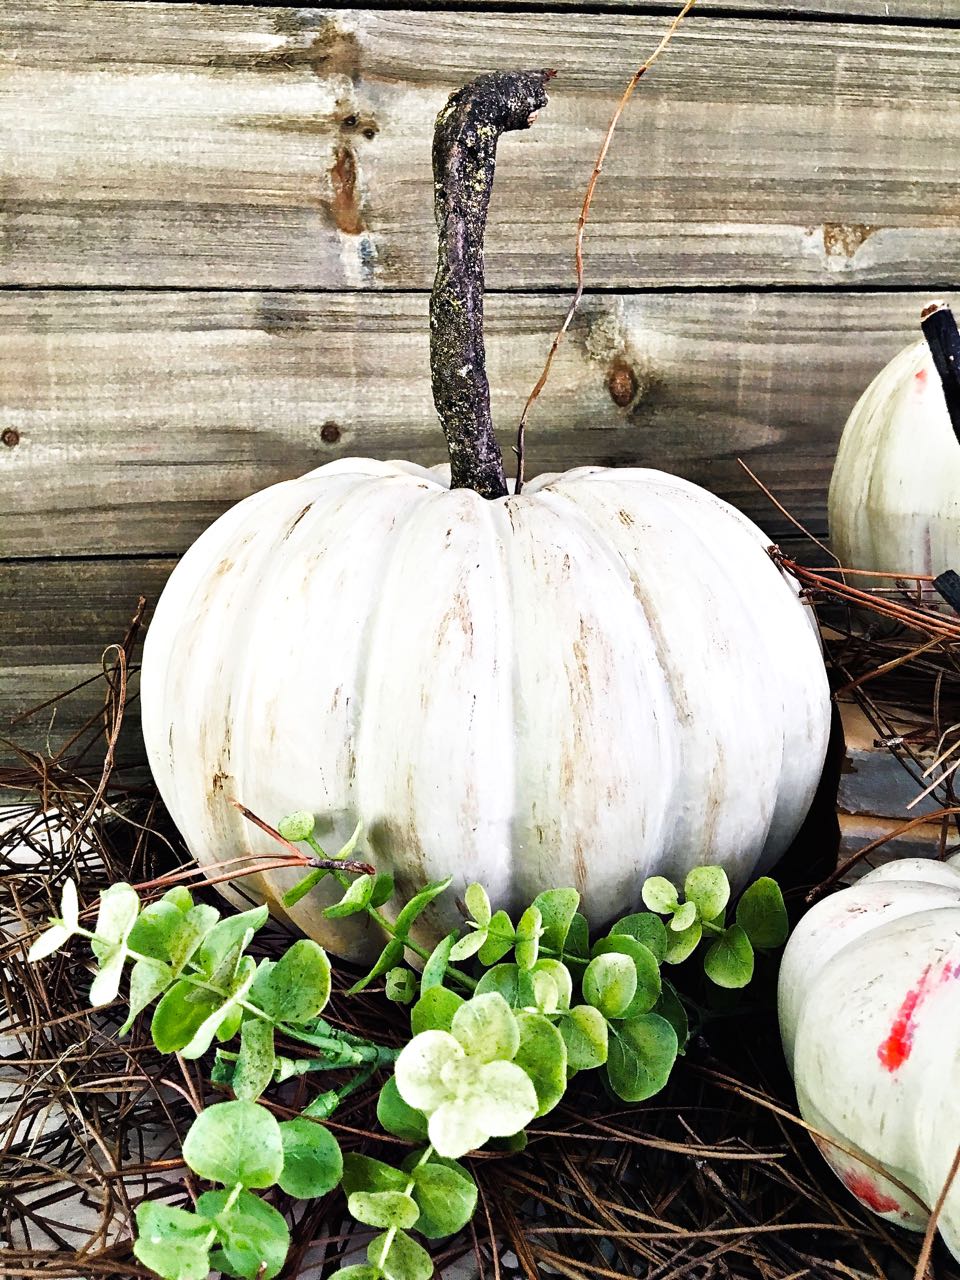
As you can see they are very shiny and definitely plastic looking. I decided to paint them in a creamy chalk paint color. Also added a spritz of burnt orange and umber to give a bit of dimension. I watered down the paint quite a bit. Then using a toothbrush – like the free one from the dentist – I dipped it into the paint …


…and spritzed each painted mini-pumpkin.

I knew I was going to use this treasured antique wooden bowl as my centerpiece container. I purchased this years ago from an elderly gentleman whose father had made it. The selling price was $3.00. I tried to give the man more money but he wouldn’t take it. He was thrilled that I loved it so much.

I went for a walk in the neighborhood and collected some natural elements for the centerpiece. I also had some faux berries from an old wreath that I used.


Before using pinecones you want to be sure that there aren’t any critters living inside of them. I typically bake mine in the oven with great results. Preheat the oven to 250 degrees. Turn the oven off and place the pinecones on a baking sheet and place it in the oven until the oven is cool.
Acorn warning
Furthermore, I would advise against using real acorns inside the house. Even with the baking method. There are mites that bore deep inside of the mites and it is very hard to get rid of them. Don’t take the chance.

I know that this is photo overload, but I love how this centerpiece turned out 🙂

I had most of the materials on-hand so this project was very inexpensive to create…approximately $3.00 total!

Take a walk outside and you might be surprised at what you can find. Pretty fallen leaves, pecans, pinecones, berries, rocks, twigs or thistle. The possibilities are endless and these items are all free!

I love decorating with natural items and plants. I feel it gives my home and decor a warm and inviting feeling.


Are you doing any decorating for Fall yet? We would love to hear what you are up to.
Until tomorrow,
Love these neutral pumpkins with the toothbrush tip! They don’t even look like the same pumpkins. Too cool! Safe travels home, Coco
Hey CoCo – Thanks, girl! This was a fun and easy project. We especially love the elements of nature that went into the bowl. Quick, easy and done 🙂
Absolutly gorgeous! What a steal to find those pumpkins and you gave them such a great makeover!
But that bowl….that bowl couldn’t be any sweeter! I love this so much. 🌰🍂🍁
Hey Karen – that bowl and the story that go with it are etched in memory. Still can’t believe that the man was selling it 🙂 We are always surprised that the thrift stores have so many holiday items for such little money! Thanks so much!
The pumpkins look great painted white and speckled. They really make this arrangement!! And, $3 for that wooden bowl? What an awesome find! Beautiful centerpiece! Glad you got to spend a few days crafting 🙂
Thanks so very much Angie! The Fall season is when we really get energized to get things done. We really enjoy doing projects together and this one was so quick and easy.
Beautiful! I love the white/cream color with the orange. I was thinking about doing that in my decor too but wasn’t sure how it would look. Now I know, it’s perfect! Thanks Vicki!
Hey Liz – thank you! So glad that we could pave the way for you LOL. Let us know how your pumpkin project turns out!
OMG! Beautiful.
Kris
Thanks Kris! We really appreciate it!
I look at those orange balls every time I go into Hobby Lobby (2 hours away) and am tempted to buy them but never know where to use them. I love seeing them scattering in the bowl with the pumpkins and pinecones. Now I wish I would have bought some 🙁 That bowl is AMAZING and such a fabulous find for $3. I can’t even imagine how much a handmade item like that would be at an antique store. Really beautiful display!
Hi Jamie…oh my gosh, that’s a long way to travel to Hobby Lobby! We know that you appreciate vintage finds just as much as we do. This is a true treasure that we really value very much! Thanks so much for liking our centerpiece!
Vicki, Omg I love this centerpiece and it looks like very high end fall goodness and I can’t believe you painted the plastic pumpkins and spattered the paint in a way that looks so pretty. The bowl is the best part and almost looks a pumpkin with the cute handle on it. What a steal. Love it, Lisa
Hey Lisa – You are so very sweet! This was such a fun and very quick project…our favorite kind. Oh my gosh, you are right about the bowl – never noticed that before! Thanks so very much!
What a beautiful and lovely centerpiece! Your wood bowl is gorgeous! I really like the simplicity of your pumpkins and gourds, the cream coloring with the flecks of color brings the whole piece together perfectly.
Hi Kelly – Thanks so much! We just couldn’t pass up the good deal on the pumpkins but knew they would need to be altered in some way. We appreciate your “thumbs up”!
These are so cute. I love the tip about using a toothbrush to create the speckled paint treatment. Thanks for sharing!
This looks really great!
Love, love, love this ladies! The paint speckles were the perfect touch! I’ll be pinning and sharing! Lots of love to your both!
Cat
Thank you Cat! We appreciate your support!
These pumpkins looks so beautiful!!! Love the whole decoration style!!! and my favorite part the brush splats!!!!
XOXO
Absolutely stunning. Love how the chalk paint and specked orange give the pumpkins a totally new and unique look. That wooden bowl is amazing, what a wonderful find. Thanks for tutorial. Can’t wait to try this technic.
Hi BonBon- It was a super quick and fun project. Can’t wait to see what you create!
Gorgeousness. I love the rustic pumpkins! Pinned and shared!!!
Hey Stephanie – We can’t thank you enough! Cheers to a great weekend!