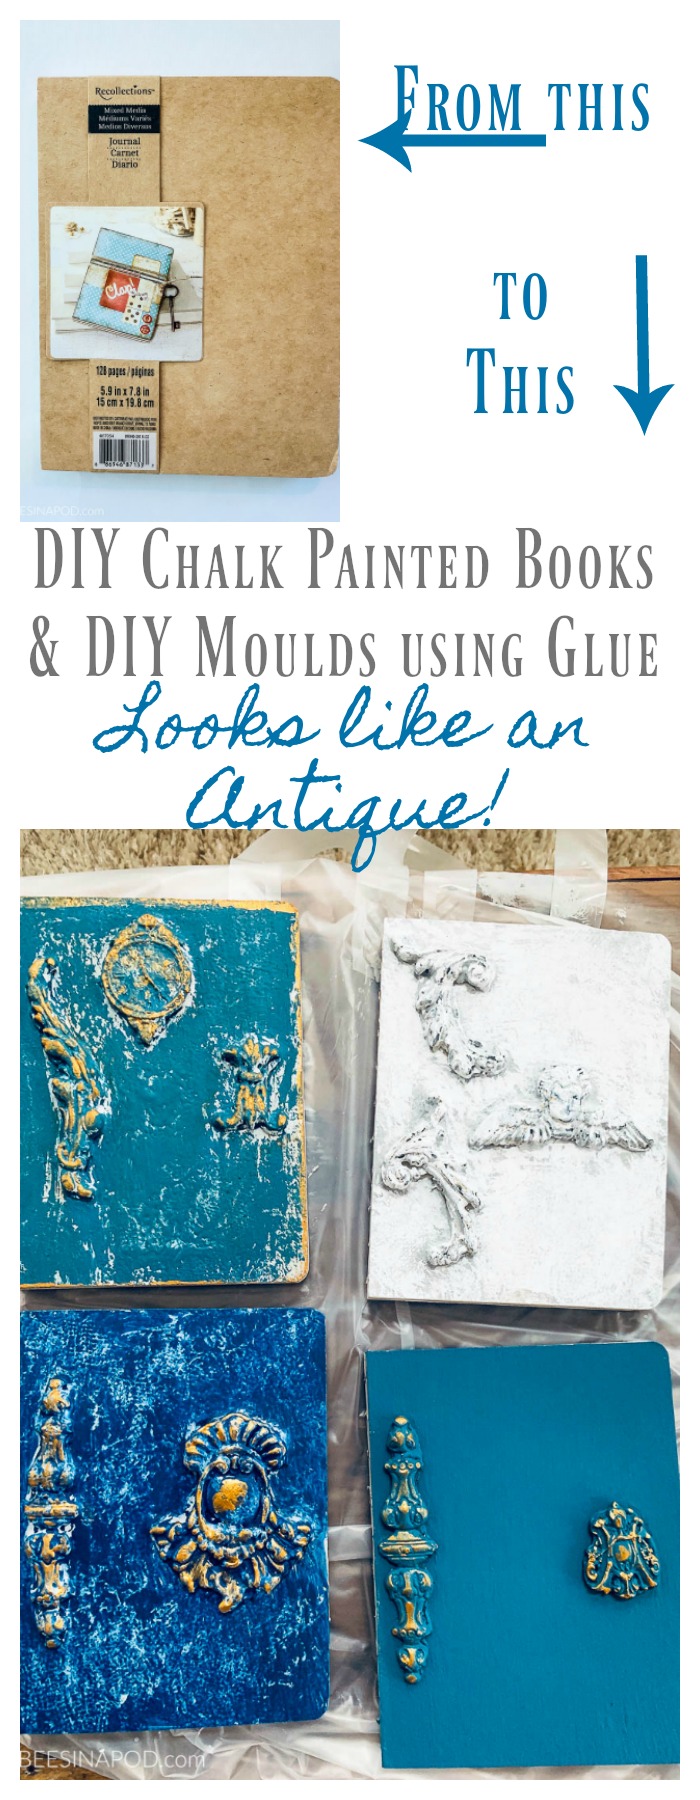
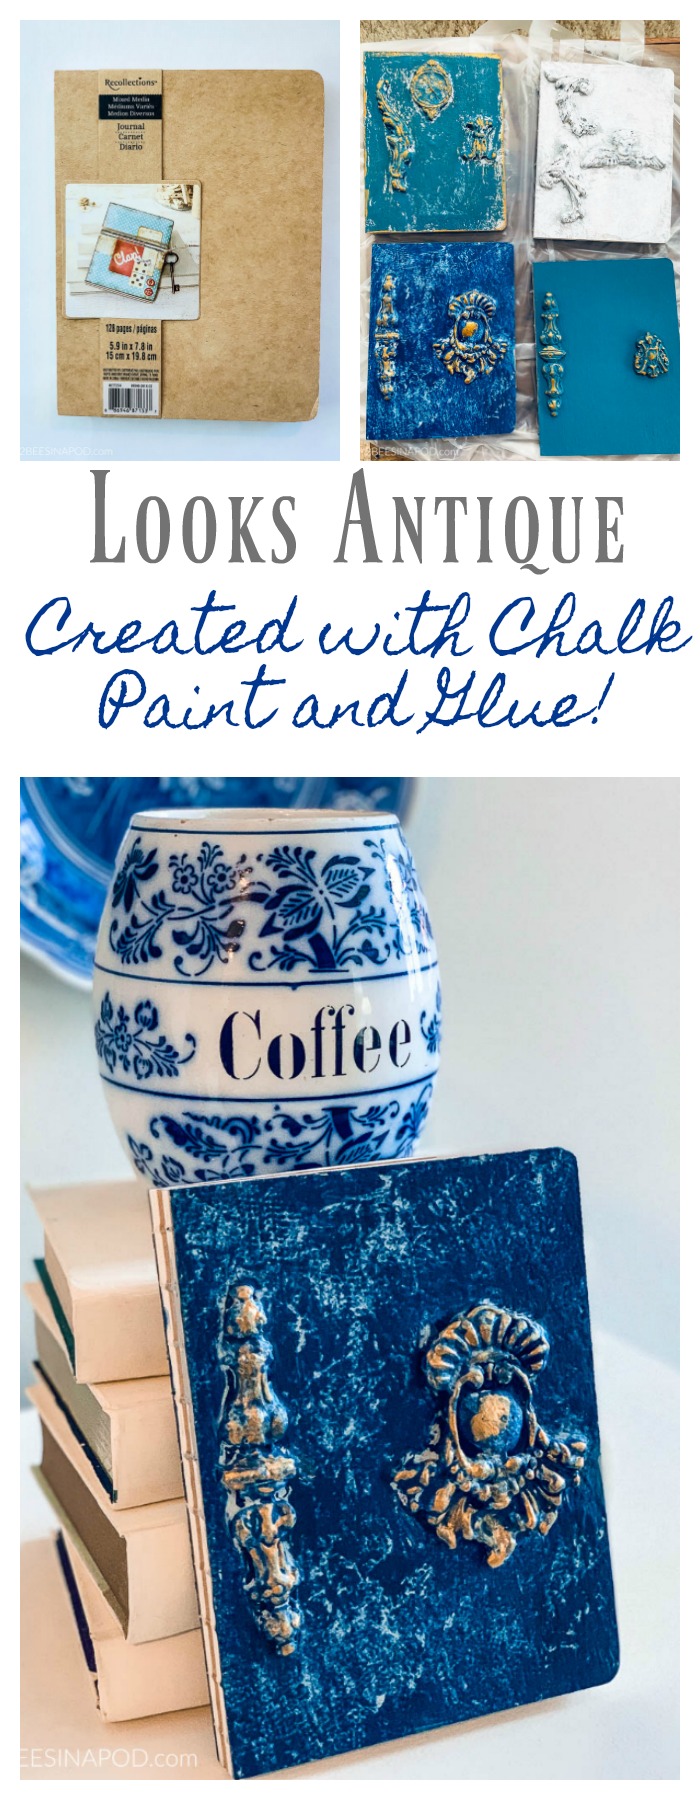
Chalk Painted Books to Look Like Antiques with DIY Molds
Please note that this post contains affiliate links. As an Amazon Associate, Rewards Style influencer and Jane Influencer, we earn from qualifying purchases and any sales made through such links will reward us a small commission – at no extra cost for you.
Chalk Painted Books to Look Like Antiques with DIY Molds
Yes, you have heard me say it before – this was a super-fun project! I love that moment when a creative spark is ignited. It’s so personally exciting and energizing that I can’t wait to get started and bring my vision to life. Now I want to get you creatively excited and energized. This is how to I chalk painted books to look like antiques with DIY molds.
What a Deal
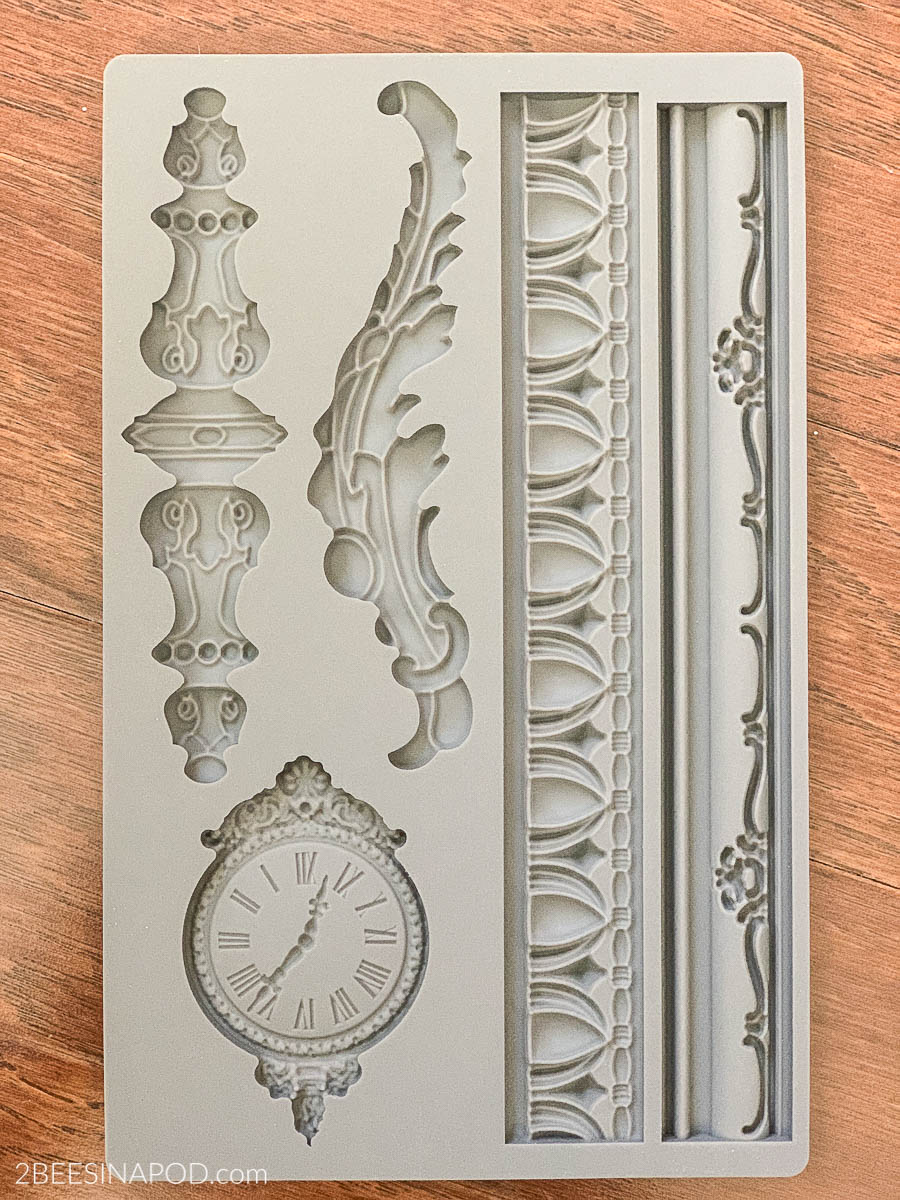
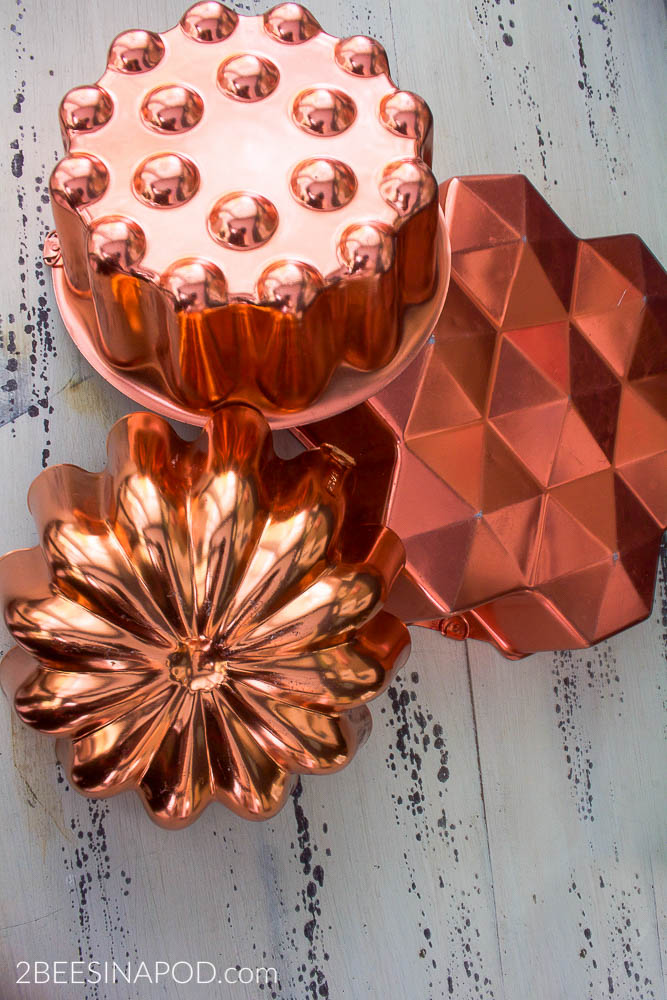
Recently I quickly ran into my local Goodwill Store. The only thing I purchased were three silicone craft molds. Obviously the donator didn’t appreciate or realize the value of these molds. I on the other hand gladly shelled out $1.00 for each mold for a whopping $3.00. At the time I had no idea what I was going to use them for, but I knew they were a good value purchase.

Two days later I was cleaning and organizing my craft supplies. Lo and behold I came across a stack of cardboard craft journal books that I had planned to make Christmas gifts with. They were another great purchase at just $1.50 each on clearance. Being that my Christmas plans shifted in a big way (you can read that post HERE) the gifts were never made. When I spotted the books an idea was immediately sparked. I wasn’t even sure if my idea would work…but it did! Here’s how I chalk painted books to look like antiques with DIY molds.
Let’s Get Started!
Supplies:
- Cardboard craft journal book. I used this one Kraft and Ivory
- Silicone molds – These are cute Crowns
- or these architechtural pieces
- Glue gun and glue sticks
- Chalk paint or chalk-type paint in desired colors
- Gold Metallic craft paint
- ModPodge
- Clear or dark wax *optional*
This is how you do it!
- Collect all of the above listed materials.
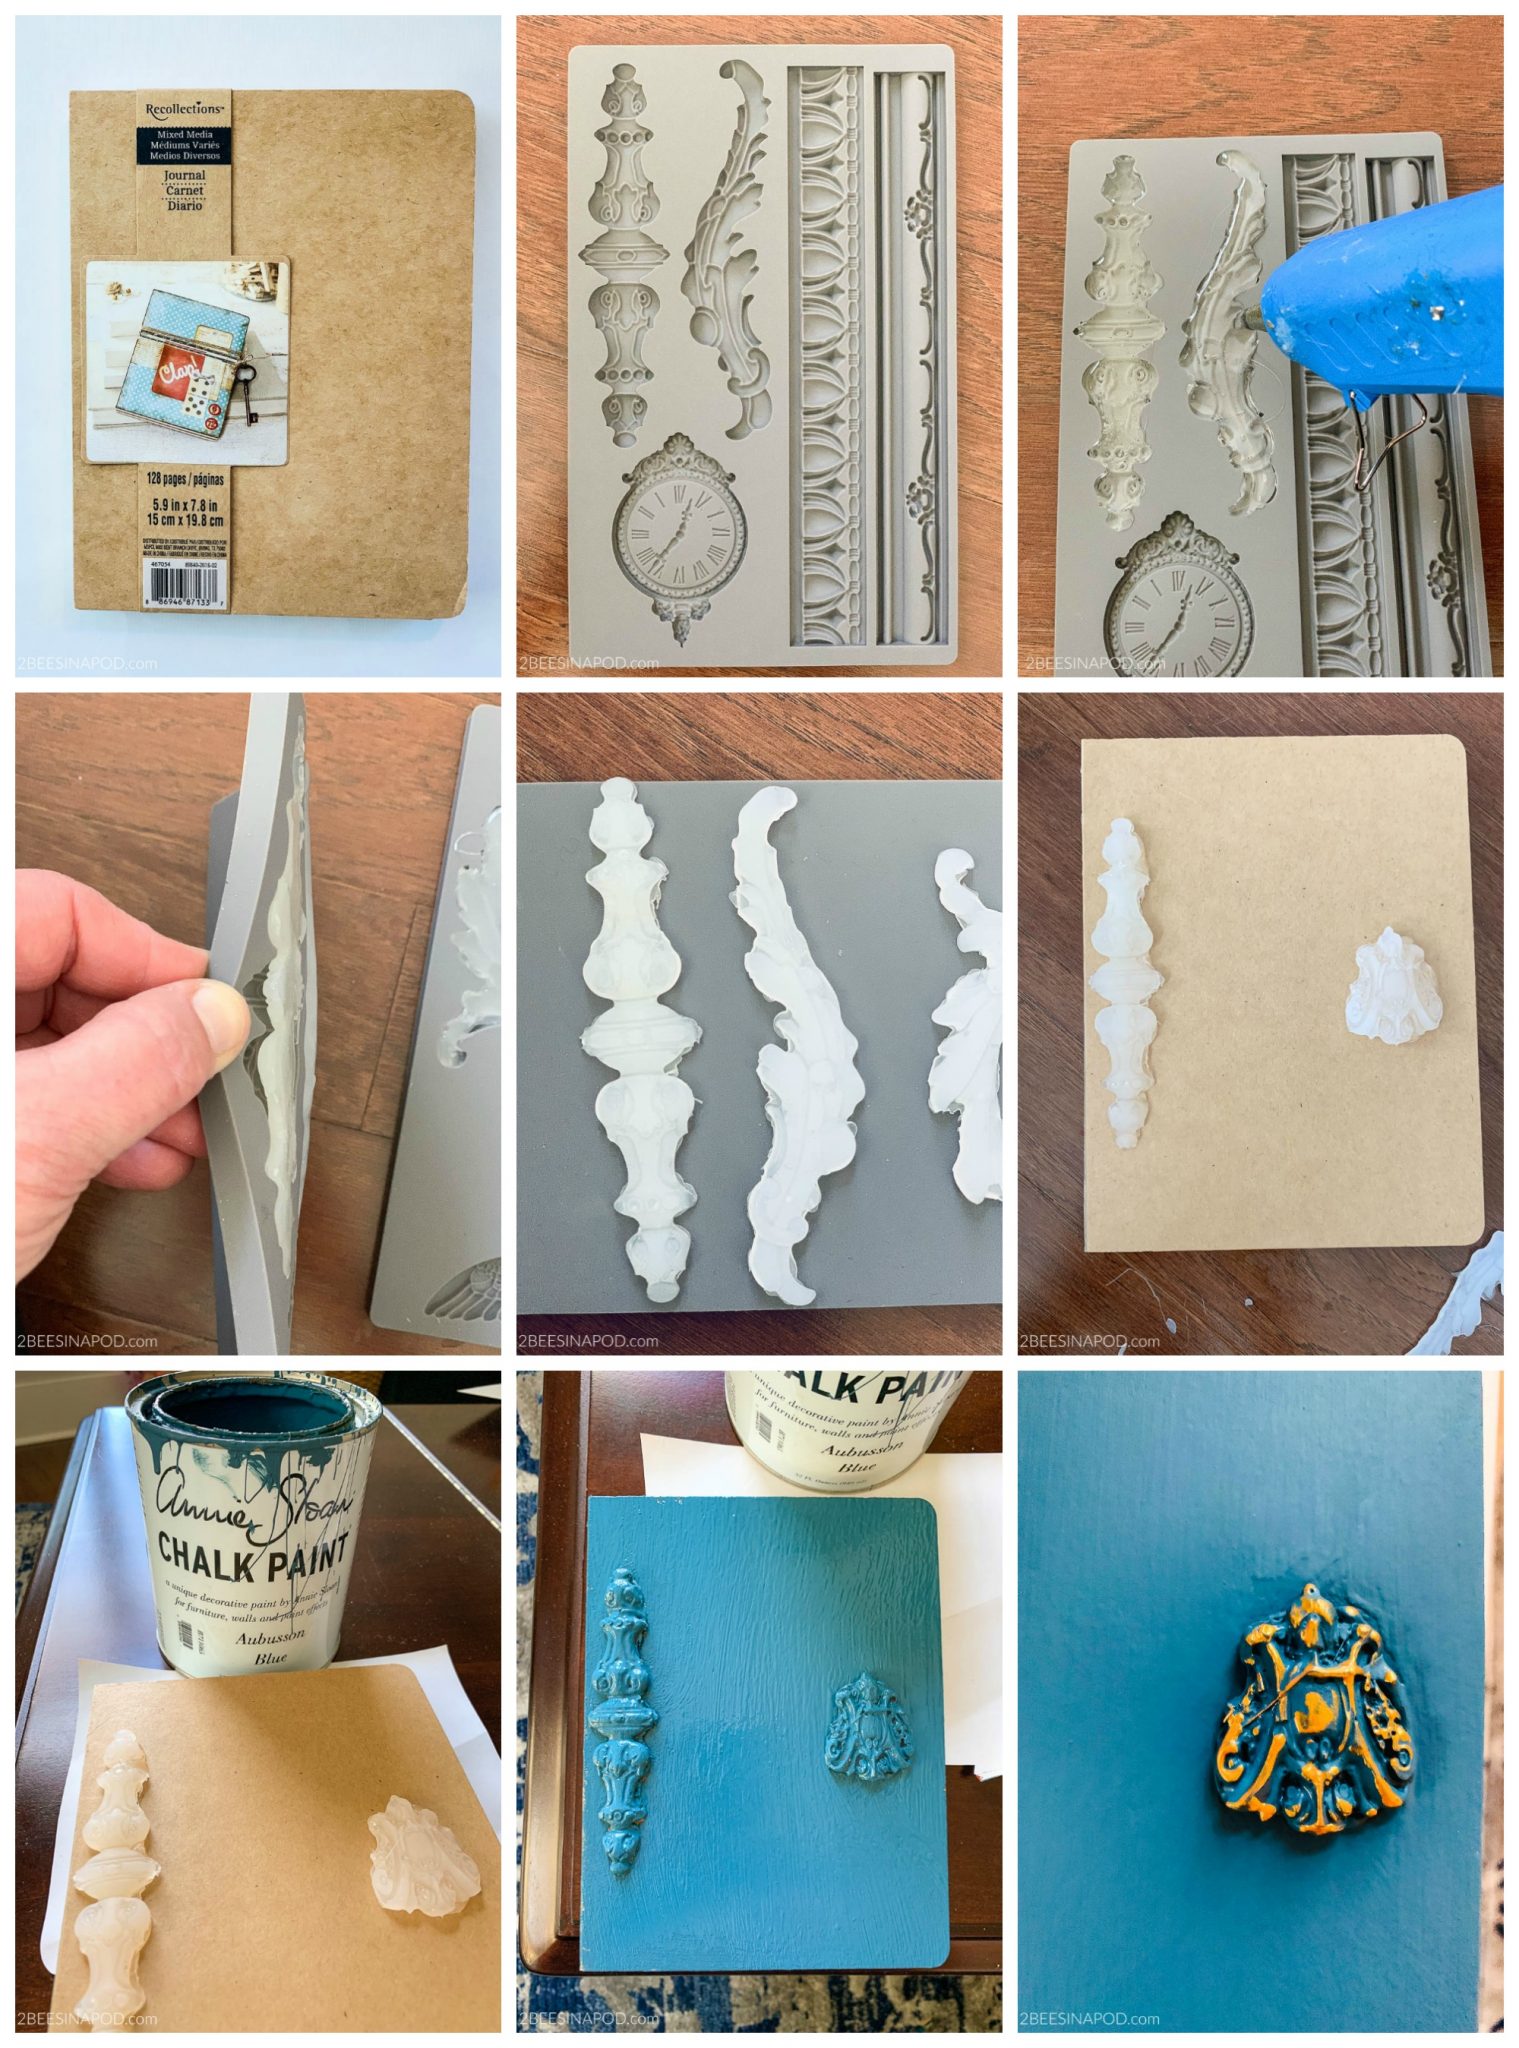
- Turn on glue gun and make sure it is nice and hot (use caution – you don’t want to burn yourself)
- Squirt glue gun into silicone molds and wait a few minutes until dry.
- Release designs from silicone molds. Trim edges if necessary.
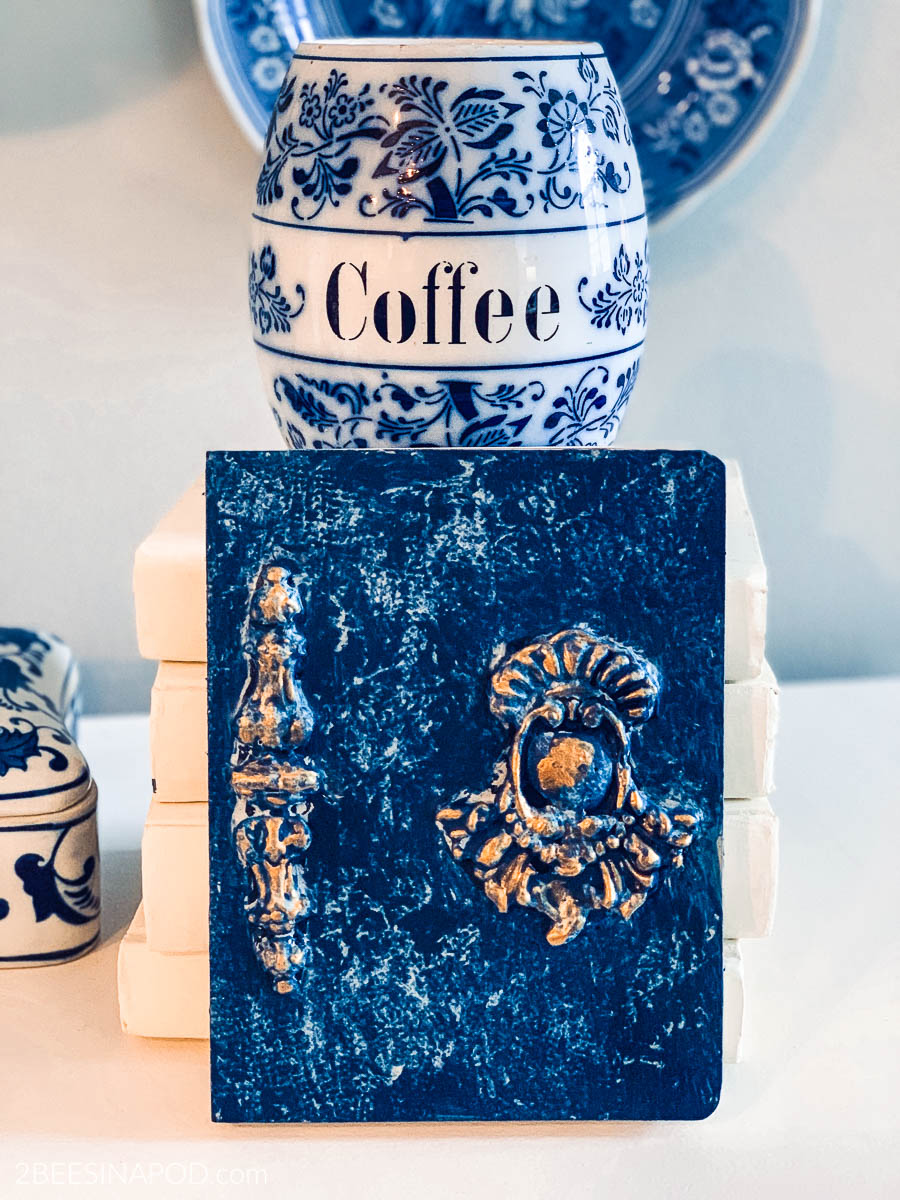
- Again, using the glue gun attach mold pieces to the outside of the journal book.
- Chalk paint the entire outside of the journal, including on top of the molds. Let dry completely.
- Using gold metallic paint on your fingertip, lightly brush onto mold pieces.
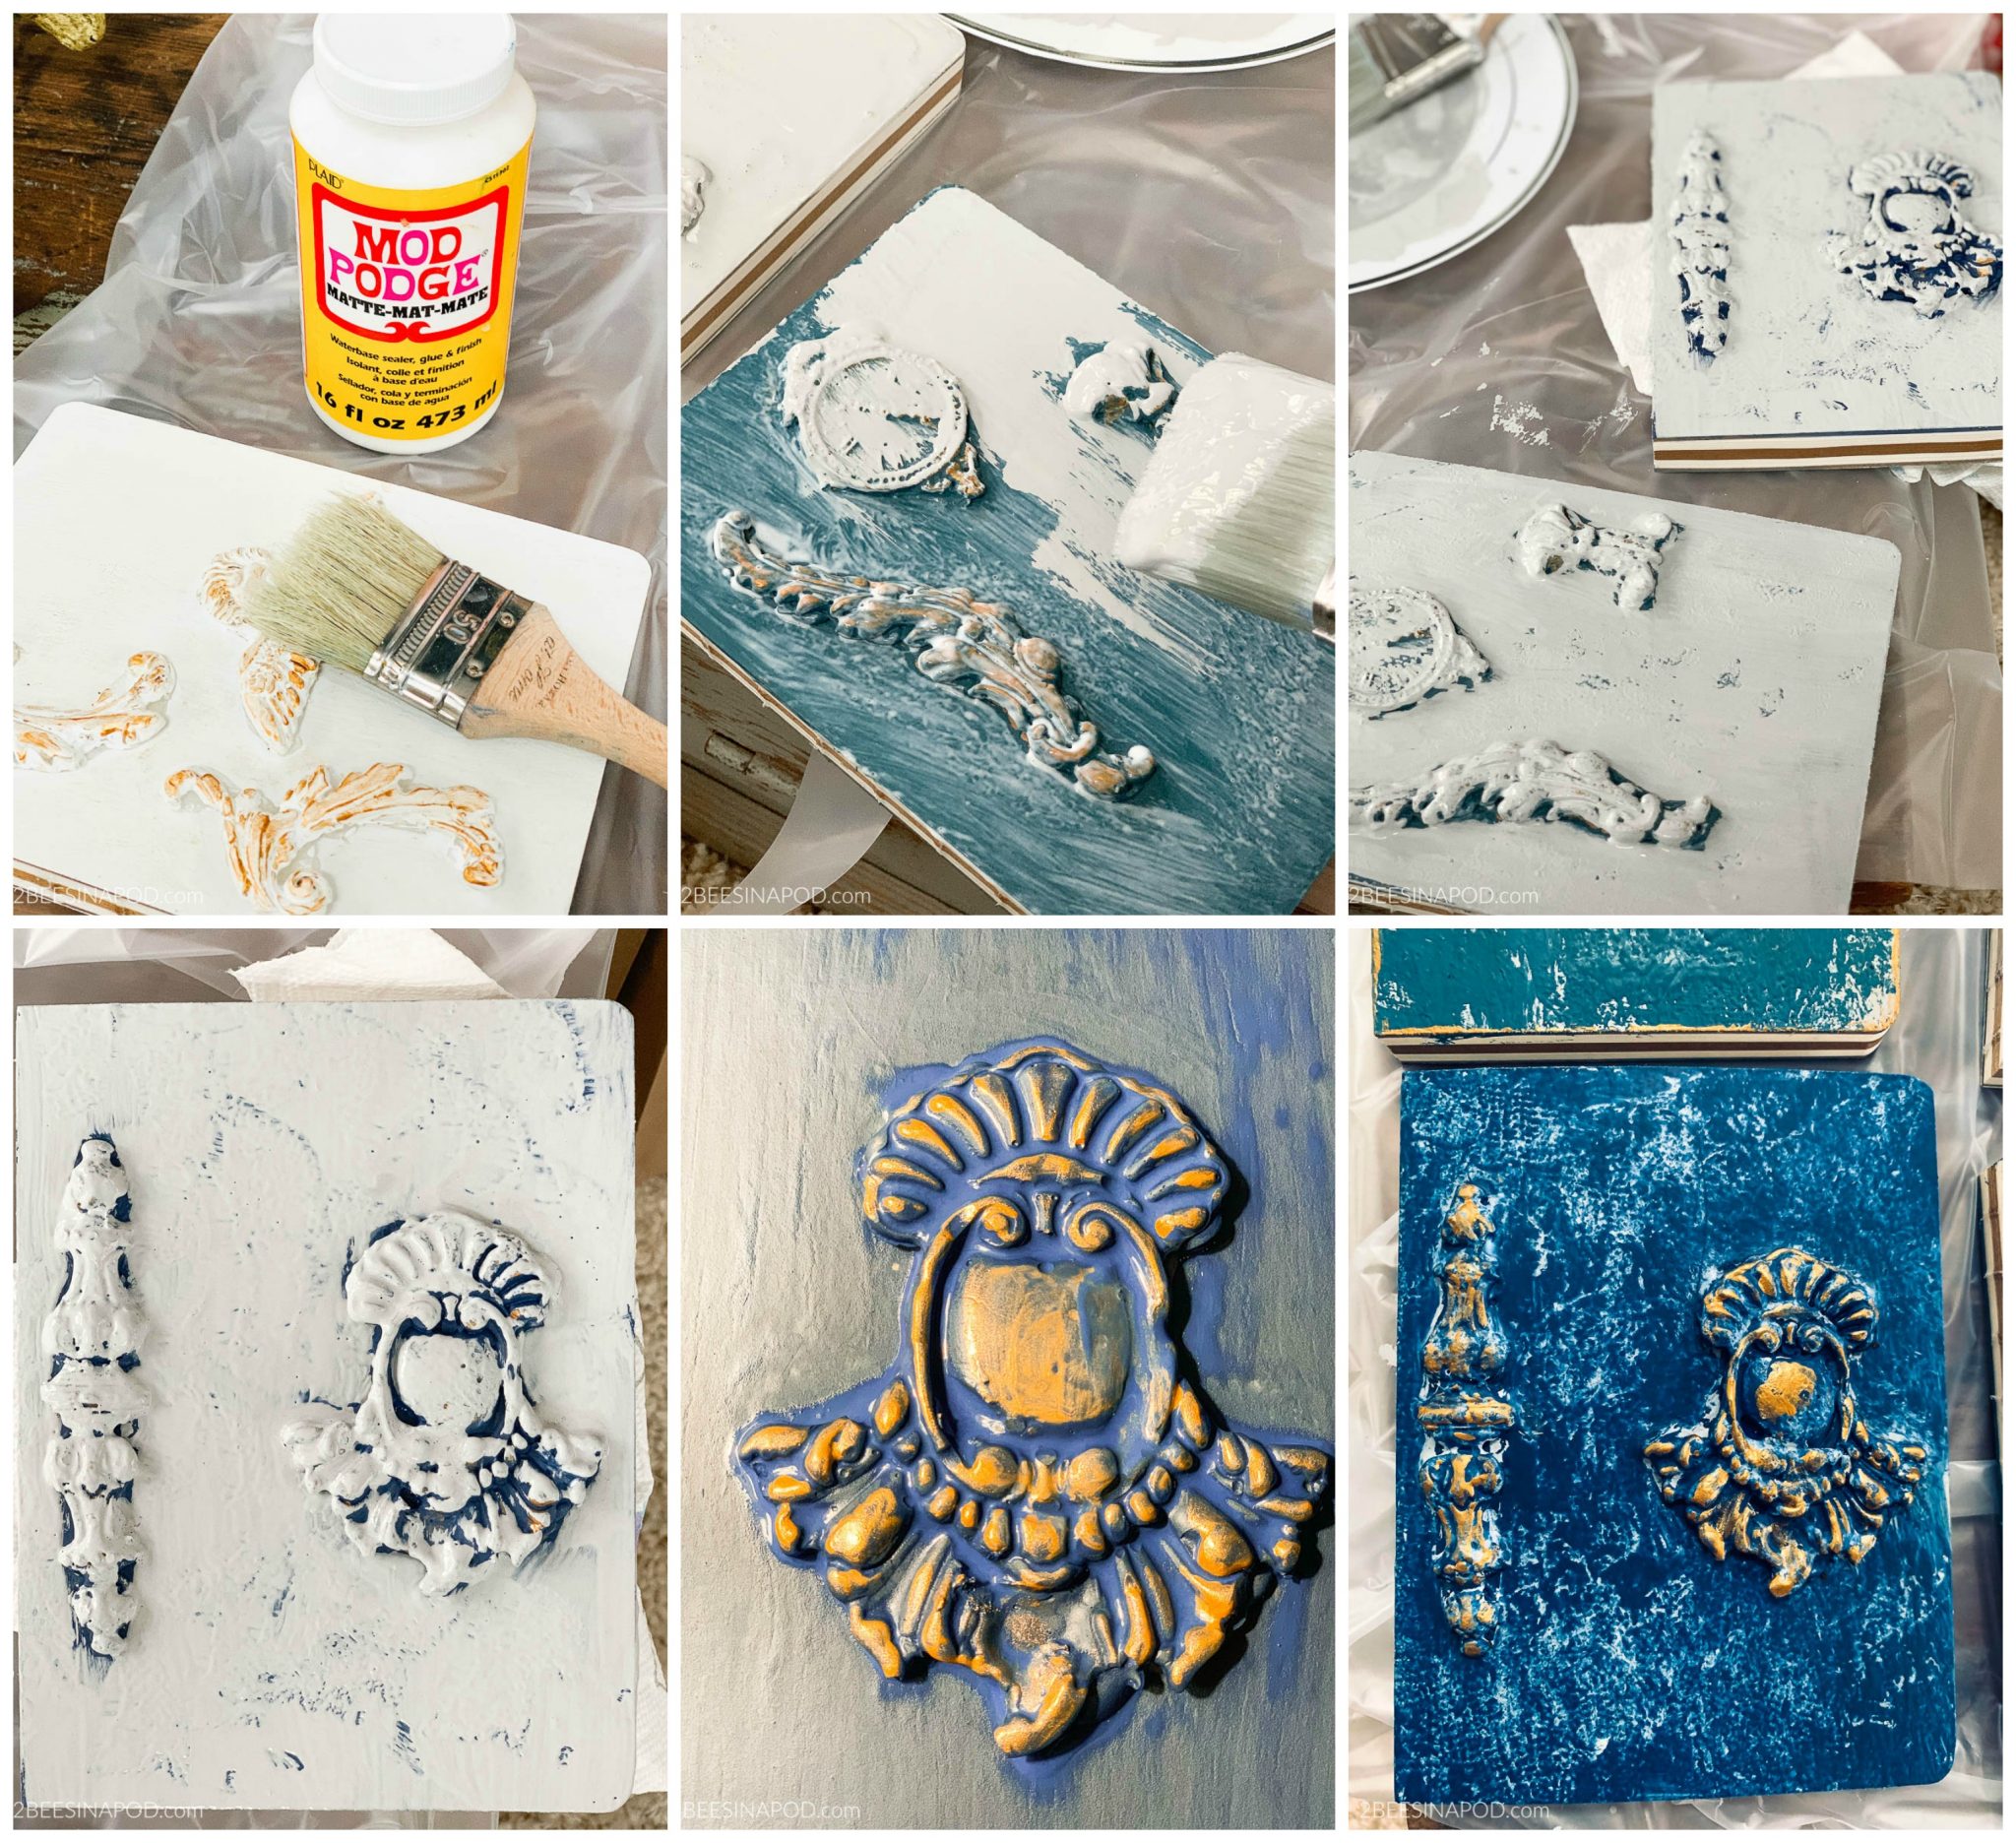
- You can finish here. If you want more of an antiquated piece…continue to next step. Be sure to use a lighter color base coat and darker color top coat. Trust me, I made this mistake!
- ModPodge a thin coat on top of the entire painted piece. Let dry completely.
- Add a secondary chalk paint color, dabbing with paper towels.
- Add more gold acrylic paint to mold pieces. You can add gold paint to the book edges too if you like.
Admire your handiwork!
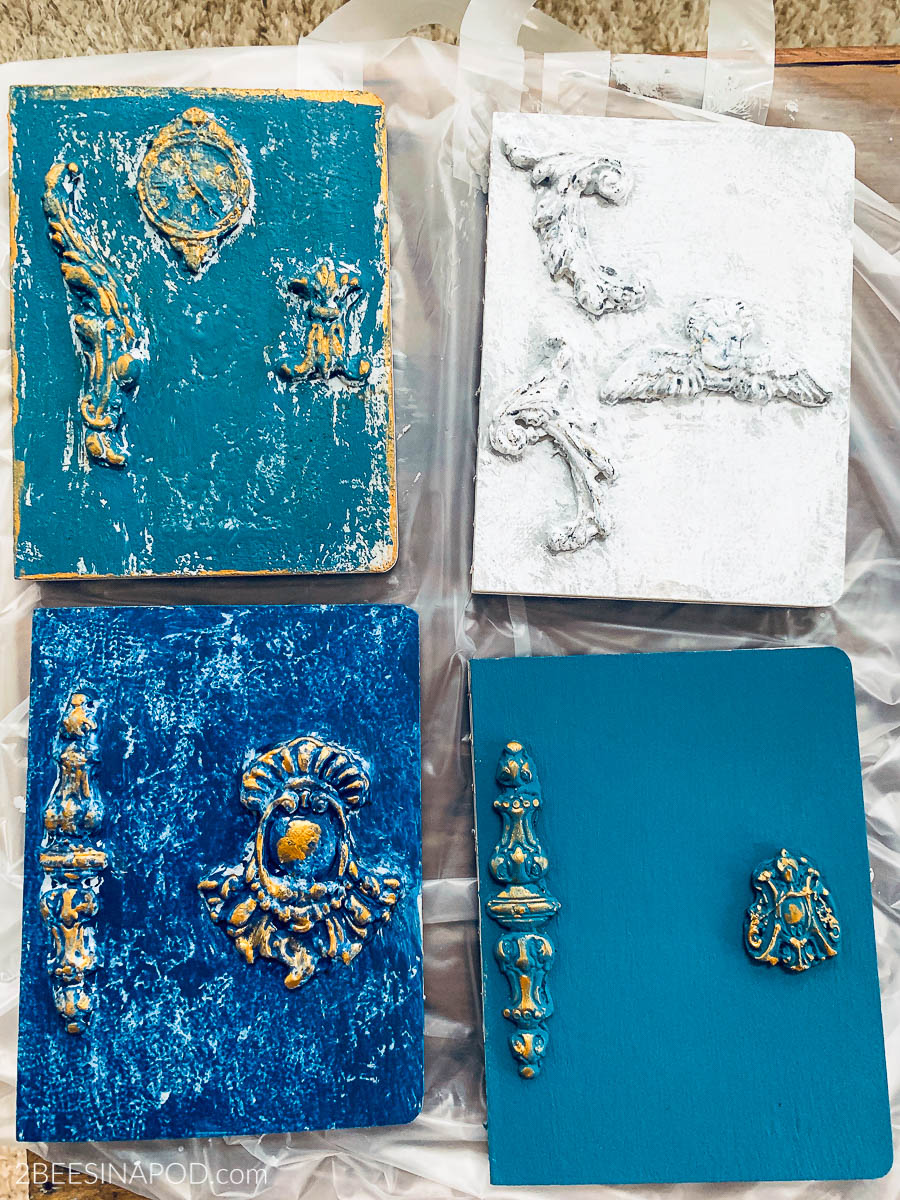
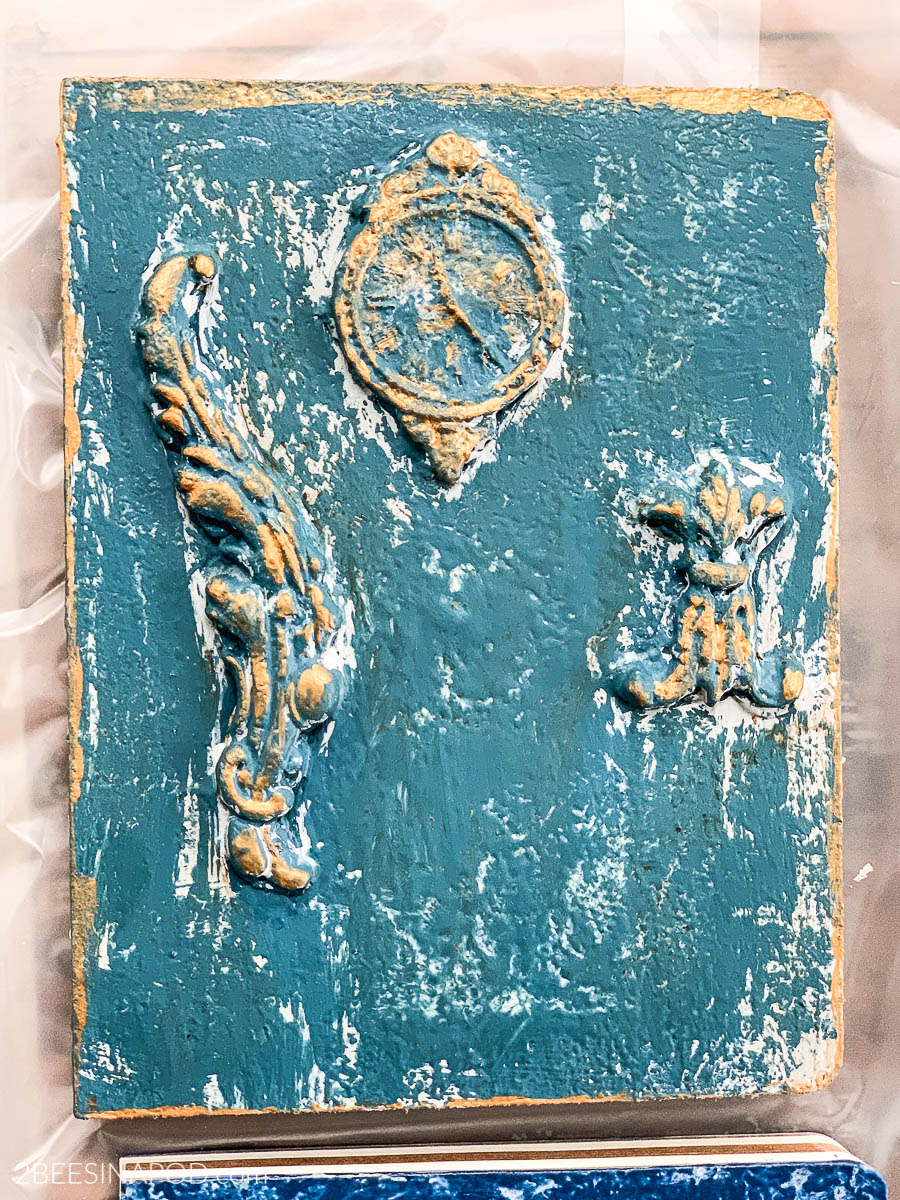
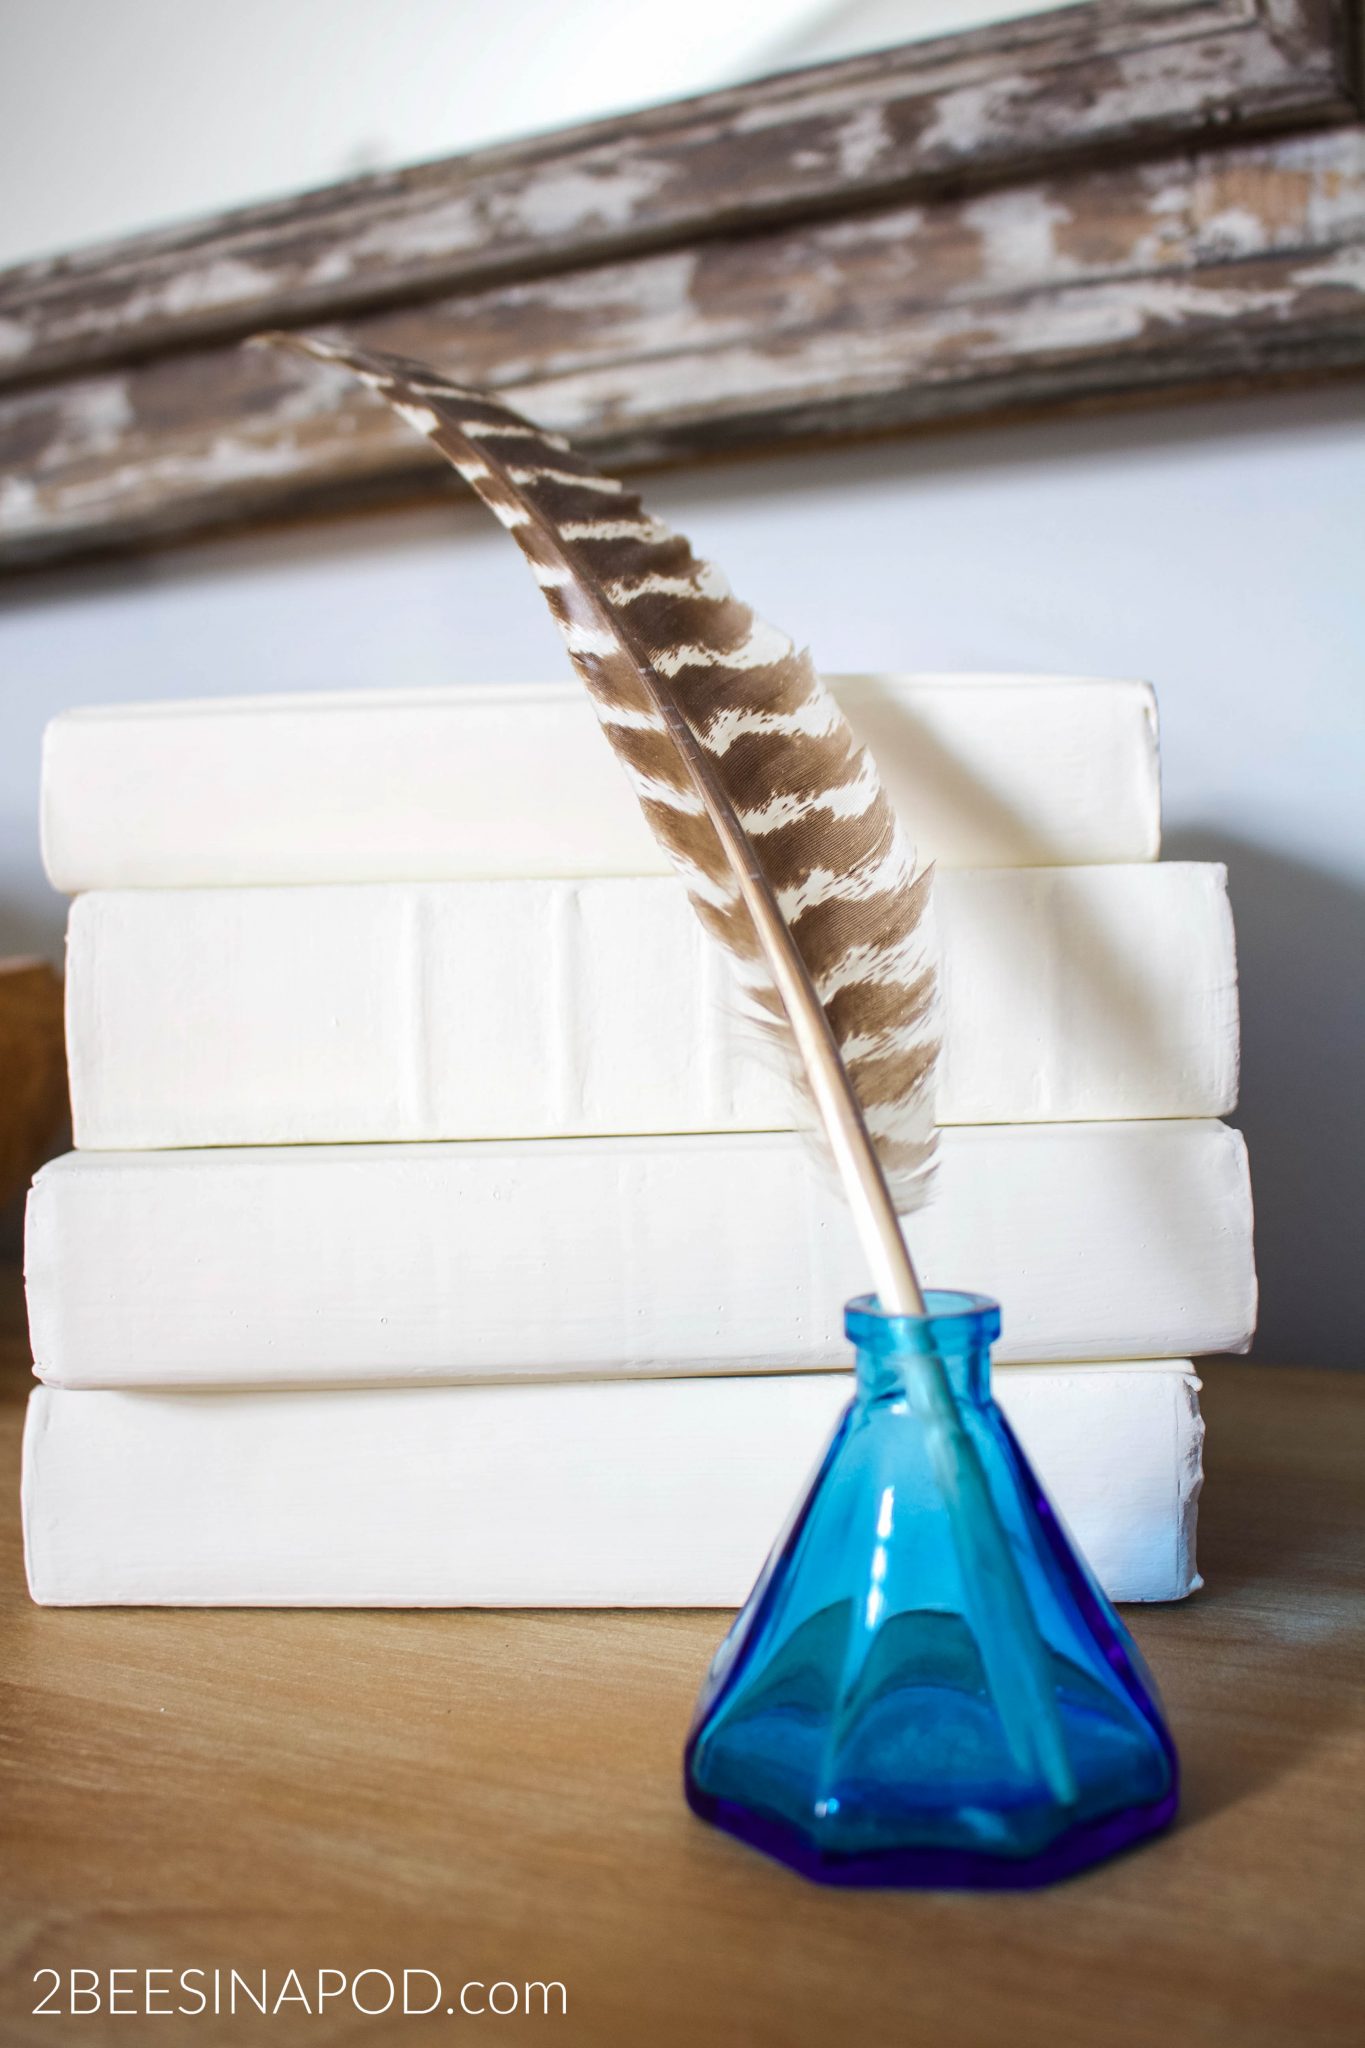
This Aubusson book only has the paint and ModPodge treatment.
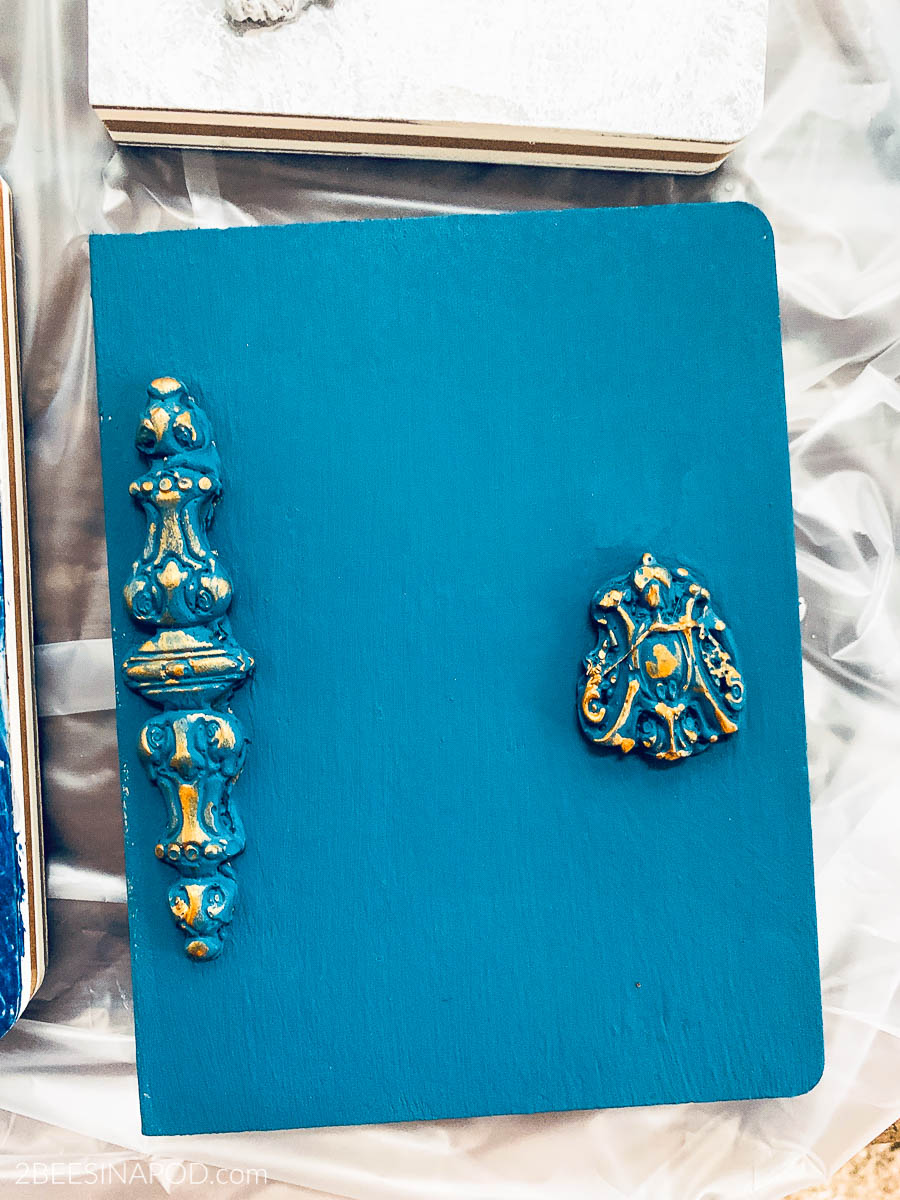
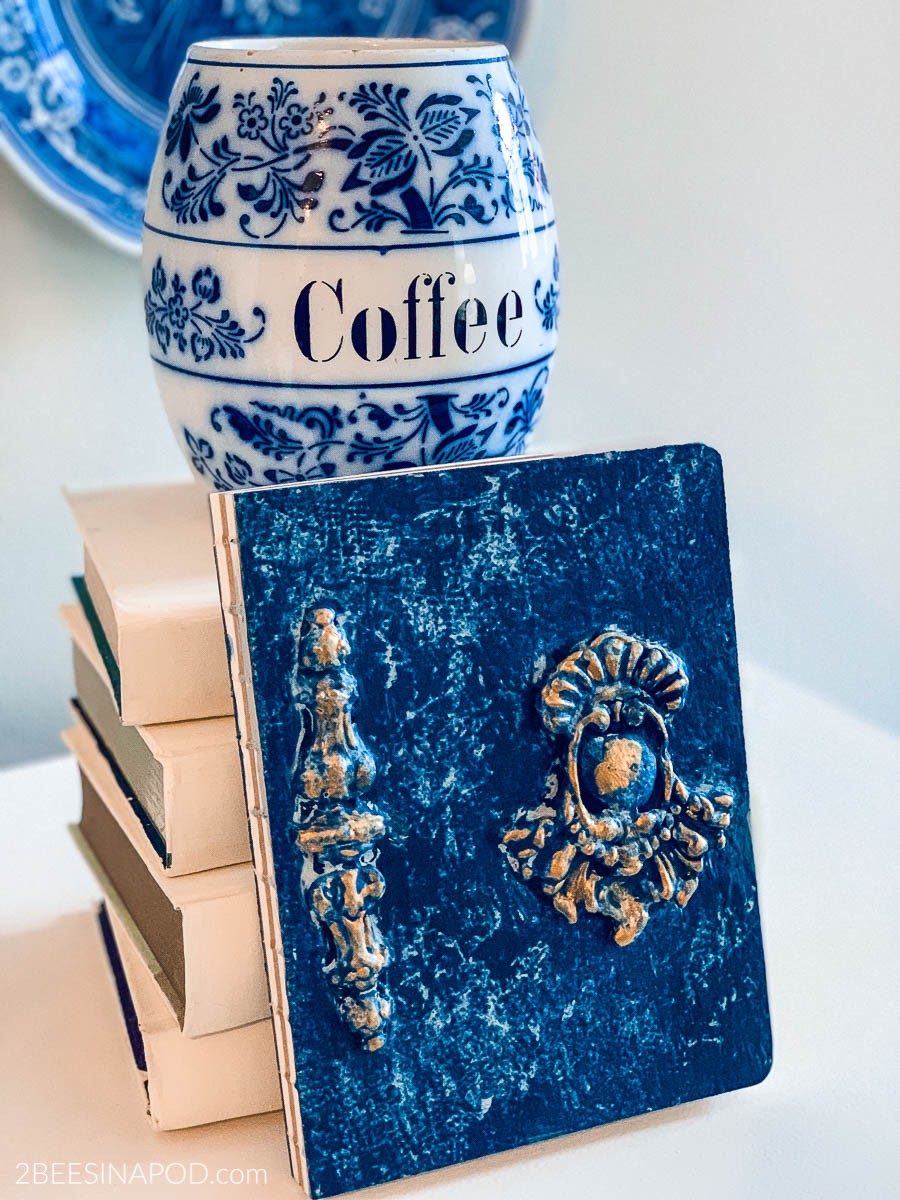
All of the other books have a two-paint color treatment. Being that I had never attempted this project before, I learned as I went along. I decided too late that I wanted more depth with two paint colors. Again, be sure the lighter paint color is underneath as your first coat. Isn’t this Napoleonic blue gorgeous?
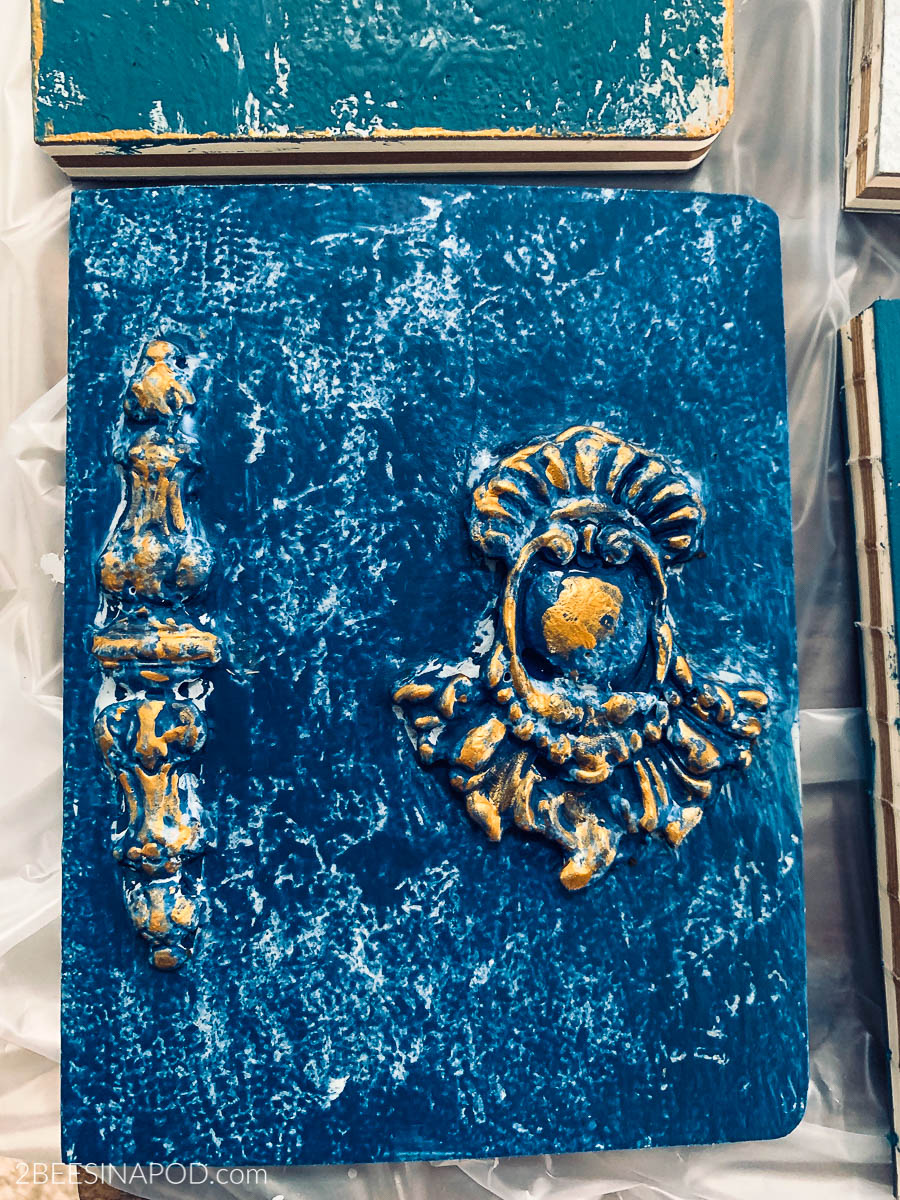
Here you can clearly see how the ModPodge adds more depth and character.
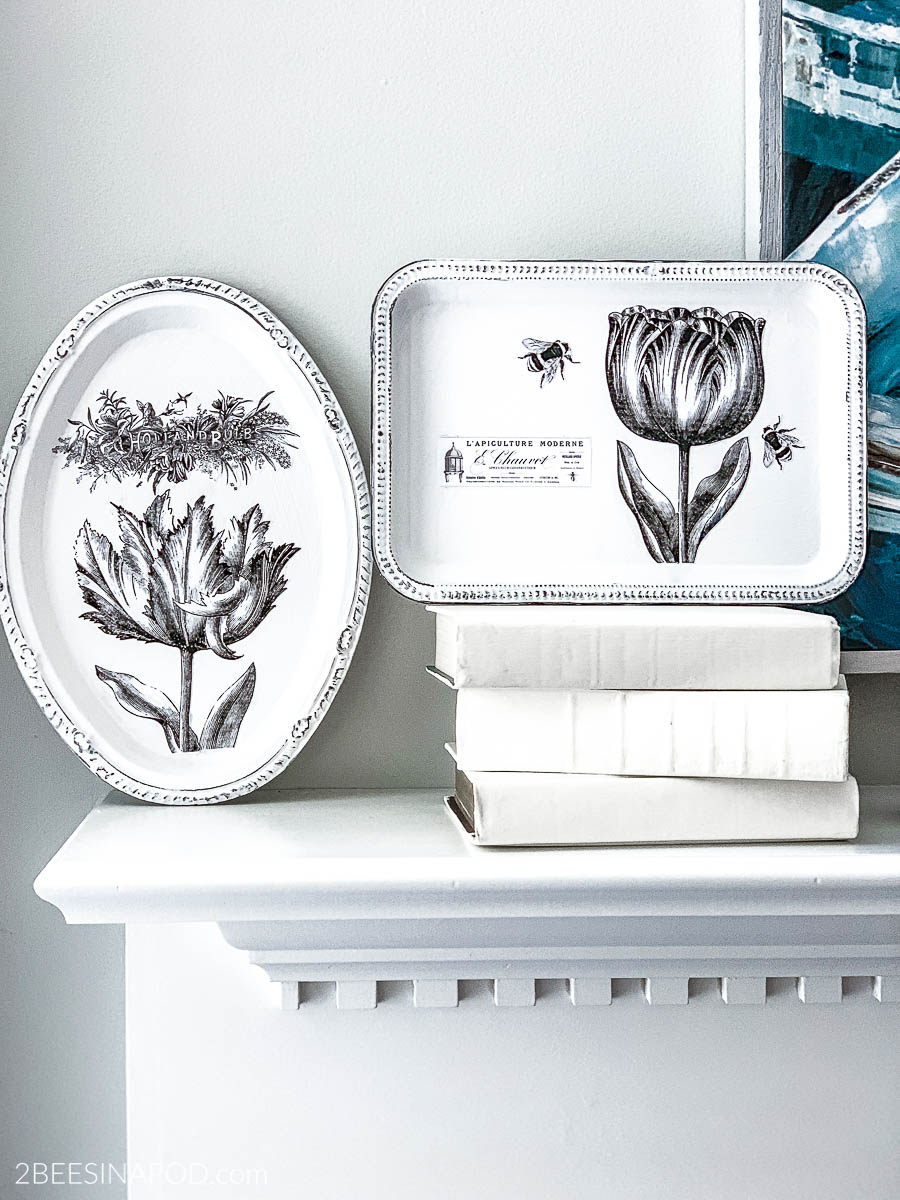
The books truly look like antique leather.
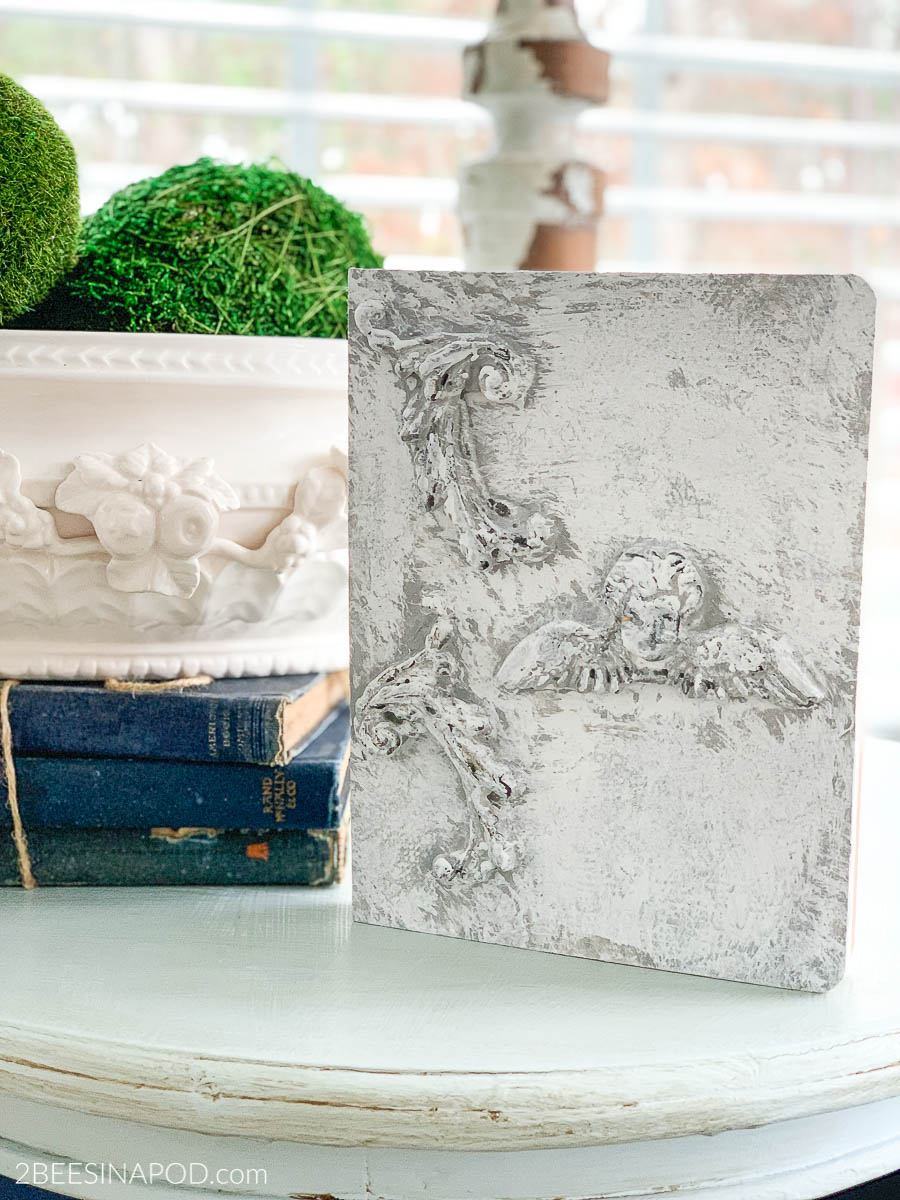
Doesn’t this one look like concrete or plaster?
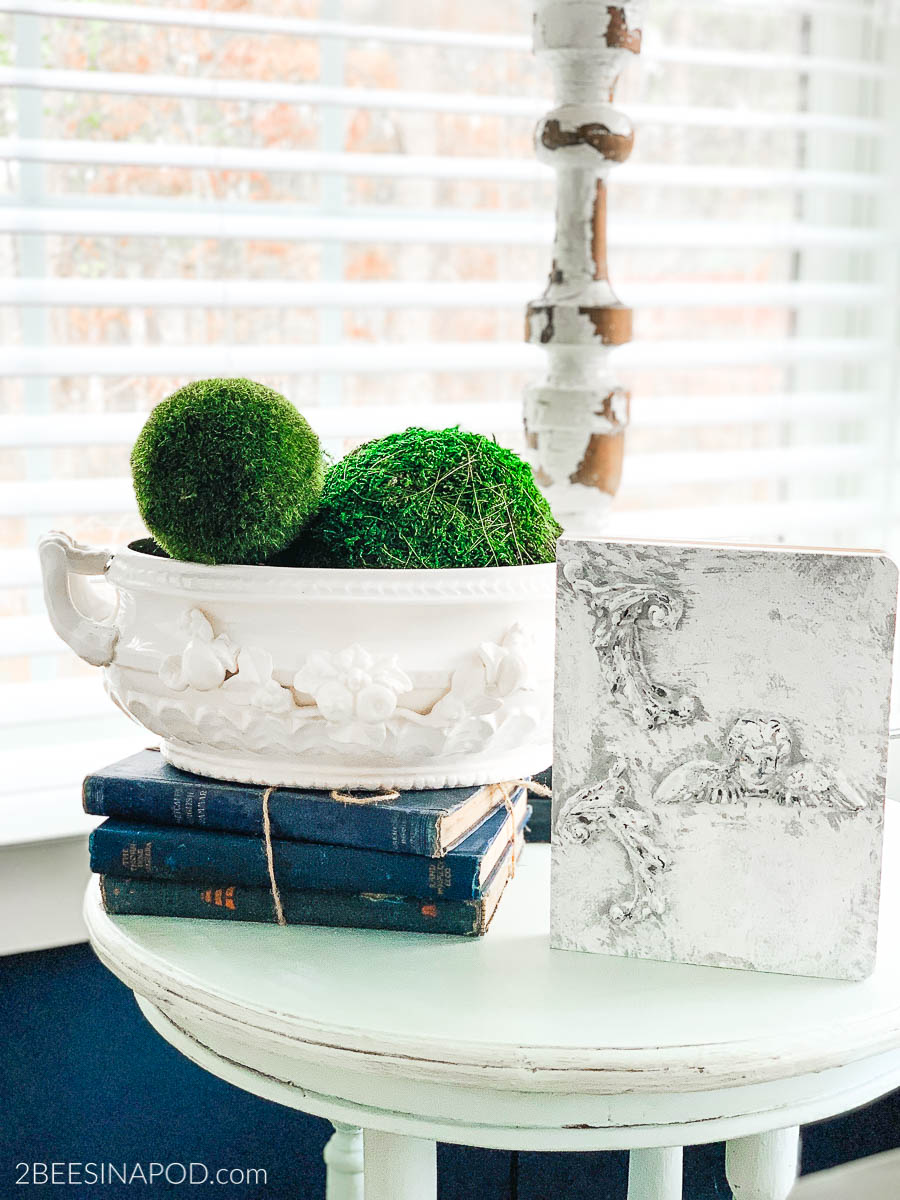
Pure White and Paris Grey chalk paint were used to achieve this look. It’s hard to believe that these pieces were created with hot glue!
It is my sincere desire that you have been inspired today to create this project or anything else that sparks your creativity. Let me know what you think in the comments below.
Don’t forget to Pin this to your favorite Pinterest Board!
You might like these ideas too!
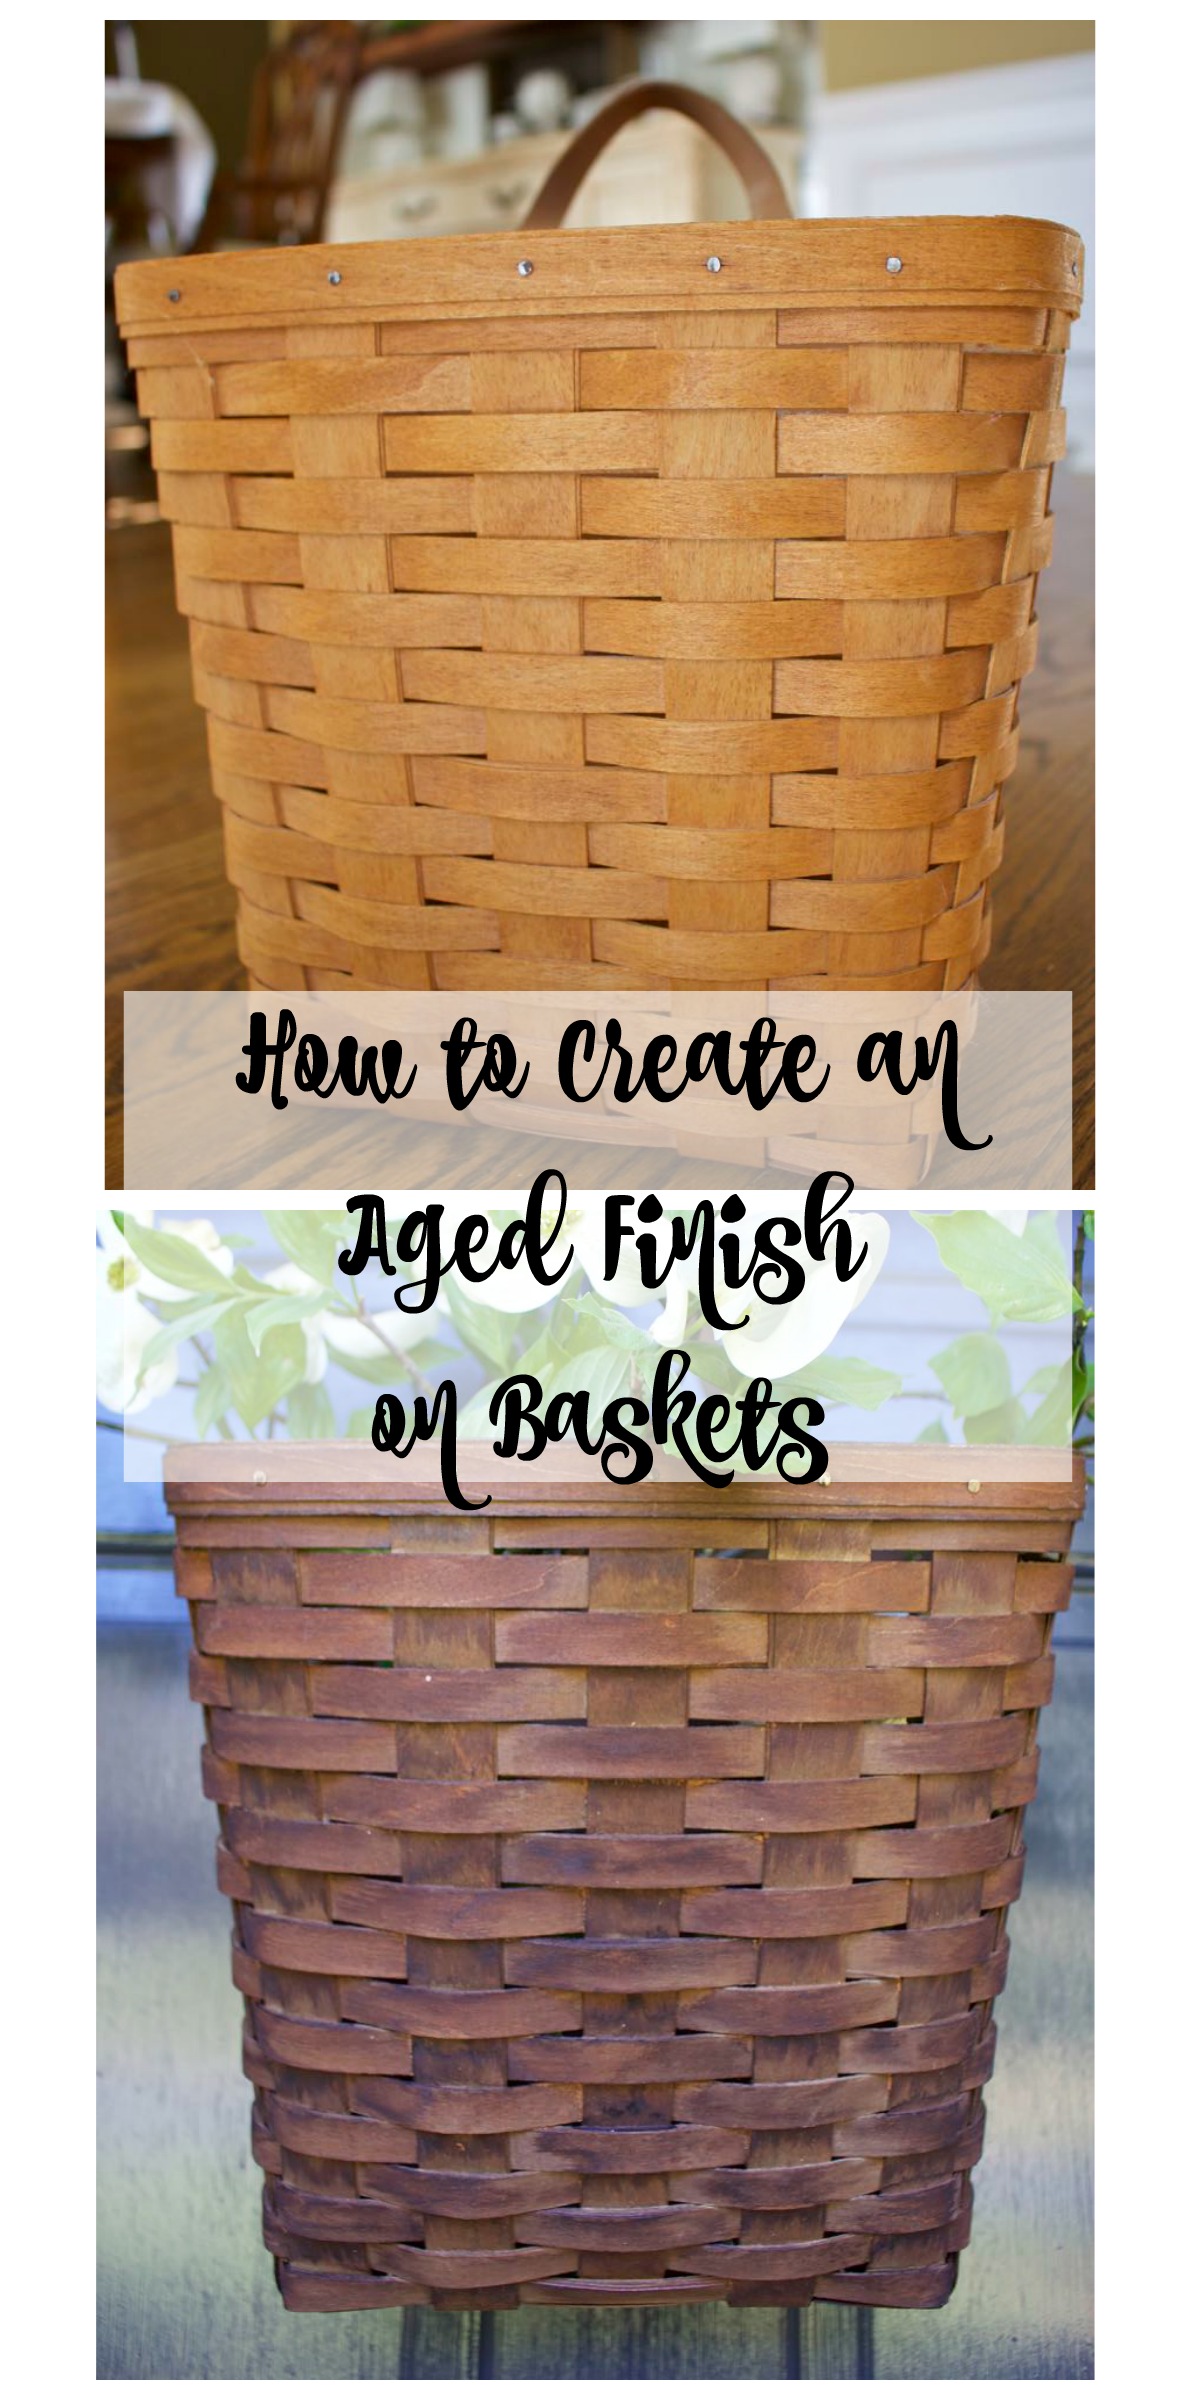
How to Create an Aged Finish on Baskets – so Easy!

Such excellent directions! If I’m able to find molds then I will surely give this a try. Seriously, I can see why these blog posts are sponsored by different companies as I’ve tried a number of different projects in the past 3 months. So much fun!
That is a steal ladies! You can’t even buy wood appliques that inexpensively in craft supply stores now. Love your fabulous find and your creative take on this upcycle too. It’s awesome! Hugs, CoCo
REALLY ? Hot glue- I have got to try this.
Thank you for the inspiration.
xo Lisa S