Decoupage Oyster Shell Trinket Dish
Please note that this post contains affiliate links. As an Amazon Associate, Rewards Style influencer and Jane Influencer, we earn from qualifying purchases and any sales made through such links will reward us a small commission – at no extra cost for you.
Decoupage Oyster Shell Trinket Dish
Way back at the beginning of March, Jenn and I had a shopping excursion. Little did I know that this would be our last shopping adventure for the foreseeable future. During that excursion I spotted some very pretty decoupage oyster shell trinket dishes. Unfortunately, I wasn’t willing to pay the $30+ price tag. Since then I’ve seen even higher prices online. Recently, my sweet friend Linda gifted me this gorgeous oyster shell trinket dish.

Is this perfect, or what? I felt like this was another nod for me to try and create oyster shell trinket dishes. Let’s get started!
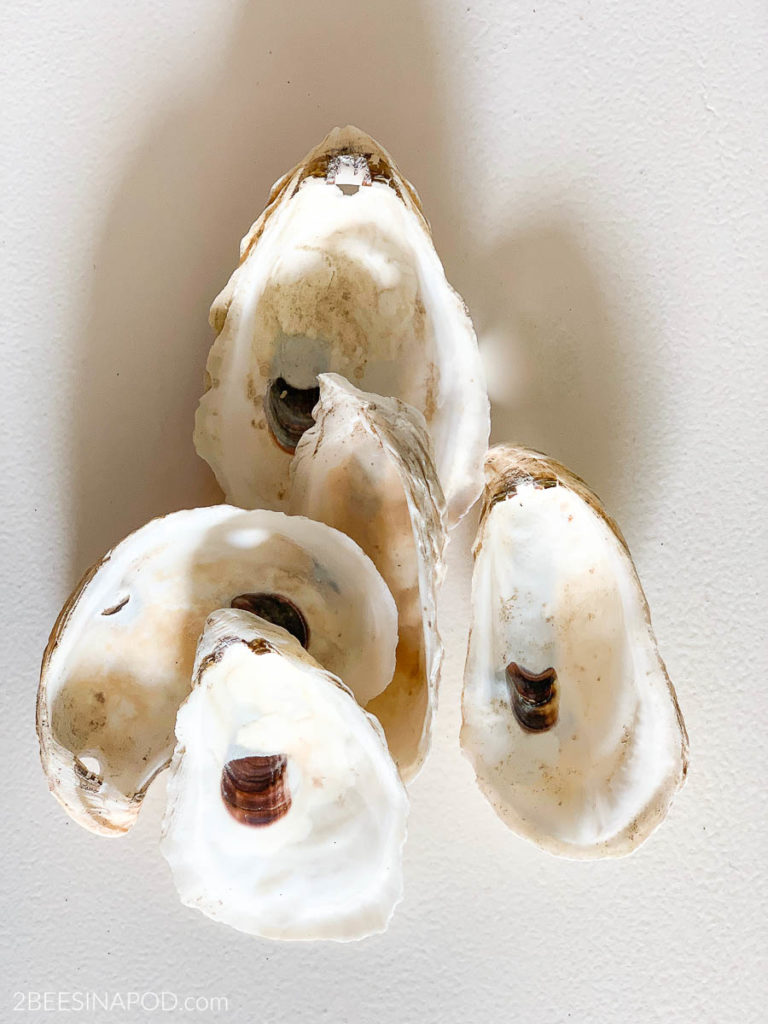
Shell collecting is a passion of mine. Anytime we have visited a beach, I inevitably bring home a tiny pile as mementos of our trip. These oyster shells are from my shell stash.
Tip
If you don’t have any oyster shells, consider asking a local restaurant for some. Yes, I have done this before – and they have always been obliging.
Another option is purchasing some from an Etsy vendor, such as THIS one or THIS one.

Make sure you start this project with very clean oyster shells. You can read our post for How to Clean Seashells After Your Beach Trip.
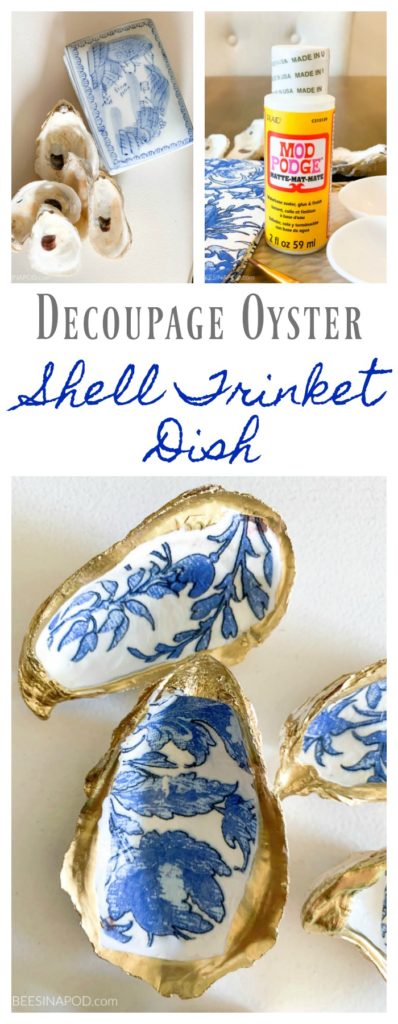
Materials
- clean oyster shells
- paper napkins
- white craft paint
- ModPodge
- gold paint
- small paint brush
Tutorial
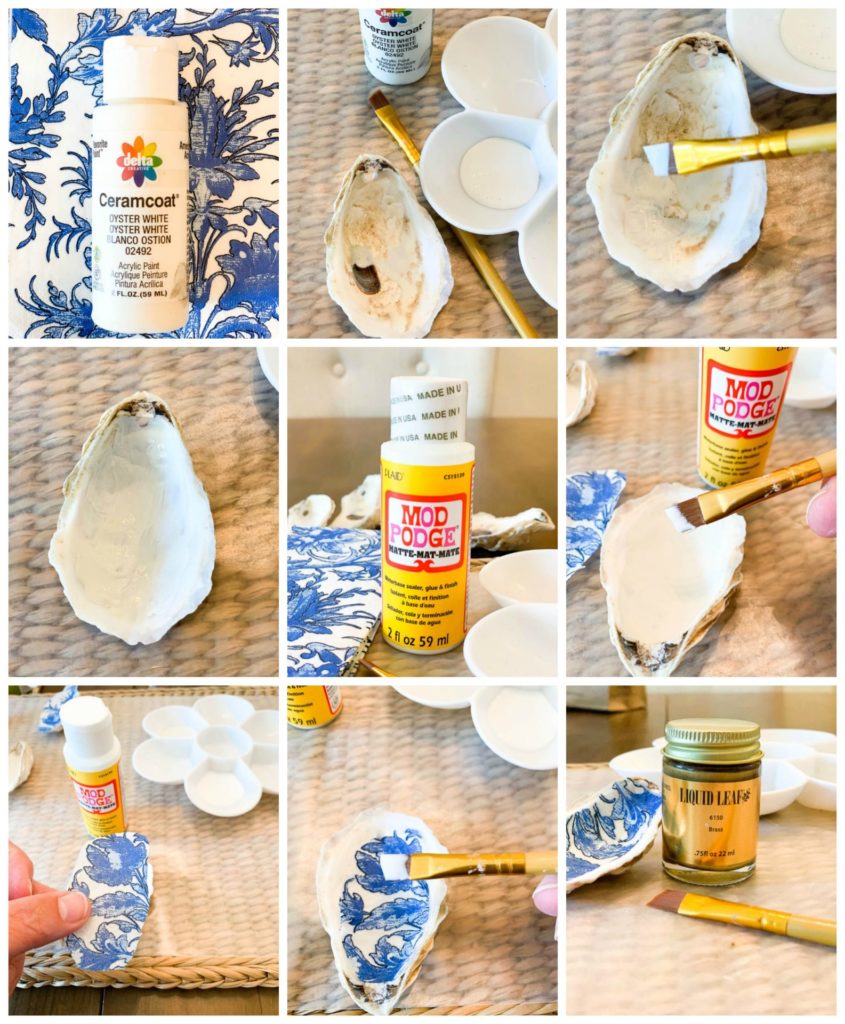
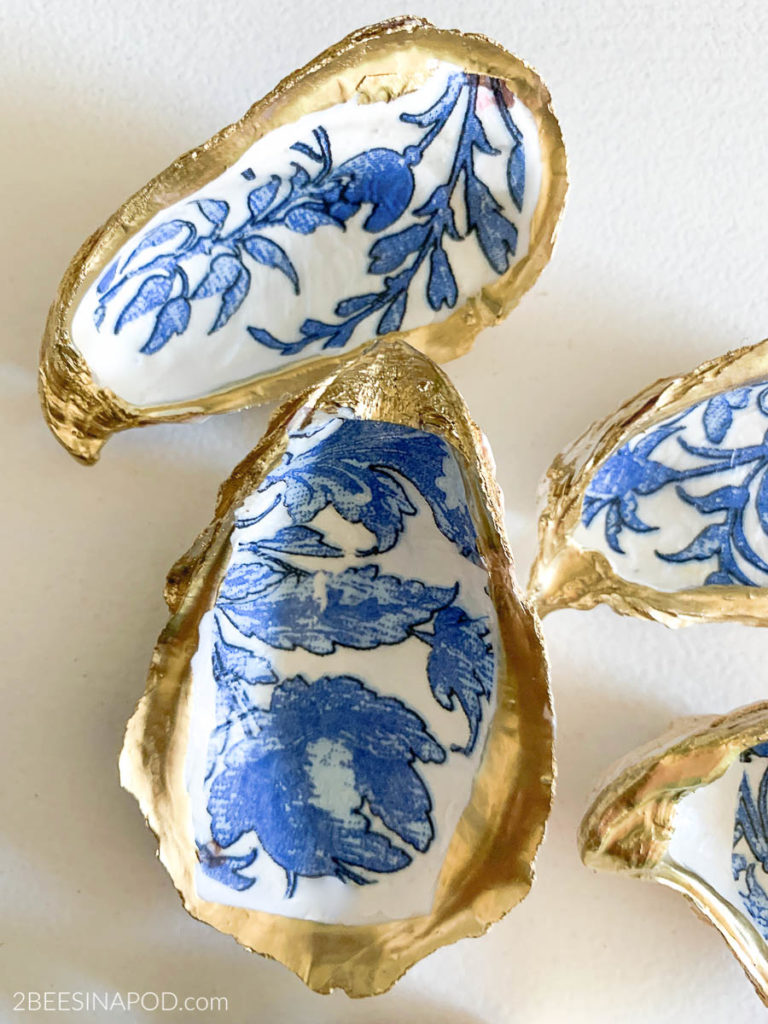
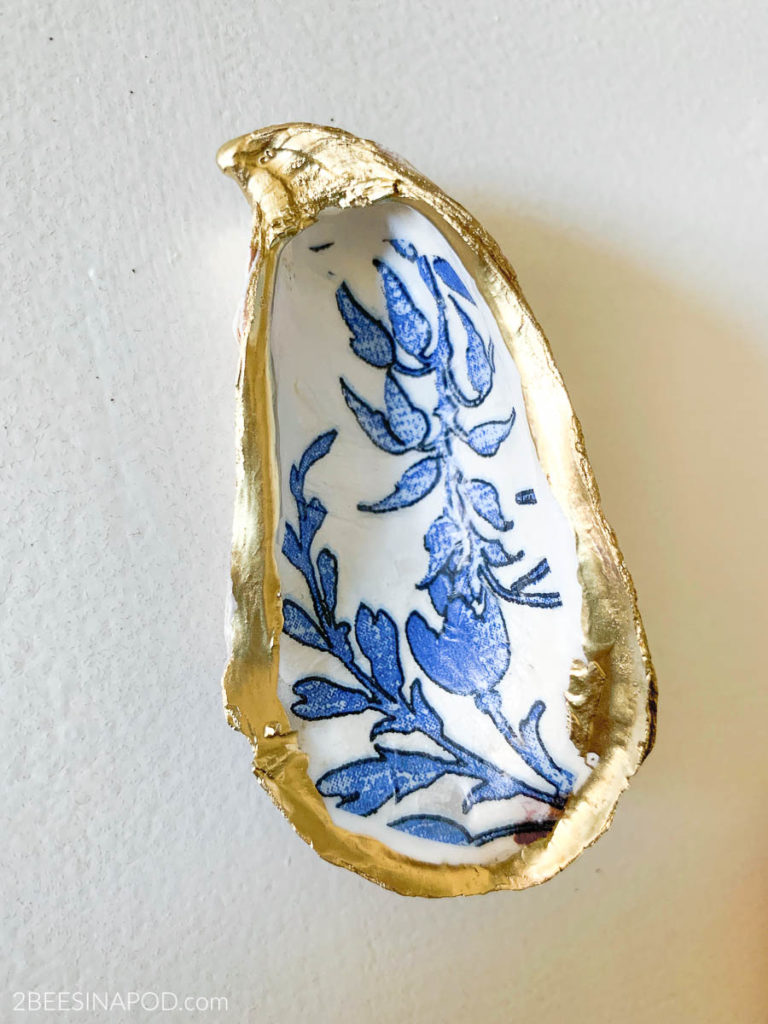
- Using white craft paint, paint the inside of the oyster shell. Make sure to especially cover dark spots.
- Paper napkins are typically 3-ply. Carefully remove the decorative, outer layer of the napkin.
- Roughly cut this napkin piece to fit inside the oyster shell. Take care to leave an outer border.
- Once the white craft paint has dried, apply a good layer of ModPodge. This is the base adhesive for the napkin remnant.
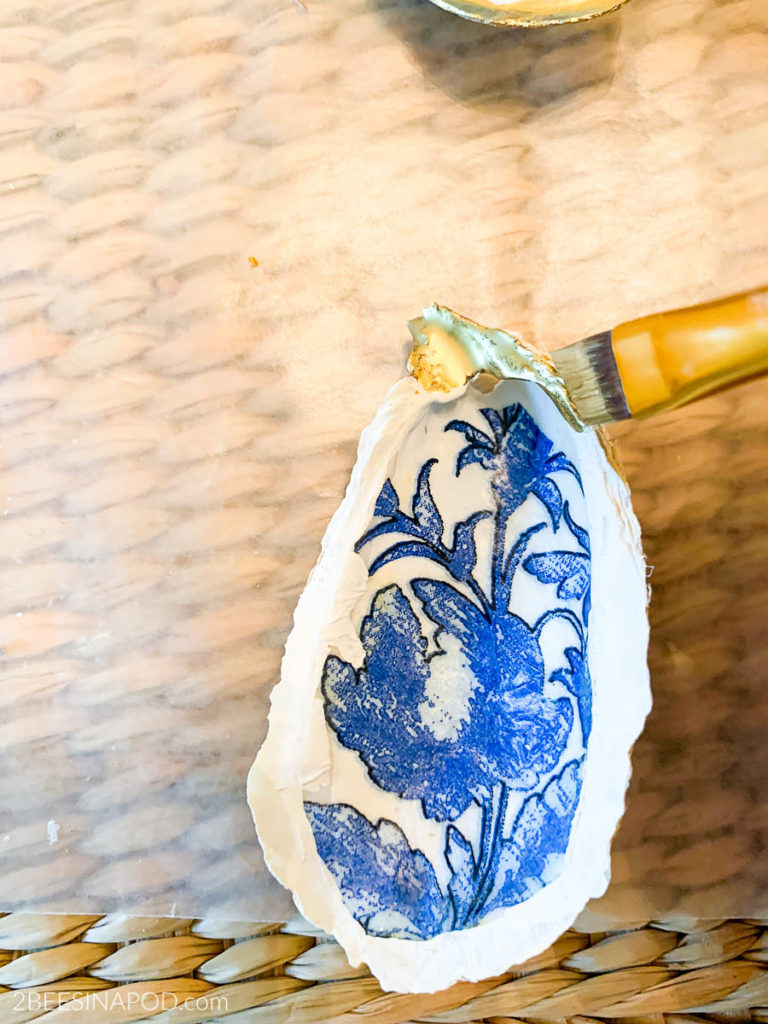
- Place the napkin piece on top of the ModPodge. Using the same brush add a little more ModPodge to the top of the napkin. Brush out any wrinkles or bubbles. Let dry completely – about 20 minutes.
- Using gold paint, paint the outer rim and edges. Let dry completely.
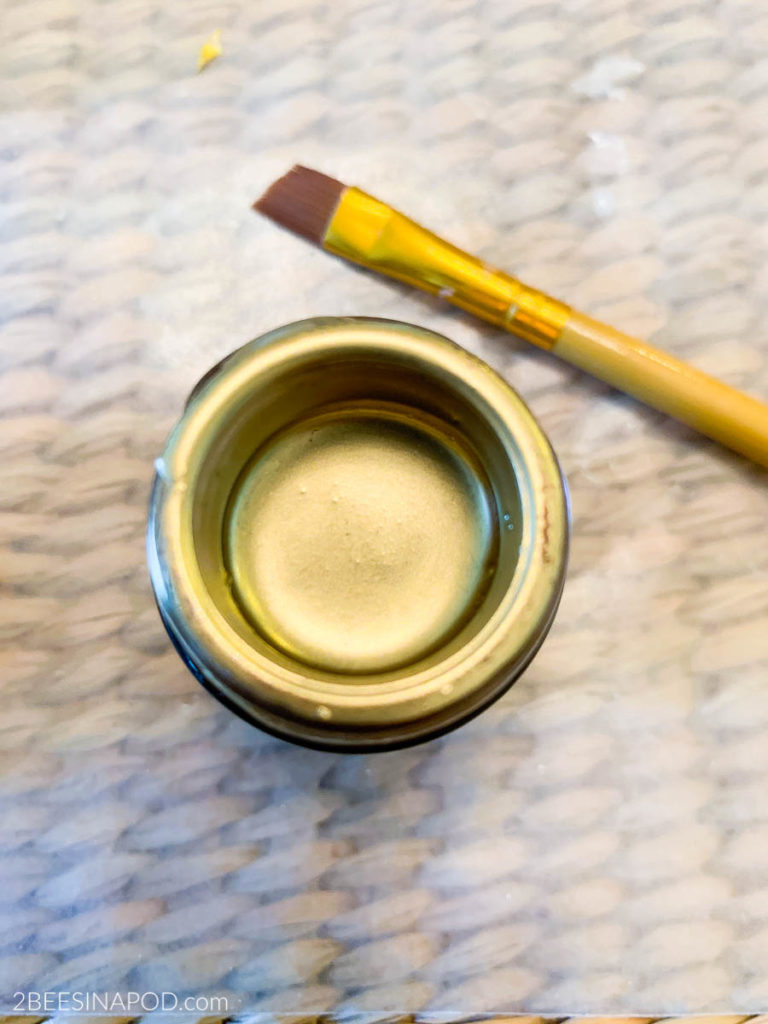
Feel free to use gold craft paint. I personally wanted a liquid gold look. This gold leaf paint was leftover from a previous project.
These trinket dishes will look so pretty in any home – coastal beach house, chinoiserie chic, cozy cottage, bohemian, rustic and more! They would also be a perfect gift for family and friends. I’m thinking of using some of these to make Christmas ornaments. Stay tuned!
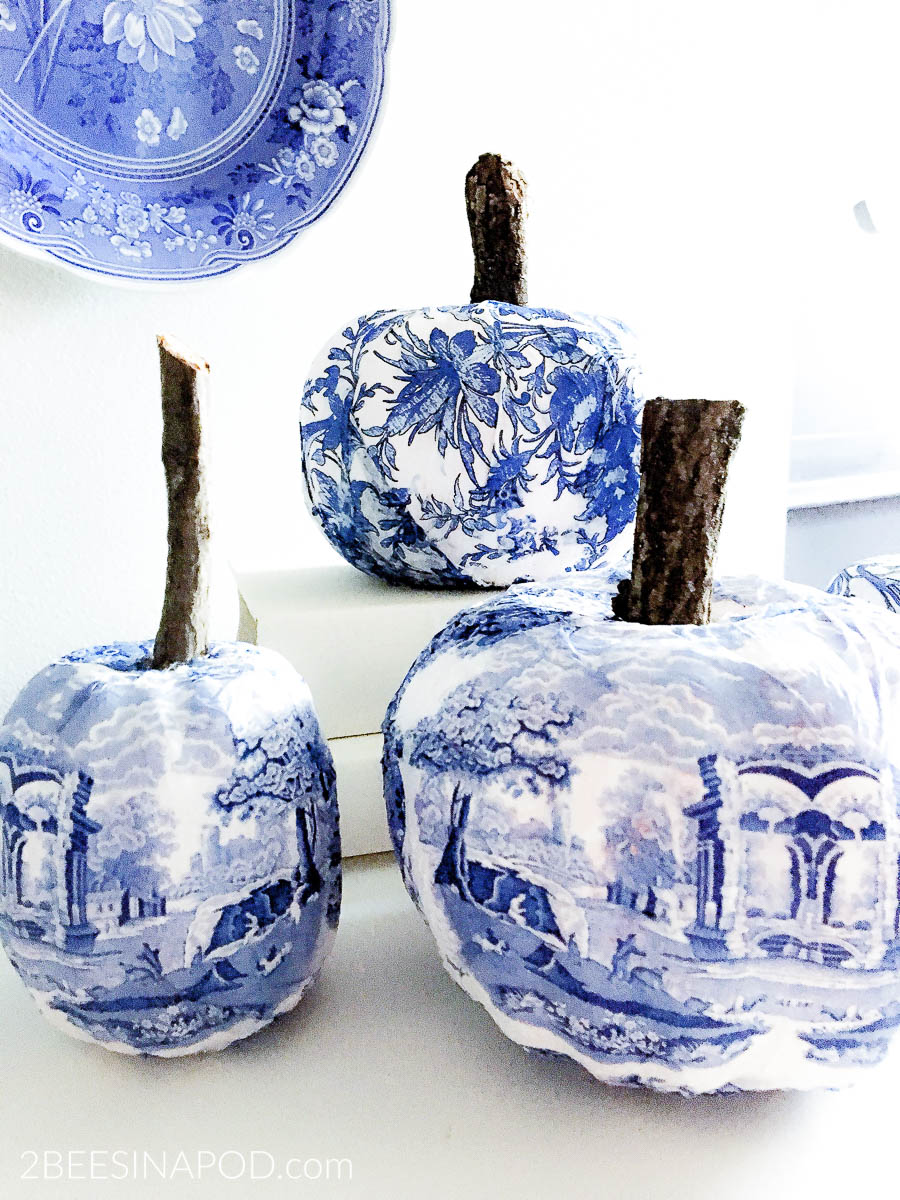
I am super happy with how these turned out. The best part is that I already had everything that I needed. So, this was a free-to-me project. Love when that happens! You can see other decoupage inspiration with How to Decoupage with Paper Napkins and Make a Tray Look Fabulous ,Plastic Bucket Transformation with Decoupage Peonies , Chinoiserie Pumpkins with Blue and White Decoupage.
I hope that you have been inspired to make a Decoupage Oyster Shell Trinket Dish. Leave us a comment and let us know what you think!
Don’t forget to Pin this to your favorite Pinterest Board!

I love these. But I am wondering how you don’t have wrinkles in the decoupaged napkin. Napkins are so thin and I’m wondering how you got them so smooth without tearing the napkin?
Hi Jamie –
The pieces of napkin are not that large when you place them on top of the ModPodge, inside the oyster shell. We pre-cut the napkin piece so that it is fairly accurate in size. In our experience, the piece is so small that there was minimal bubbling or wrinkling. When more ModPodge was added to the top of the napkin it allows to brush out any wrinkles.
We hope that this was helpful – we’d be glad to answer any other questions that you have.
All the Best,
Vicki and Jenn ~ 2 Bees
I love these, so creative and beautiful!!
Hi Tanya –
We can’t thank you enough! They were so easy to make!
All the best,
Vicki and Jenn ~ 2 Bees
I love this project SOOO MUCH!! Calling local restaurants right now so I can do this. Thanks for sharing! Hugs to you both!
Hey Angie!
We are so excited for you to make these oyster shells. Hopefully your local restaurants will come through for you!
All the best,
Vicki and Jenn ~2 Bees
I lovw this idea. I love working with shells. Thank you for sharing.
Hello –
Thank you so very much! We hope that you give this a try for yourself!
All the best,
Vicki and Jenn ~ 2 Bees
These turned out so pretty! What a great idea. Love the pattern you chose too.
Hi Marie~
Thanks so very much. We love blue and white and felt that this was a great pattern for the oysters.
All the best,
Vicki and Jenn ~ 2 Bees
Love these shells. Thank you for sharing. Maybe you could help me with a question I have with decoupaging sand dollars with key holes in them. Any ideas about how to decoupage over the holes and then cut through them? I would like to paint a thin layer of gold paint around each hole. I would place the pattern over the hole , just not sure how to do this so that the hole is open and borders adhere to the sand dollar. Sorry if this is confusing or if I’m explaining myself clearly. Thank you for any advice you can give me!
Hi Patricia!
If we understand you correctly, this is what we would do. When you decoupage with paper napkins, you are only using one layer – so the paper is very thin. So…Cut your napkin to size of sand dollar shape. Add ModPodge in a thin layer on top of the sand dollar. Place the napkin piece on top of the sand dollar and smooth into place. Using a straight pen or toothpick, immediately and carefully push through the sand dollar holes and smooth down. Let dry completely.Then you can paint with the gold paint.
We hope that this make sense. If not let us know. Good luck!
Vicki and Jenn ~ 2 Bees in a Pod