Fireplace Makeover with Sticker Tiles
Please note that this post contains affiliate links. As an Amazon Associate, Rewards Style influencer and Jane Influencer, we earn from qualifying purchases and any sales made through such links will reward us a small commission – at no extra cost for you.
Fireplace Makeover with Sticker Tiles
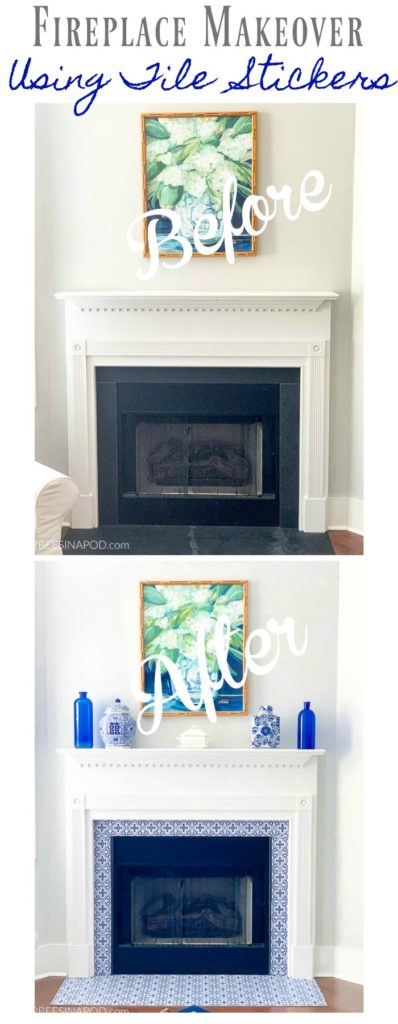
I can’t wait to show you how I completed a fireplace makeover with sticker tiles!
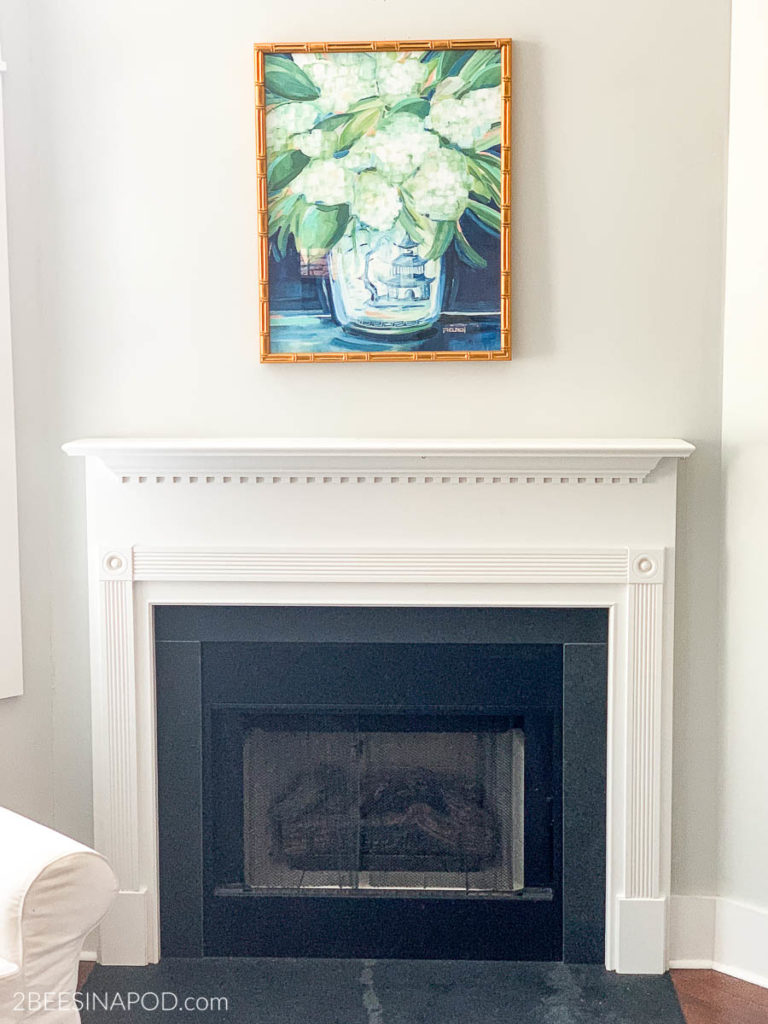
When we initially purchased our house almost 14 years ago, it was our vacation home. One thing that really bugged me was the black slate on our fireplace. There are three pieces around the insert and there is a large single piece on the floor. The floor piece has veining lines, but it has always looked like stains to me.
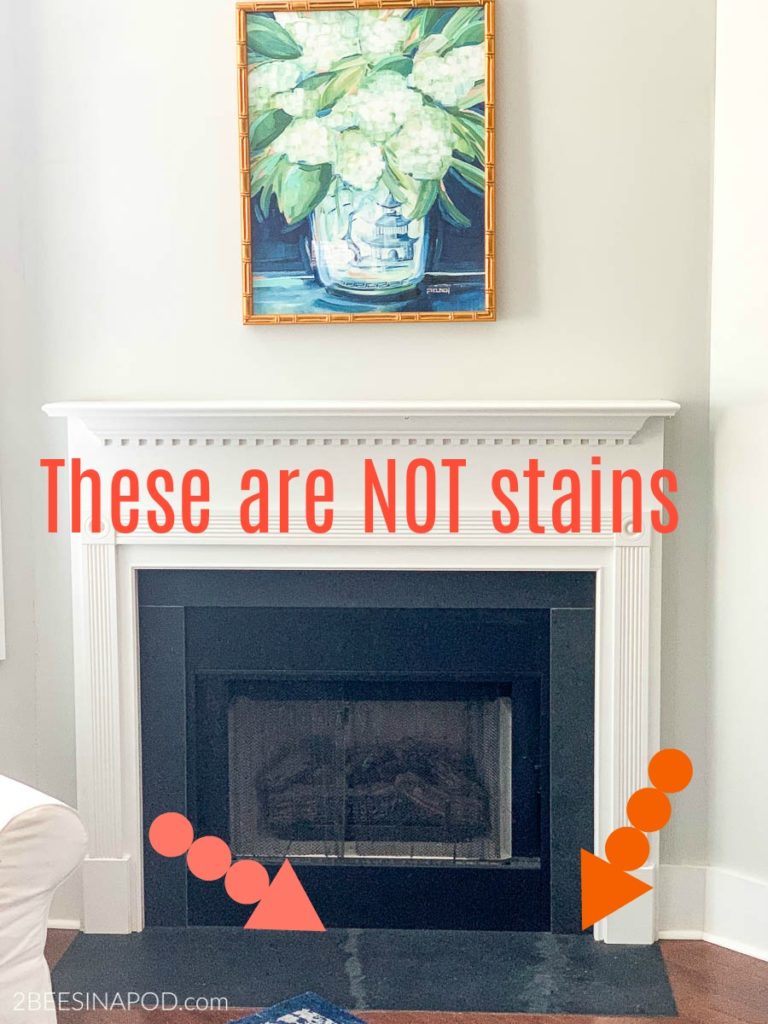
Not terrible, but it has always bothered me. Now that this is our permanent home I decided it was time to do something about it. I wanted to give the fireplace an updated look, but I didn’t want to spend a lot of money or time on it either. After doing much research I knew that I couldn’t put tile on top of the existing slate. They would pop-off in a short amount of time.
I love perusing the internet for new-to-me ideas. It was hard to contain my excitement when I discovered Snazzy Decal on Etsy.

There site has lots of styles, designs and sizes of tiles that are made out of stickers. YES! These are stickers. I chose the 4″ Antique Dutch style with added grout lines. The crackle finish looks authentic with this gorgeous shade of blue.

I couldn’t resist opening a packet to add one tile to the fireplace.

Immediately I knew that I had made the perfect choice. The sticker tiles are easy to install and look like real deal. Sticker tiles are waterproof and resilient. Here is more info directly from Snazzy Decal.
- It is a premium self-adhessive vinyl film that it 0.3mm thickness, printed with high resolution tile designs and sealed with a layer of lamination that make ti durable, scratch resistant and water resistant. It covers the existing tile surface like veneer to give it a new look, though it can also be used on non tiled surface which we offer the faux grout option to make it look like a tile.
-
Stickers are best applied to any smooth flat surface that is non-porous.
-
Stickers can be used in wet areas however the surface must not be porous to avoid water seep underneath to weaken the adhesive leading to peeling.
-
Preparation is the key to a long-lasting application.
-
Clean your existing surface for the best adhesion by removing all traces of dust, grease completely. Some tiles comes with a layer of wax by tile manufacturer, this wax will repel the stickers. We recommend you remove the coating with an acidic abrasive cleanser.
-
Peel off a small section of the backing paper to help you align the sticker to the tile, and remove the remiang backing paper while smoothing out amy bubbles.

Following the package instructions, I got to work. In just an hour and a half (1 ½) my fireplace looked like this!
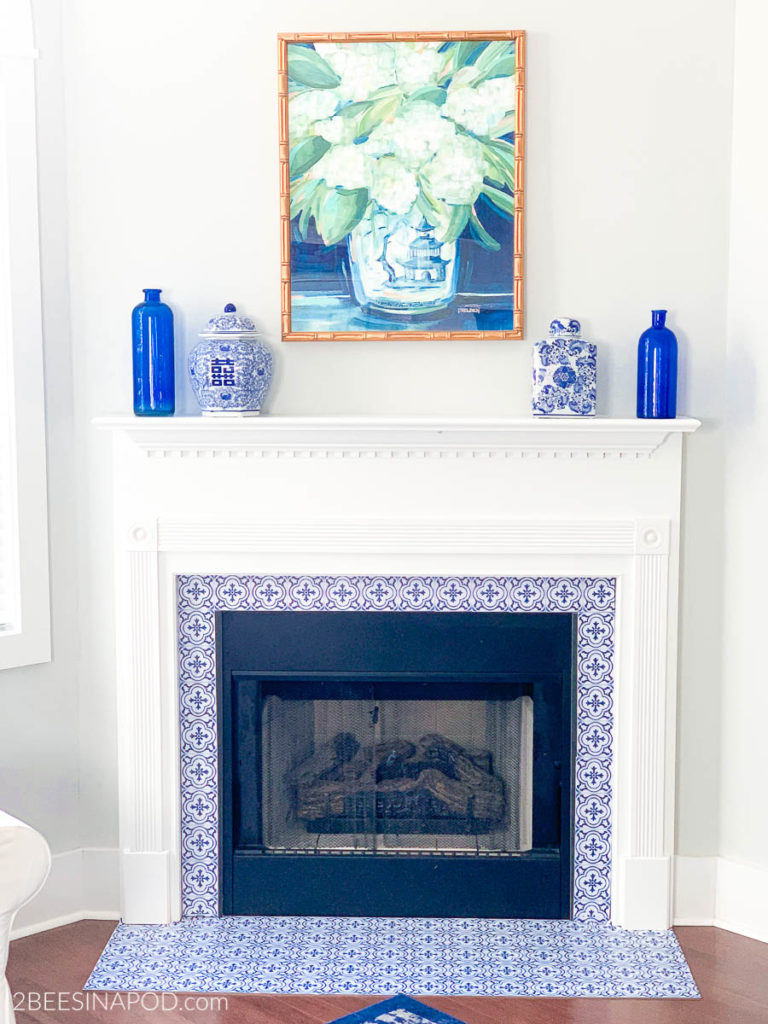
The tile stickers are super easy to install – just peel and stick. They are also very easy to cut with scissors for any tricky corners or angles. Most people that have seen this fireplace makeover can’t resist coming over and touching the tiles. They look that real!
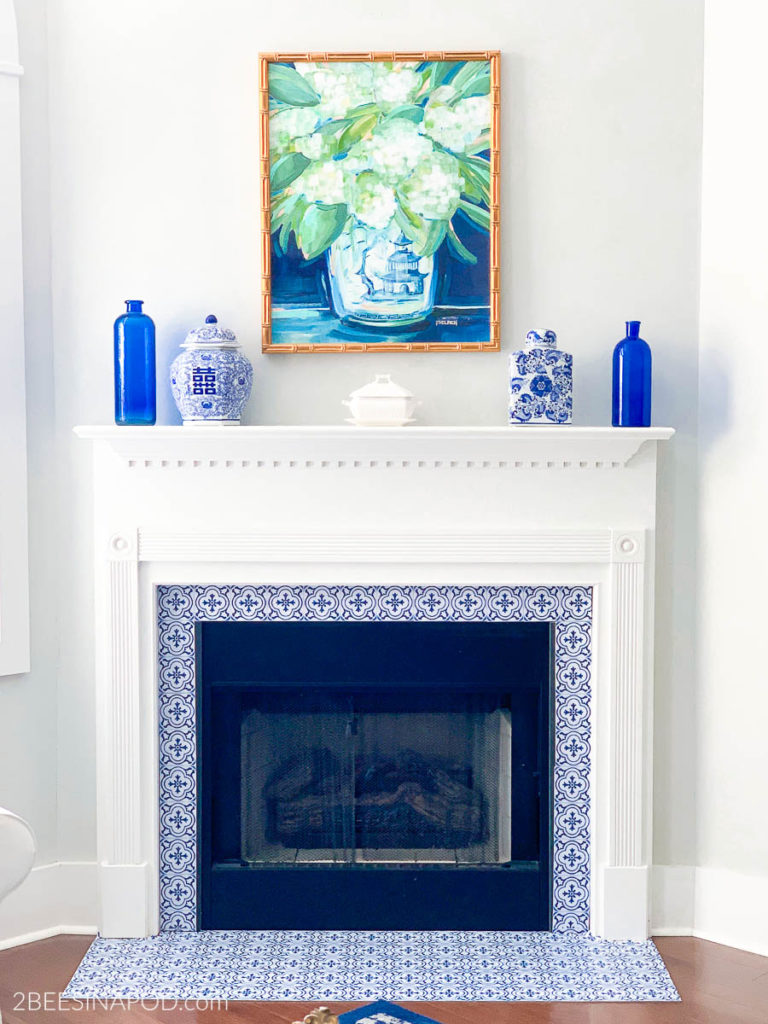
Such a transformation, right? I am so very happy with my “new” fireplace!
DON’T FORGET TO PIN THIS TO YOUR FAVORITE PINTEREST BOARD!


This turned out amazing!! You would never know they are not tile! And I love, love the blue and white. 🙂