Chandelier Makeover with Chalk Paint
Please note that this post contains affiliate links. As an Amazon Associate, Rewards Style influencer and Jane Influencer, we earn from qualifying purchases and any sales made through such links will reward us a small commission – at no extra cost for you.
This week I learned a couple of things. Doing a chandelier makeover with chalk paint is super easy. Photographing a chandelier is a tad challenging. Let’s start at the beginning.
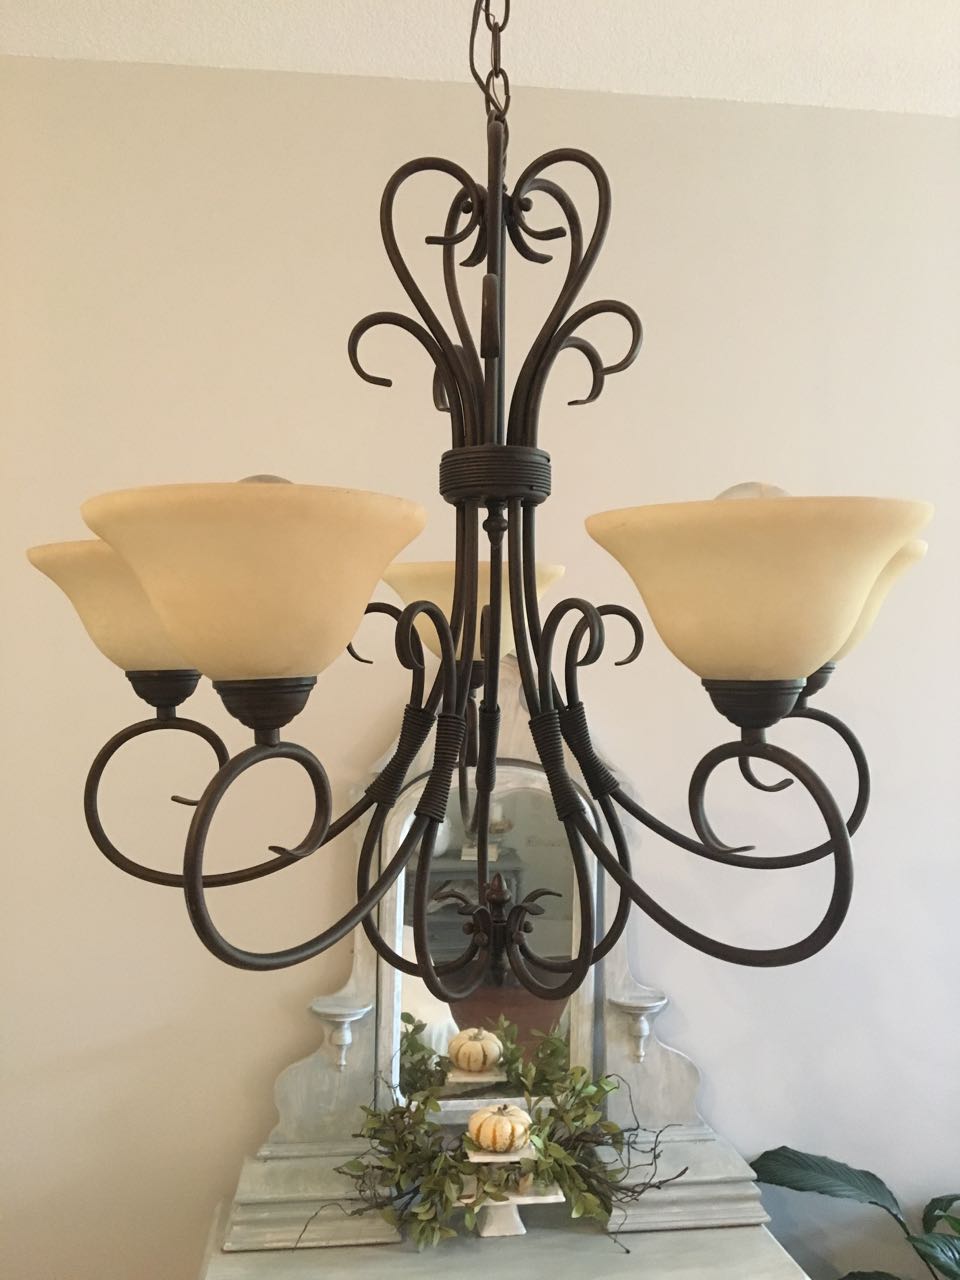
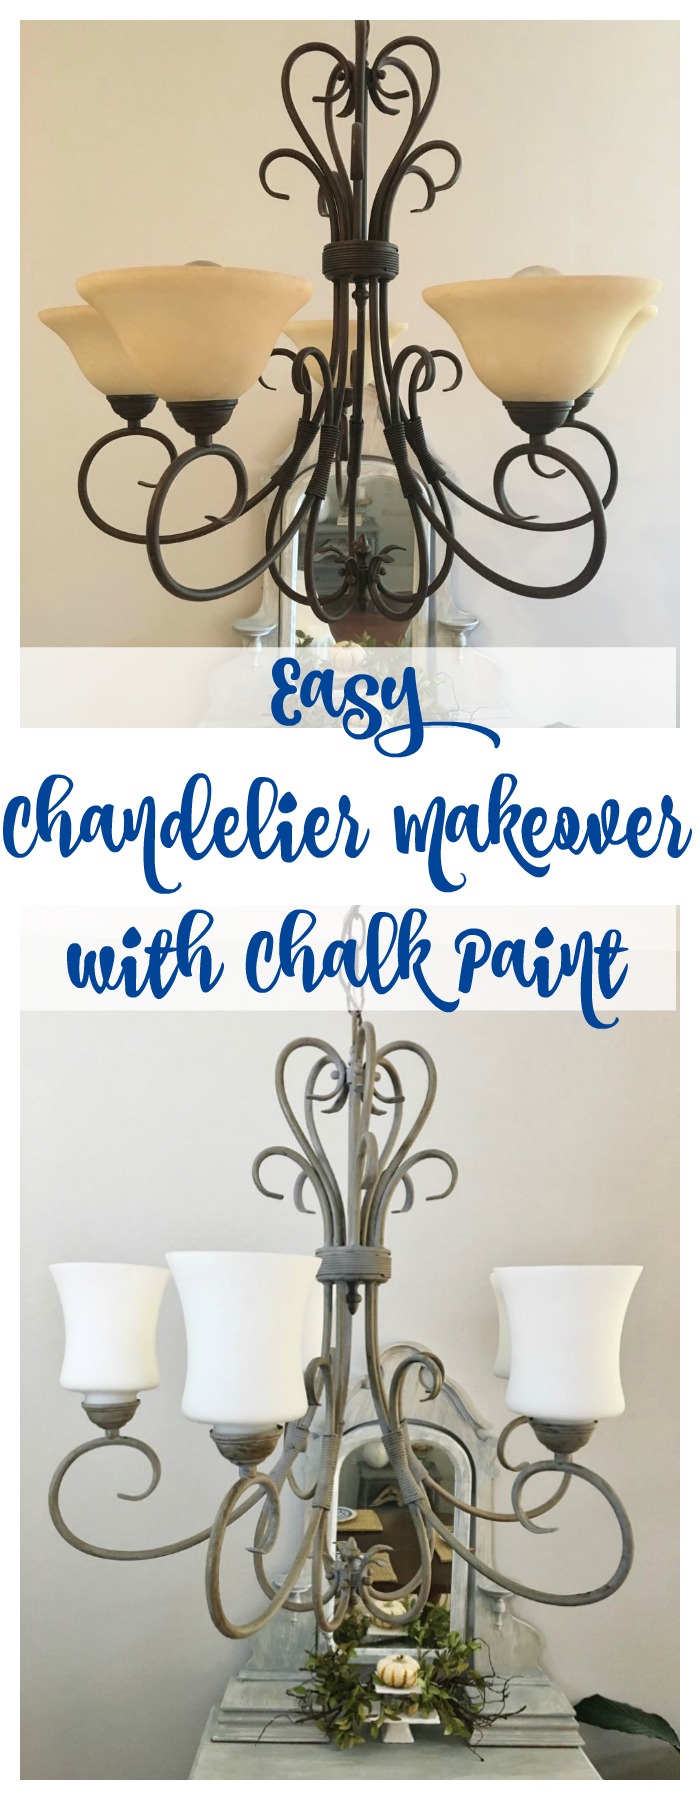
This is the chandelier light fixture that is hanging in our dining room. Nothing particularly wrong with it…just not my style.
We recently painted the dining room in Benjamin Moore’s Gray Owl and the new color significantly lightened up the room.
The chandelier globes made the room glow yellow…and not in a good way. I’m sure the globes were designed to make the room more radiant. Instead, the dining room looked like it was bathed in bad self-tanning lotion. 🙂 The dining room walls were previously a goldish color and the lighting was perfectly fine. It’s amazing how many things are affected with new paint color.

The dark bronze is just too heavy for the room. I’ve been searching for a new chandelier for quite awhile now. Apparently, I have champagne taste as all of my favorite choices cost hundreds of dollars. This expenditure isn’t in the current budget so I needed a Plan B.
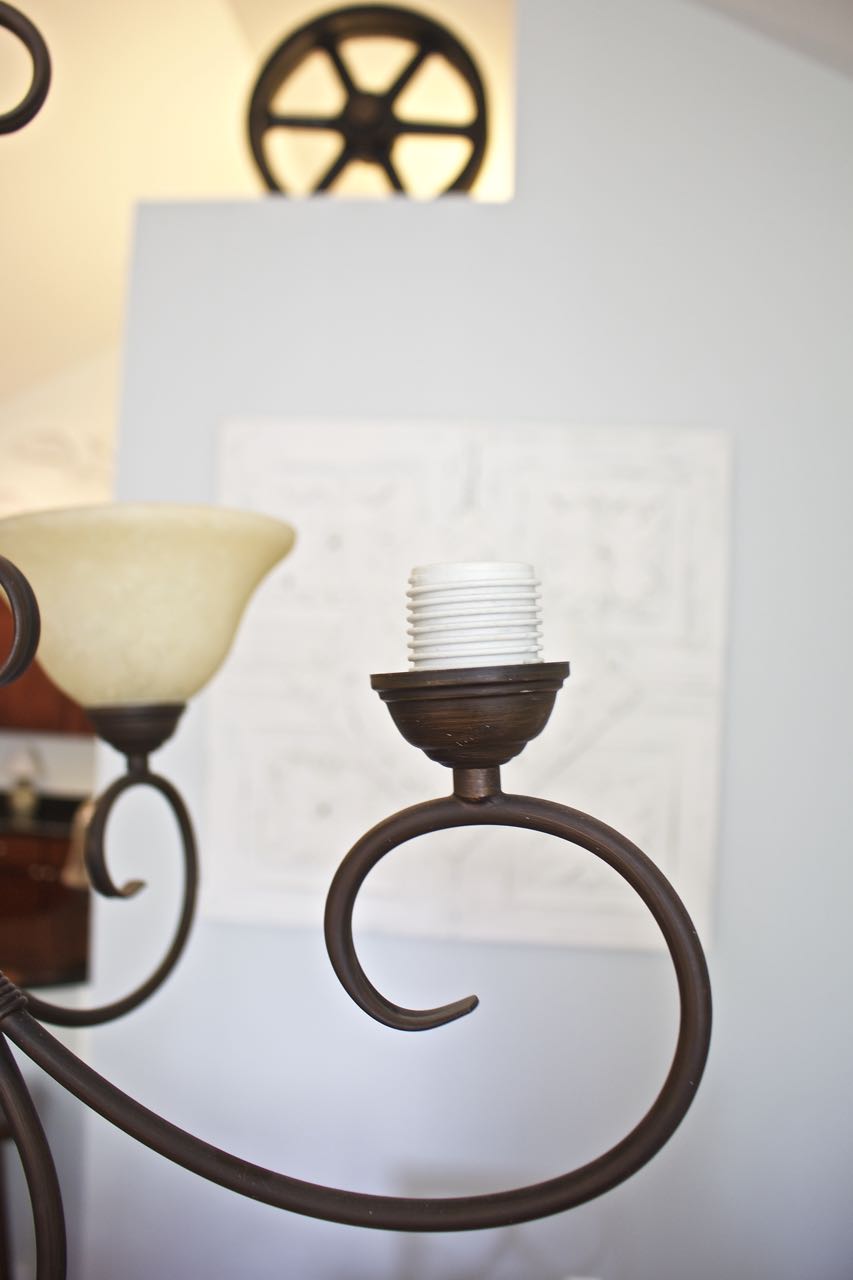
My first idea was to remove the globes and create a candlestick chandelier. Well, this idea was quickly thrown out. See that large white ridged ceramic socket? It’s not removable unless I planned to rewire the entire chandelier…which I did not. The socket was too large for a candlestick sleeve. Which leads me to Plan C.
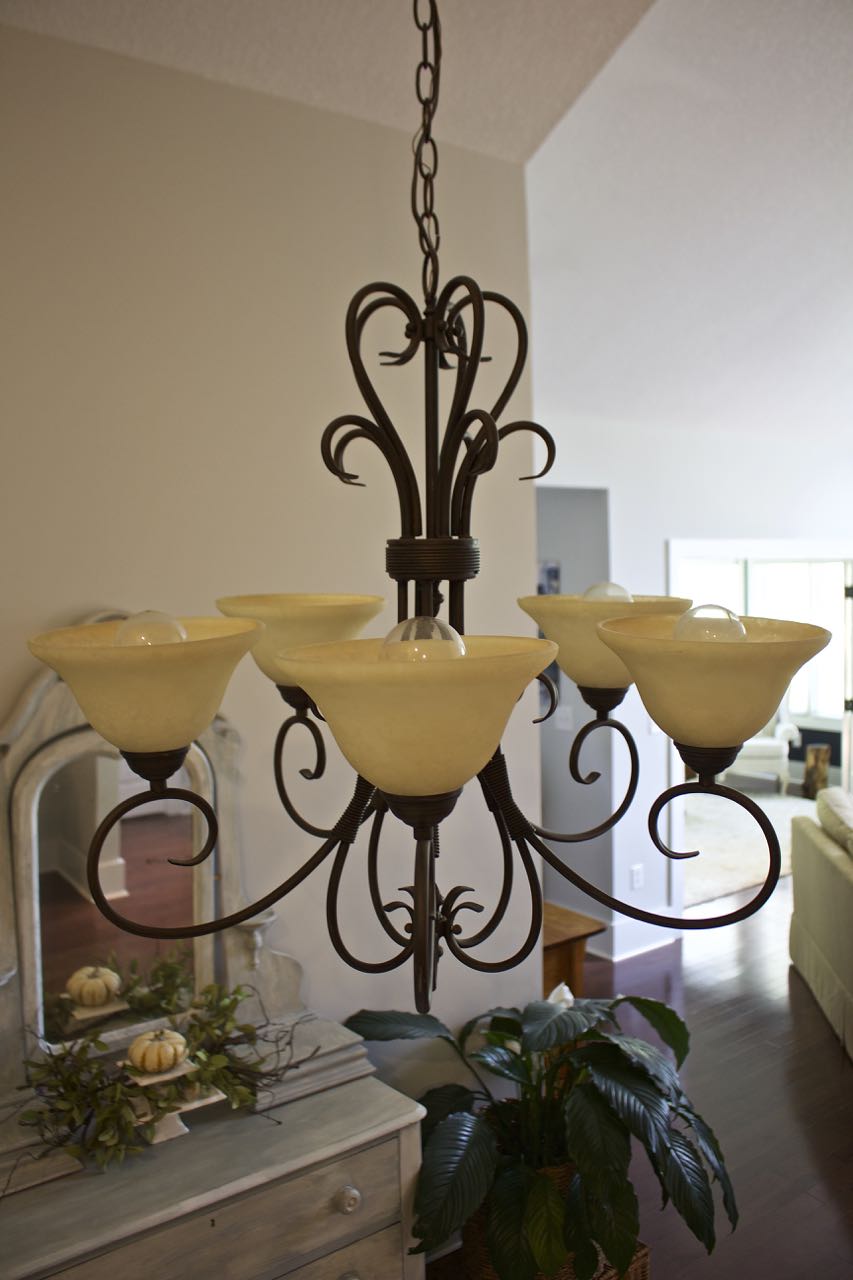
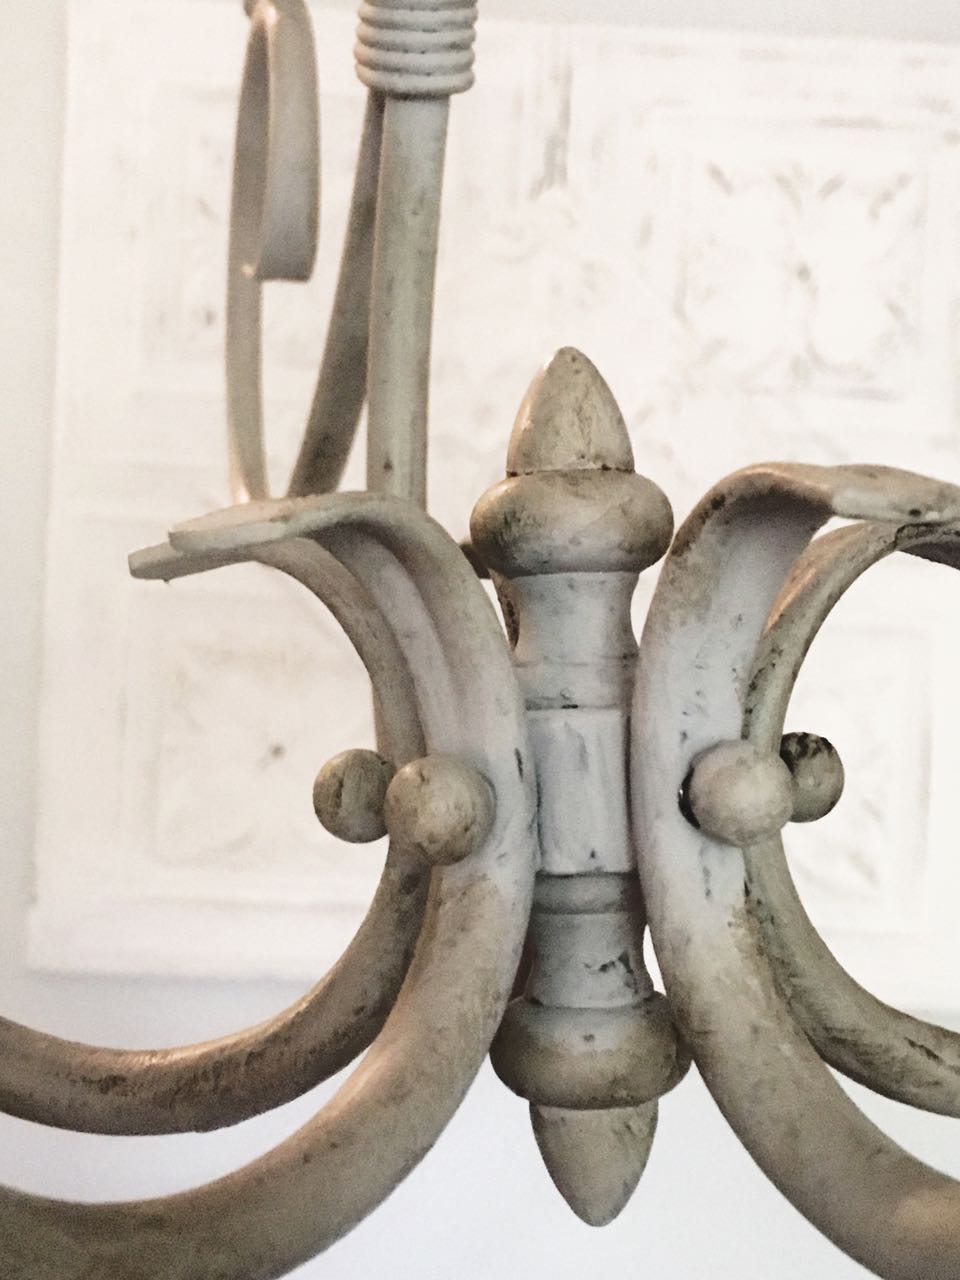
Jenn and I have successfully used chalk paint for a lot of projects – painted furniture and craft projects. I decided to give it a try for this chandelier makeover. I used a single coat of leftover Chalk Paint in Paris Grey. I turned the circuit breaker switch off for the chandelier and began painting. I didn’t even take the chandelier down – I simply painted it in place. After the chalk paint dried I added a coat of dark wax to give the chandelier an antiquated look.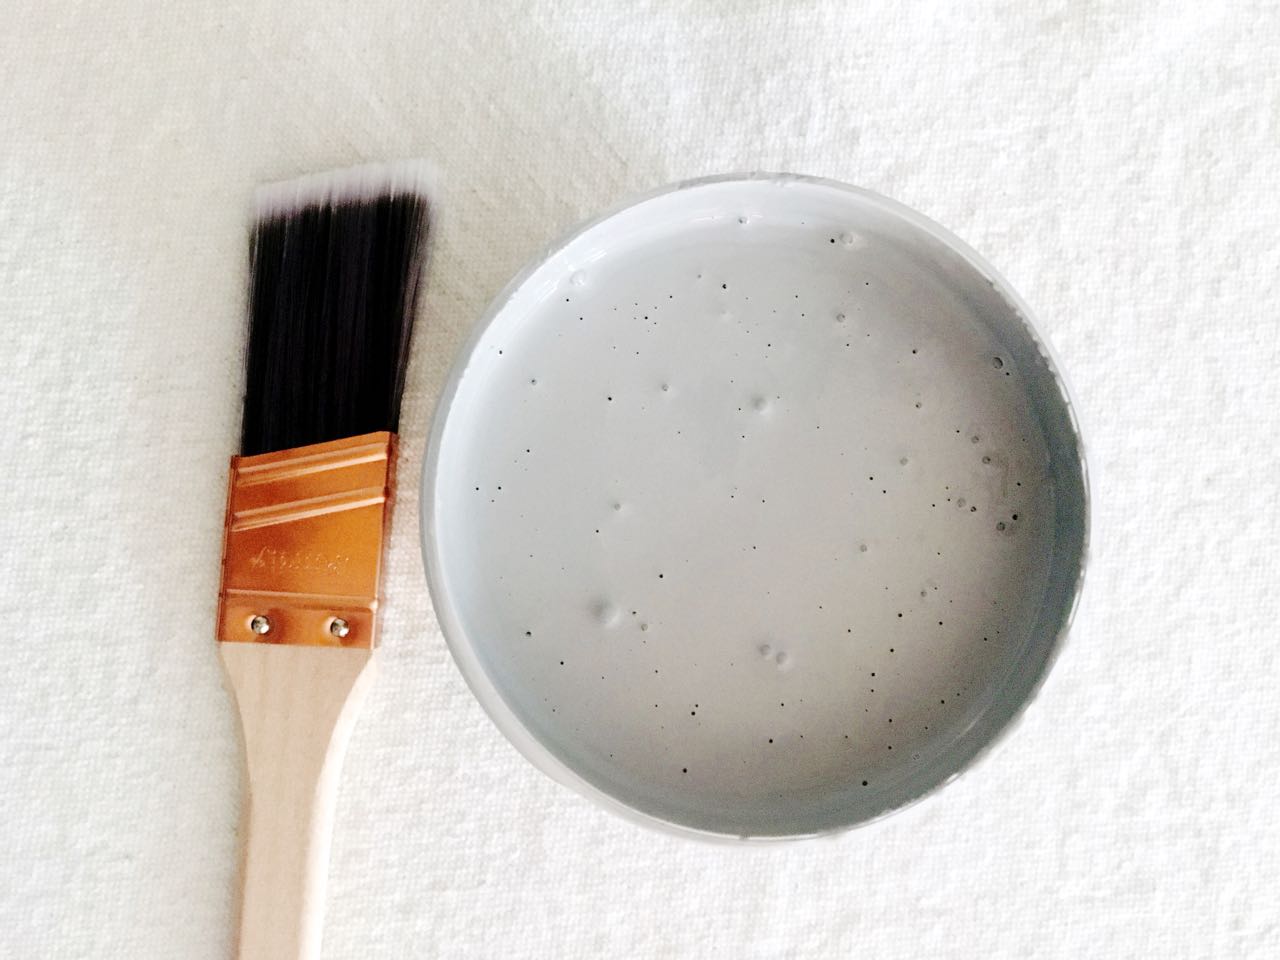
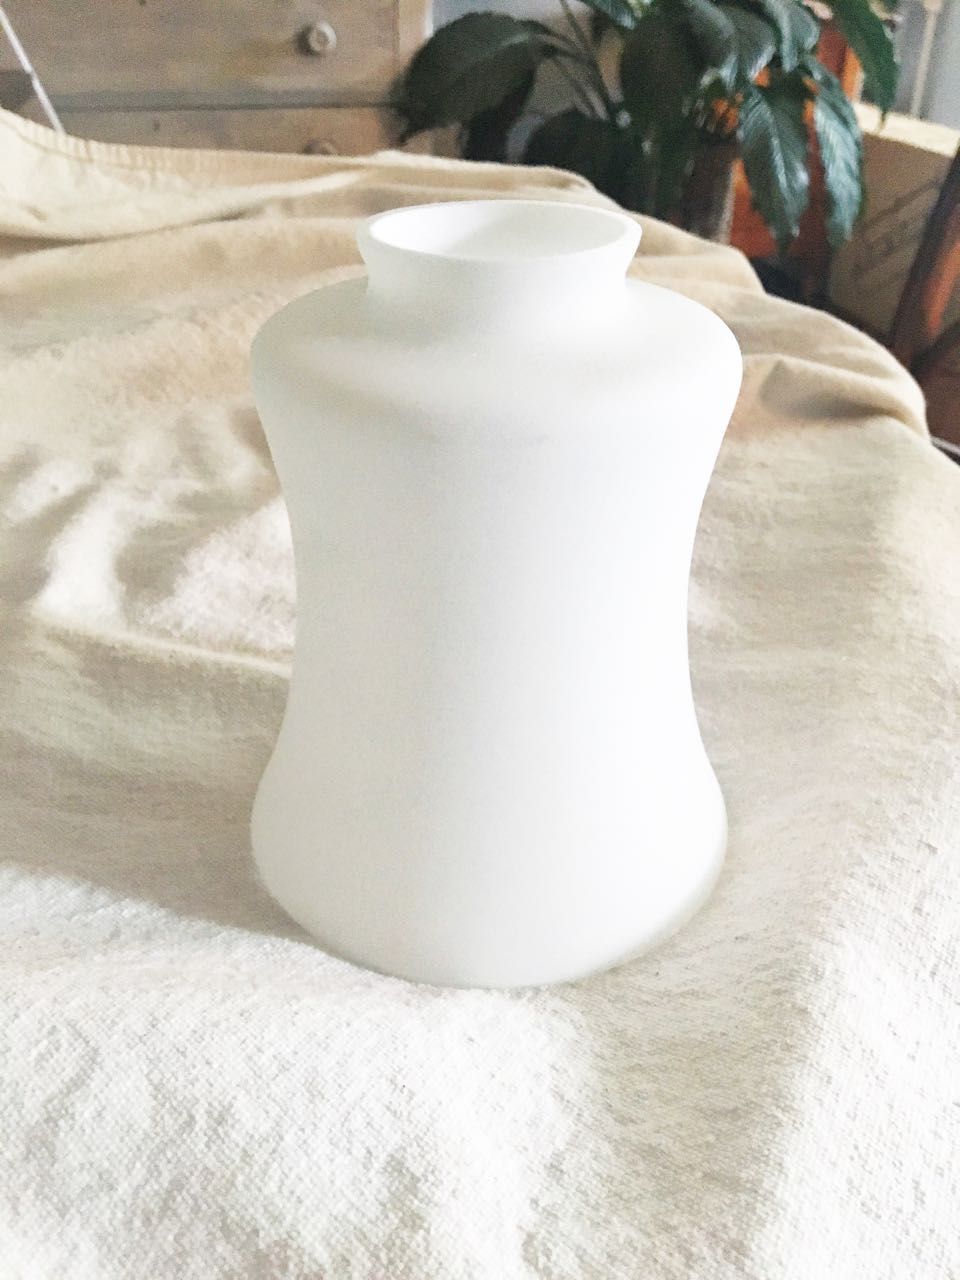
New light globes were needed to cover up the ceramic socket. Being ever mindful of my budget, I pride myself on doing makeovers and projects for the smallest amounts of money as possible. Replacement globes can get pretty pricey, so I decided to head out to a local Habitat store. Look at what I found for $1.00 a piece!! I was thrilled!
Here’s a close up shot of the waxing detail. Remember when I said chandeliers were difficult to photograph?
There are so many open spaces and half walls in this house. I hope you get the essence of how great this chandelier looks now.
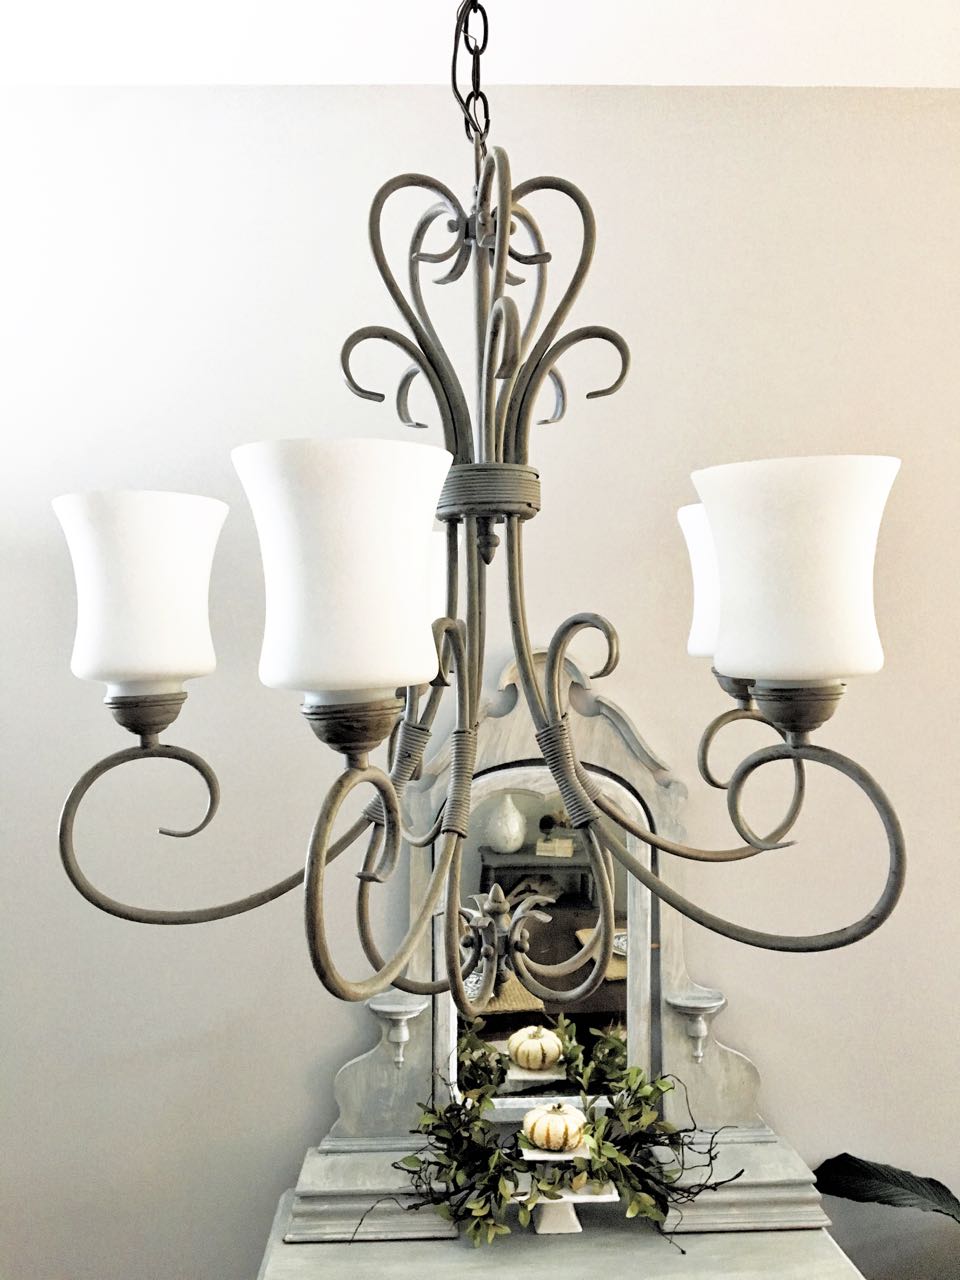
The white globes and new light bulbs bathe the dining room in bright light now.
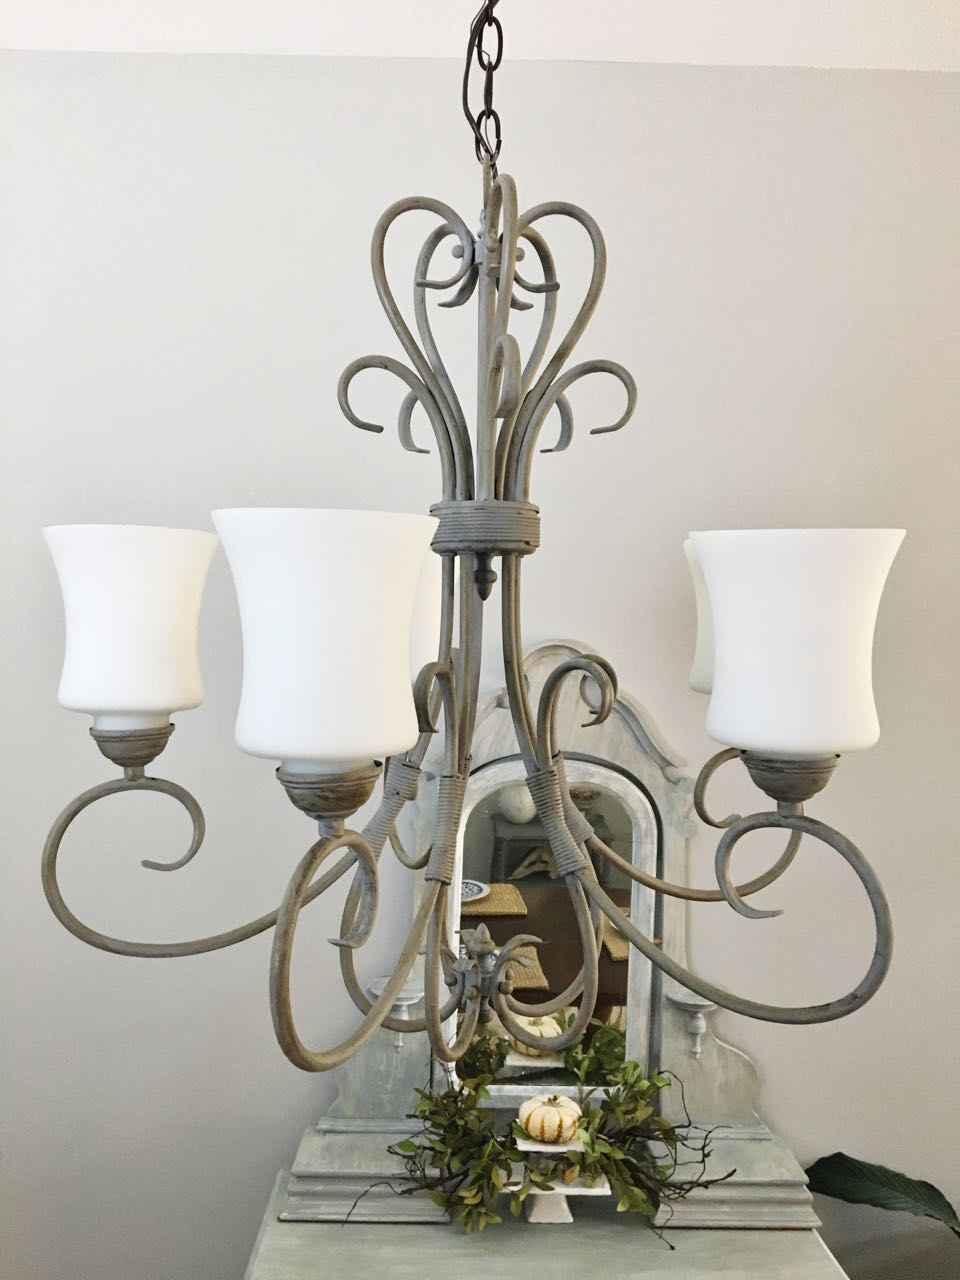
The chandelier blends so well now with my decor and style.

I am so glad that I took the time to give this light fixture a makeover. It saved me a lot of money and I really love the new look. It was $5.00 well spent! Have you chalk painted anything recently?
Until tomorrow…
XO~Vicki
Let’s be Pin Pals. Pin this to your favorite Pinterest board…
What a great makeover and I love the new globes! You always find the deals. Keep us posted on how the wax holds up on the layer of paint and metal. I’m so curious! Fab makeover lady 🙂
I just love the new chandelier! You should be so proud of yourself!!
Thank you so very much Ellenann!
OMG, I’m moving soon and my new place as an ugly ceiling fan I’m going to try this, I have nothing to lose!
YAY Beverly – let us know how it turns out!
Love it.
Thanks so very much Kay!
That is so beautiful, Vicki! Saves a ton of money updating an old one and it’s perfect!!
You are so very sweet Kendra…thank you! You know how much we love lamp makeovers!
I’ve always wondered it the paint scratches easily on metal….like will it scrape off? I know something that hangs from the ceiling won’t come into contact with things that could scratch it but what about something like a lamp? Will it work for that?
Karen
Hi Karen – We have not used chalk paint on a table top lamp…yet. It’s only been a few short weeks and the chandelier doesn’t have any scratches at all. We have done lots of lamp makeovers using spray paint with fantastic results. We are fortunate that none of them have any scratches at all. We would be glad to answer any other questions you have about paint and lighting makeovers!
Can you please tell me what dark wax you used. Thanks
I just took the light fixture from my daughters home to replace the broken one in mine! It looks just like this one! I am doing this Saturday! Thanks you two!!
Hi Leeanne –
Glad we could inspire you! We would love to see your light fixture when you have completed it! Good luck!
Vicki and Jenn
I love that color, it looks softer!
Maria
Love the new globes ! Awesome makeover and up to date!
What a great job! This looks lovely in your room and all for 5.00. They say necessity is the mother of invention! Yours is a perfect example! I think there is more satisfaction in this than paying hundreds for a new one, even if you can afford the splurge!
Hi Vicki and Jenn
Need your help very successful In using chalk paint on chandelier want to paint existing chain but need tips on how to avoid the wire from being painted?
Thank you so much