DIY Curtain Rods
Please note that this post contains affiliate links. As an Amazon Associate, Rewards Style influencer and Jane Influencer, we earn from qualifying purchases and any sales made through such links will reward us a small commission – at no extra cost for you.
Have you ever spent the night in the guest room of your home? A few weeks ago I wasn’t feeling well. I didn’t want to wake Honey Bee so I made my way in the dark to our guest room. I eventually fell asleep…the bed is so comfortable. When I awoke, I realized I had never slept in this room and was now looking at it through different eyes.
I had previously thought that this room was cute and comfortable. It was definitely comfortable but I now thought it was not cute at all. How could have I missed this key element?
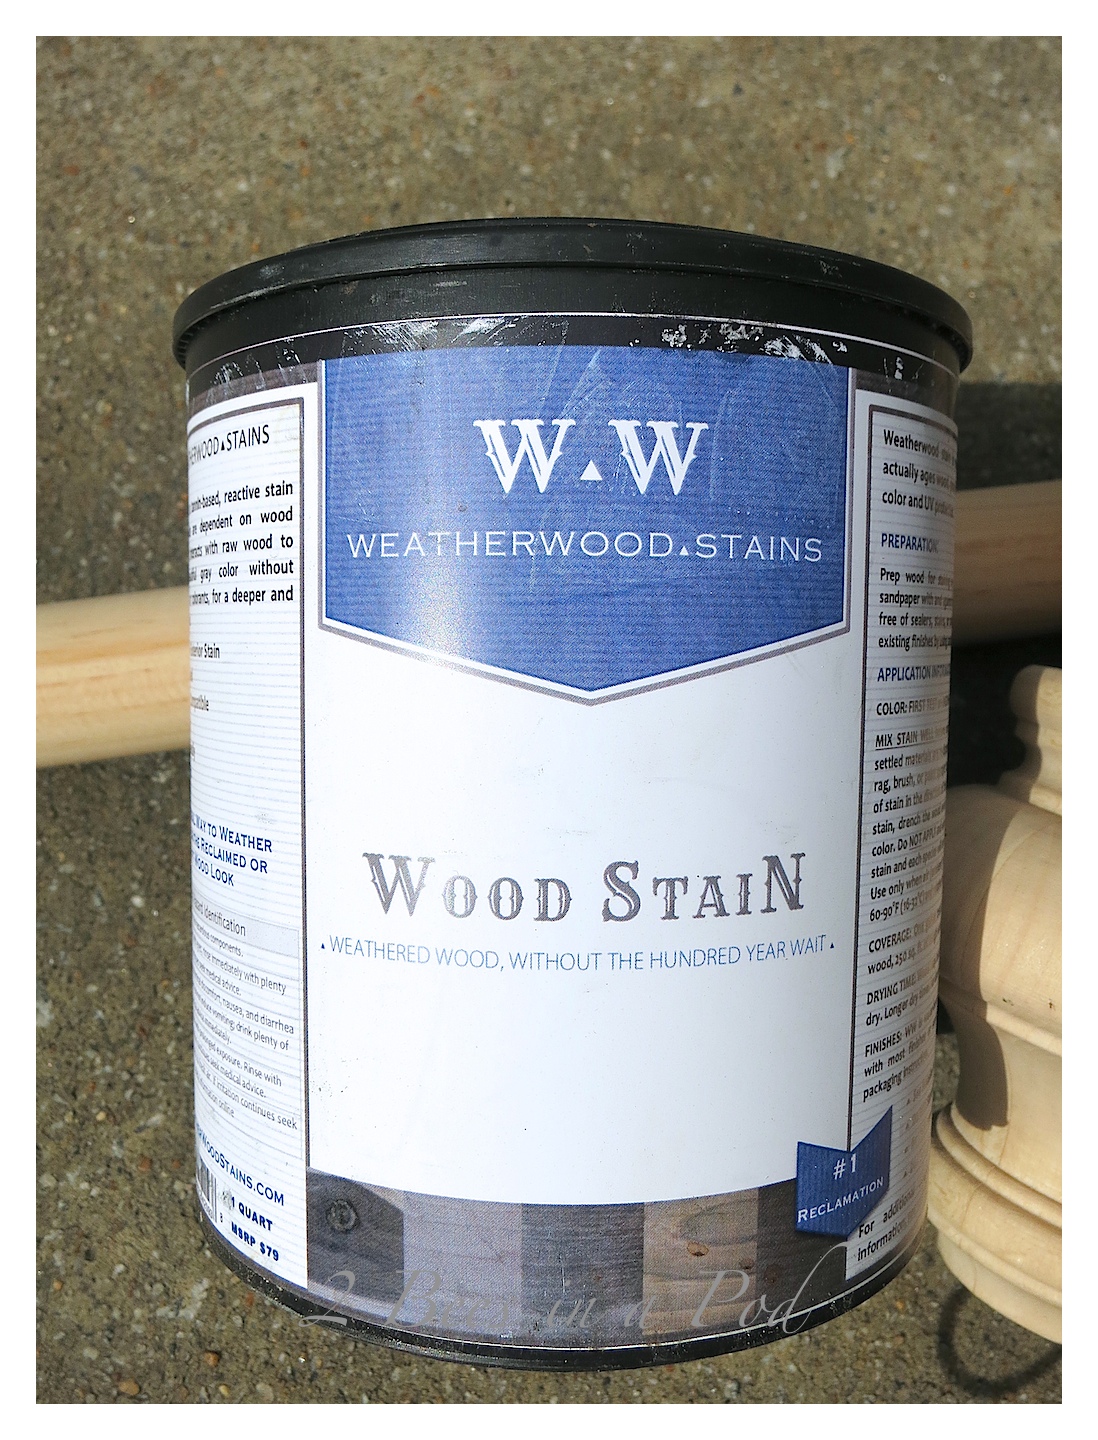
Around this time Jennifer and I were offered an opportunity to try a new product, Weatherwood Stains. Their product #1 Reclamation is a reactive stain that creates different weathered colors based on raw wood species. You can make wood look aged without having to wait 100 years.
I became very excited – this was like a science project 🙂 Keeping my guest room in mind, I knew exactly what we could create…DIY Curtain Rods.
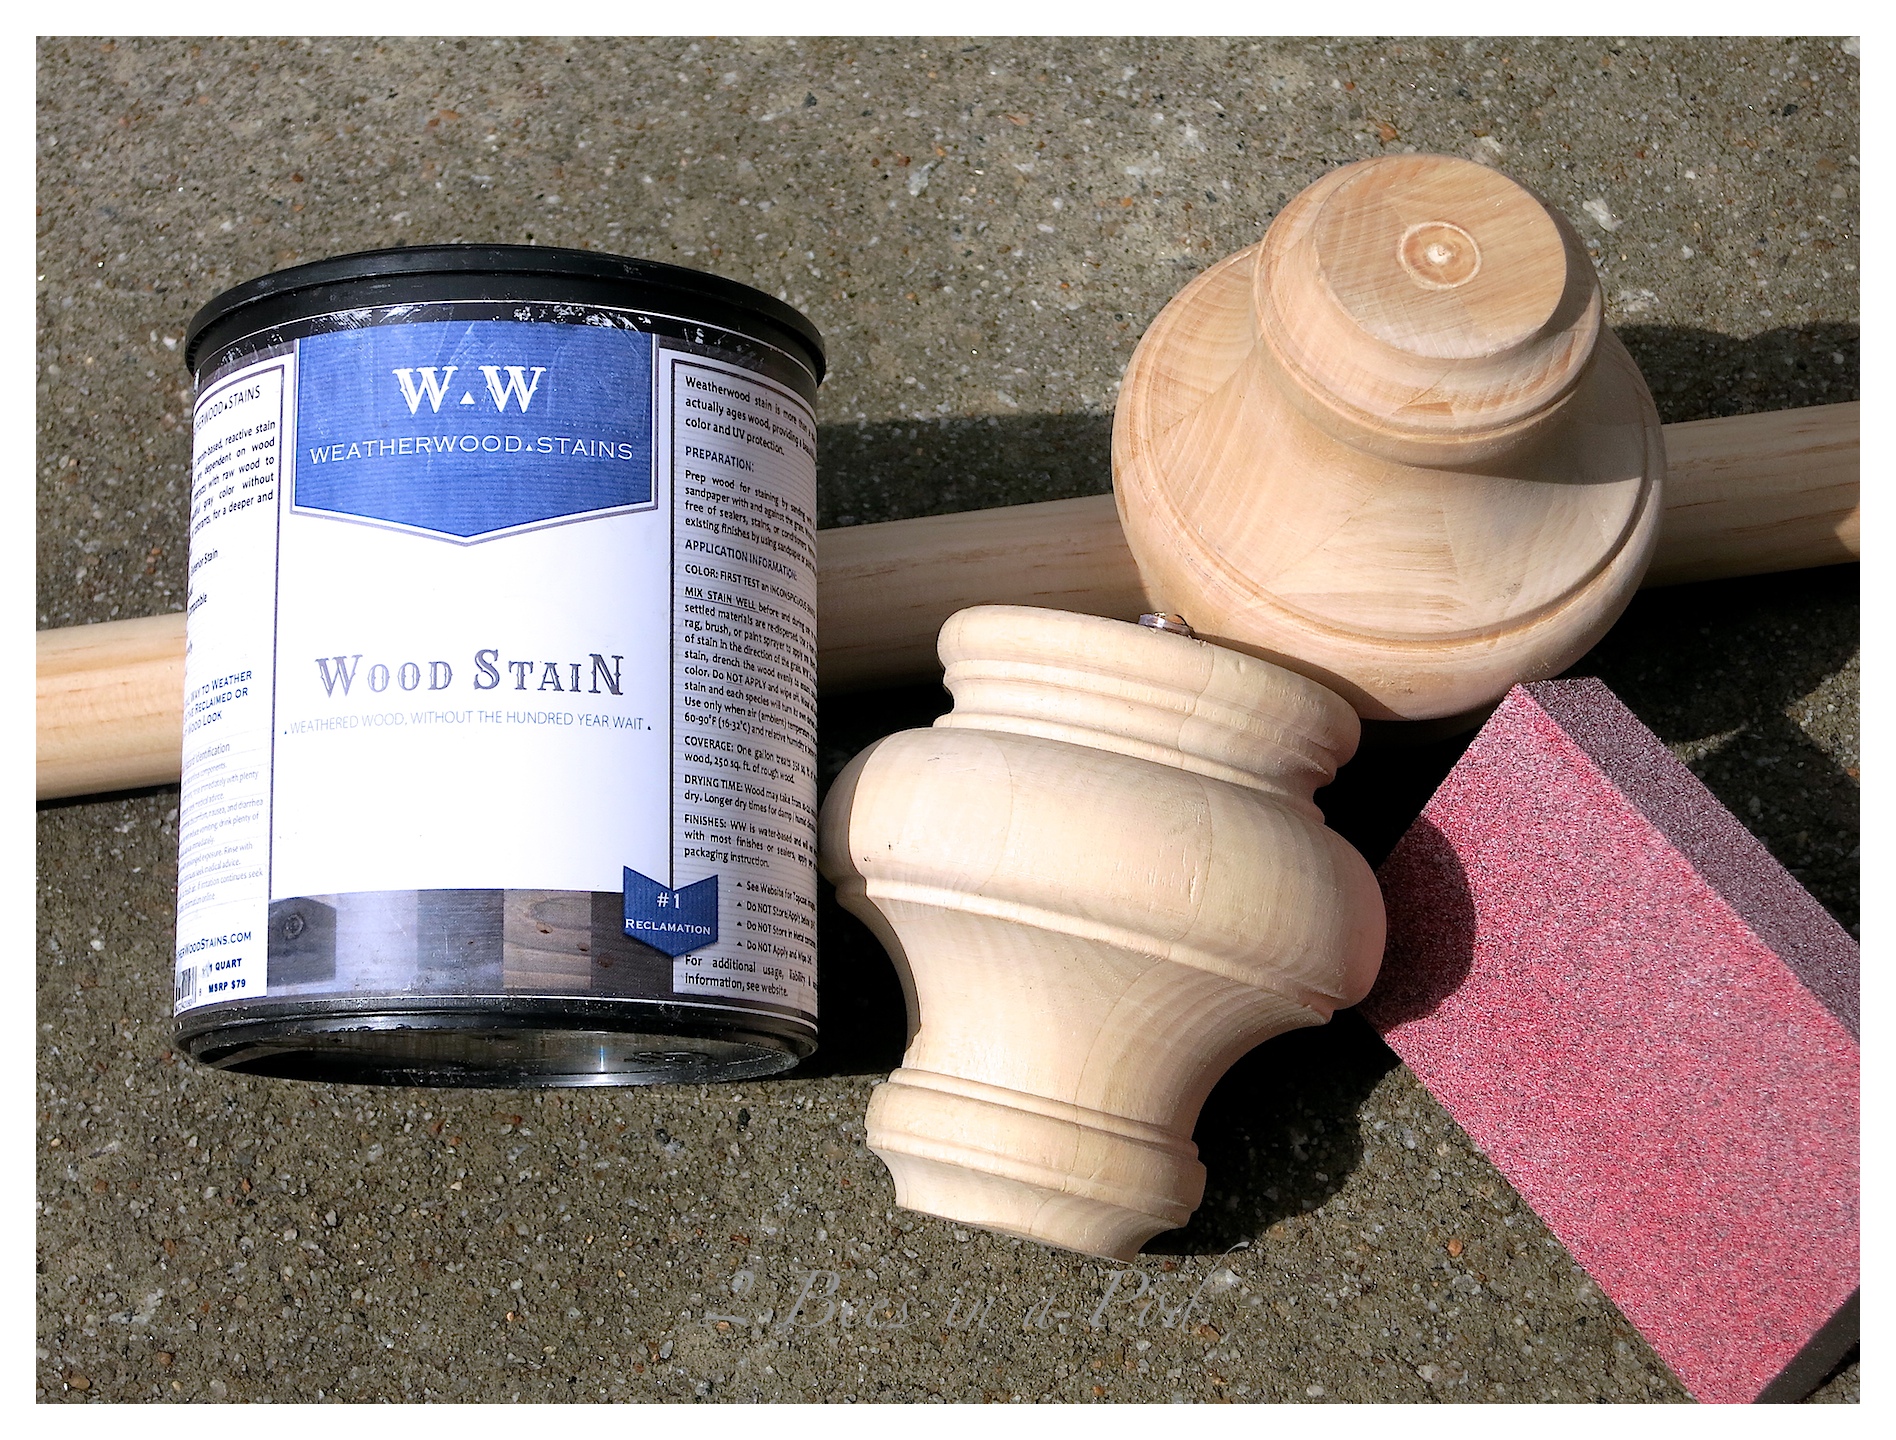
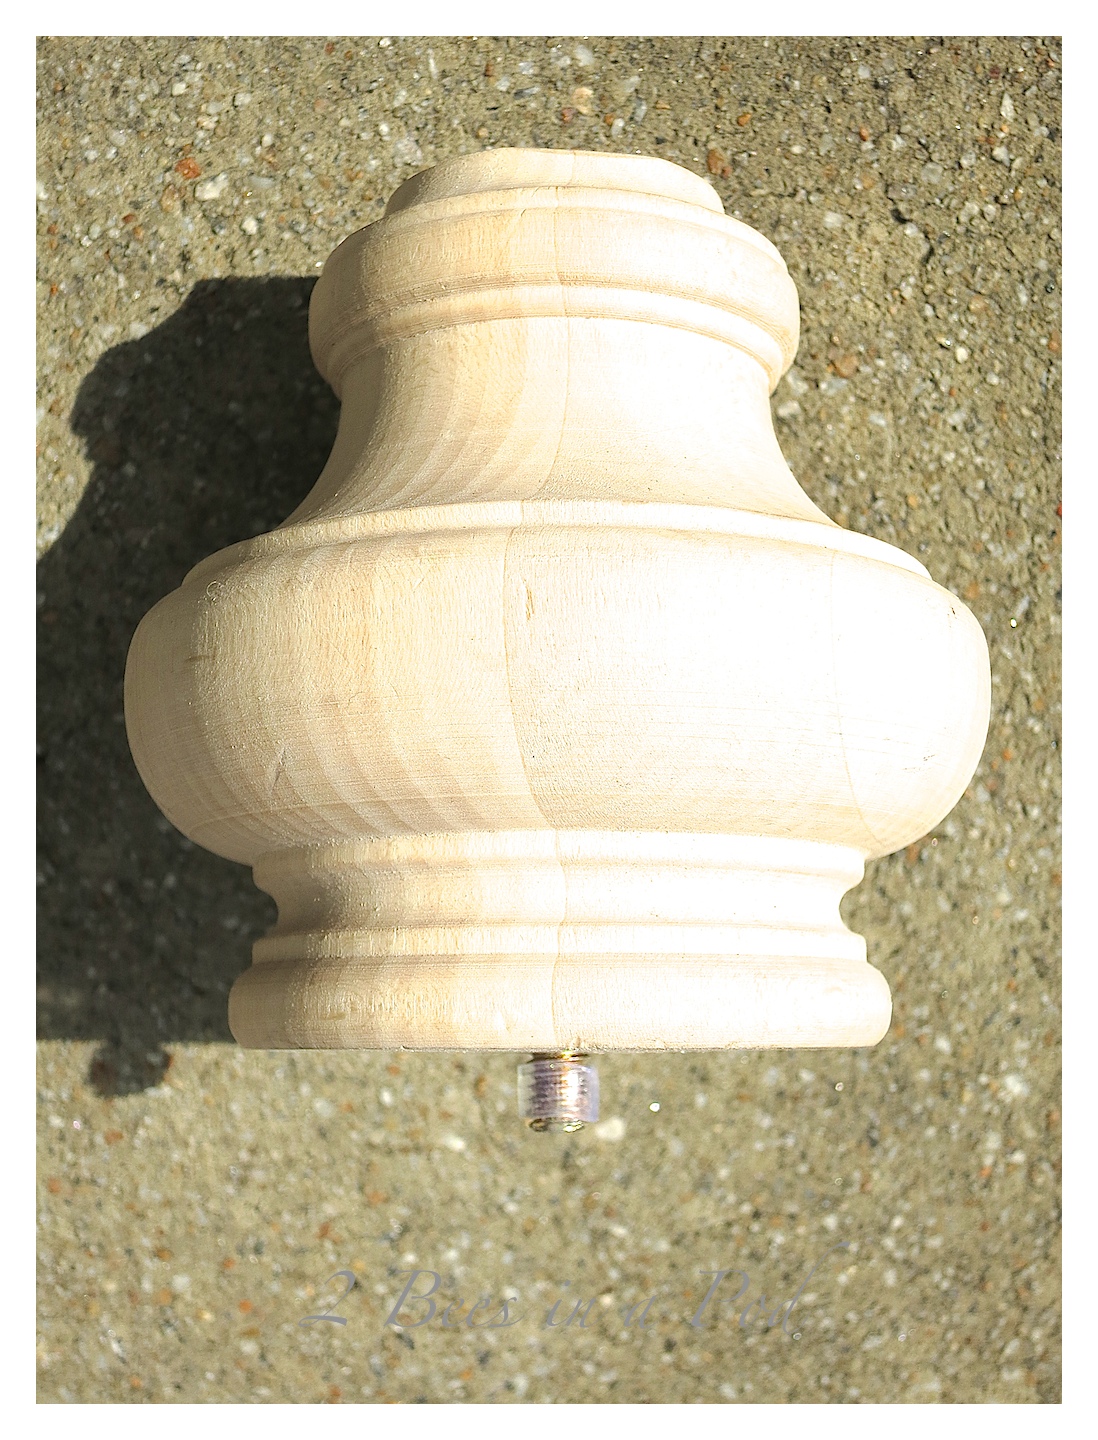
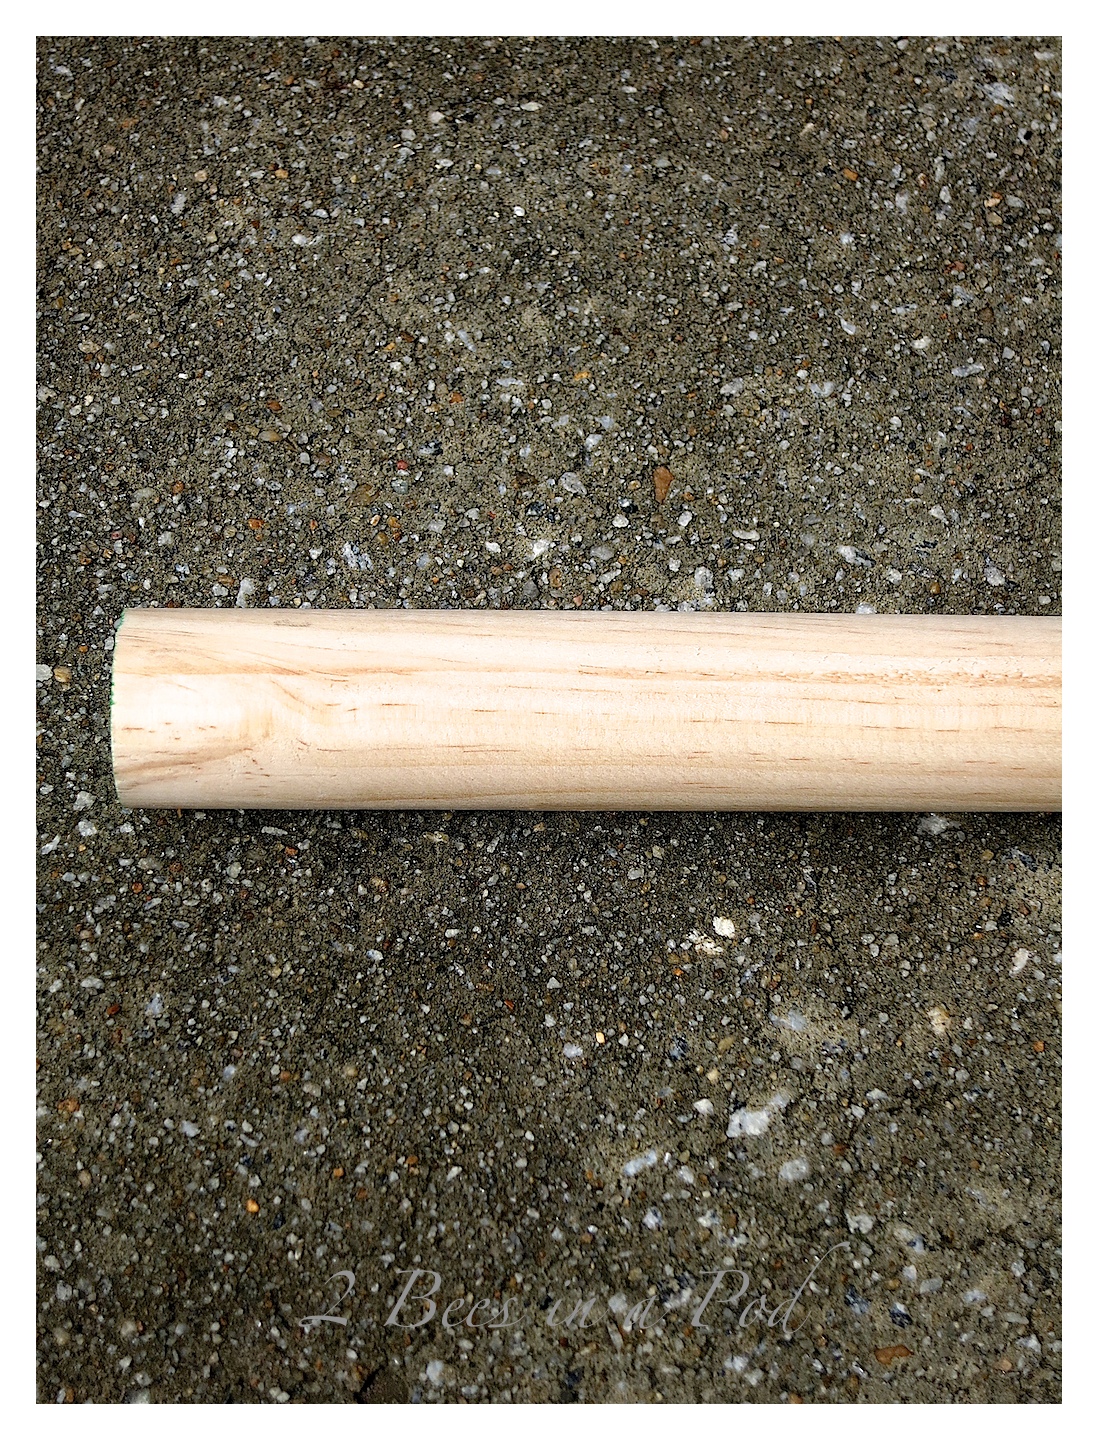
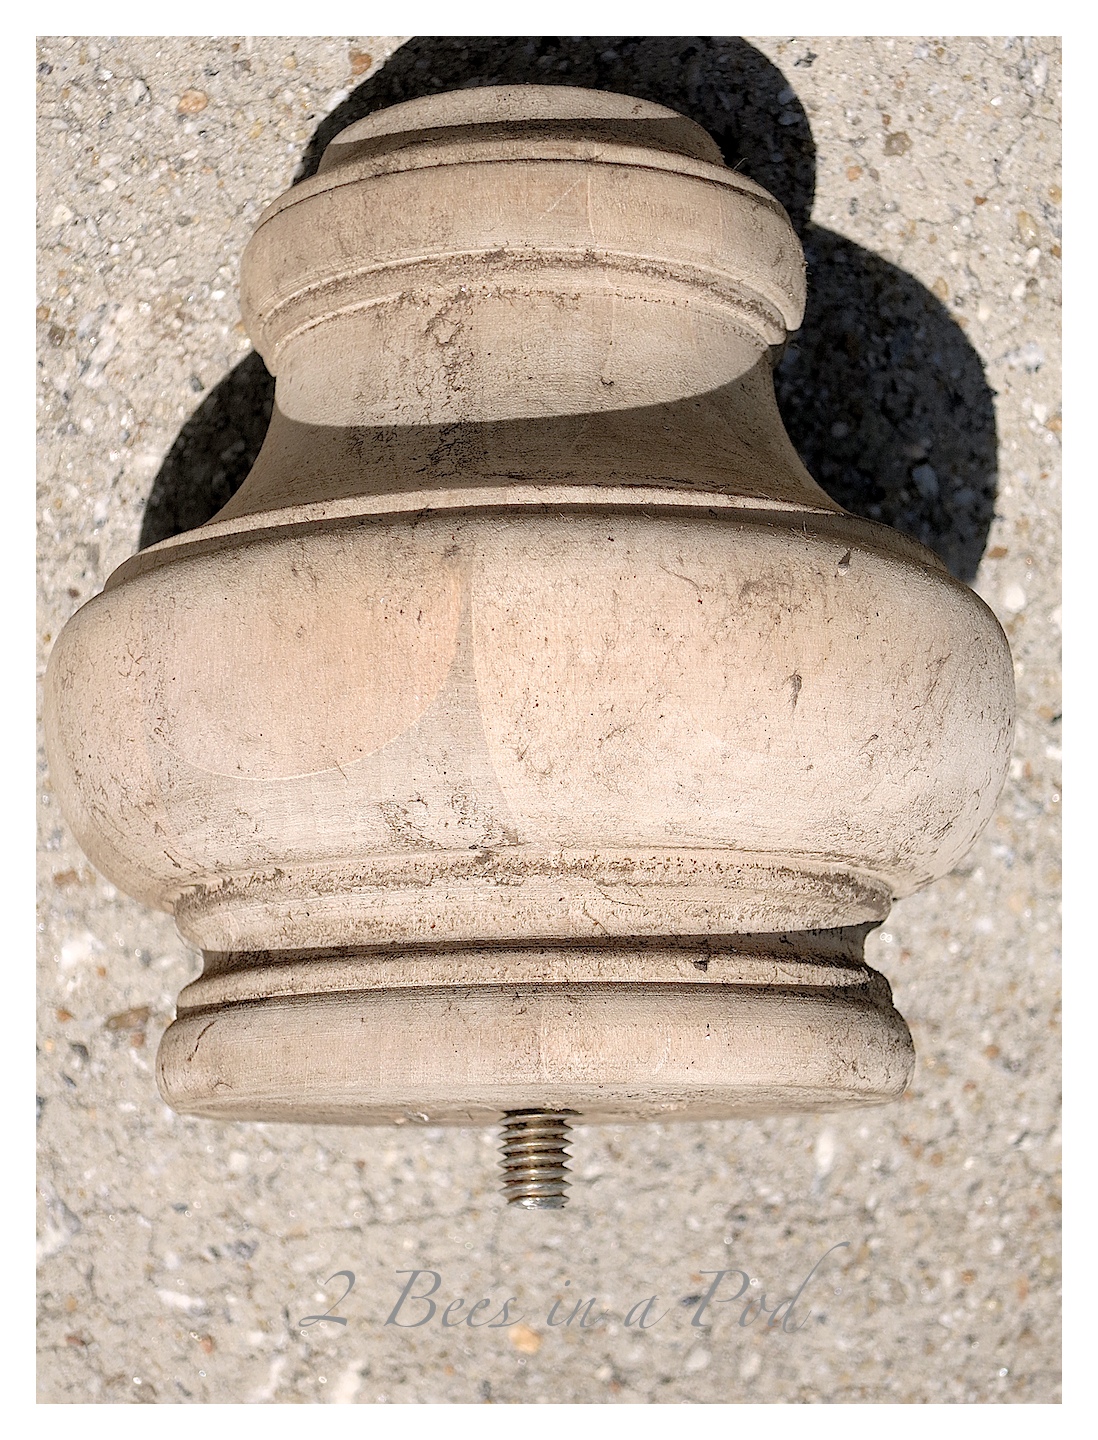
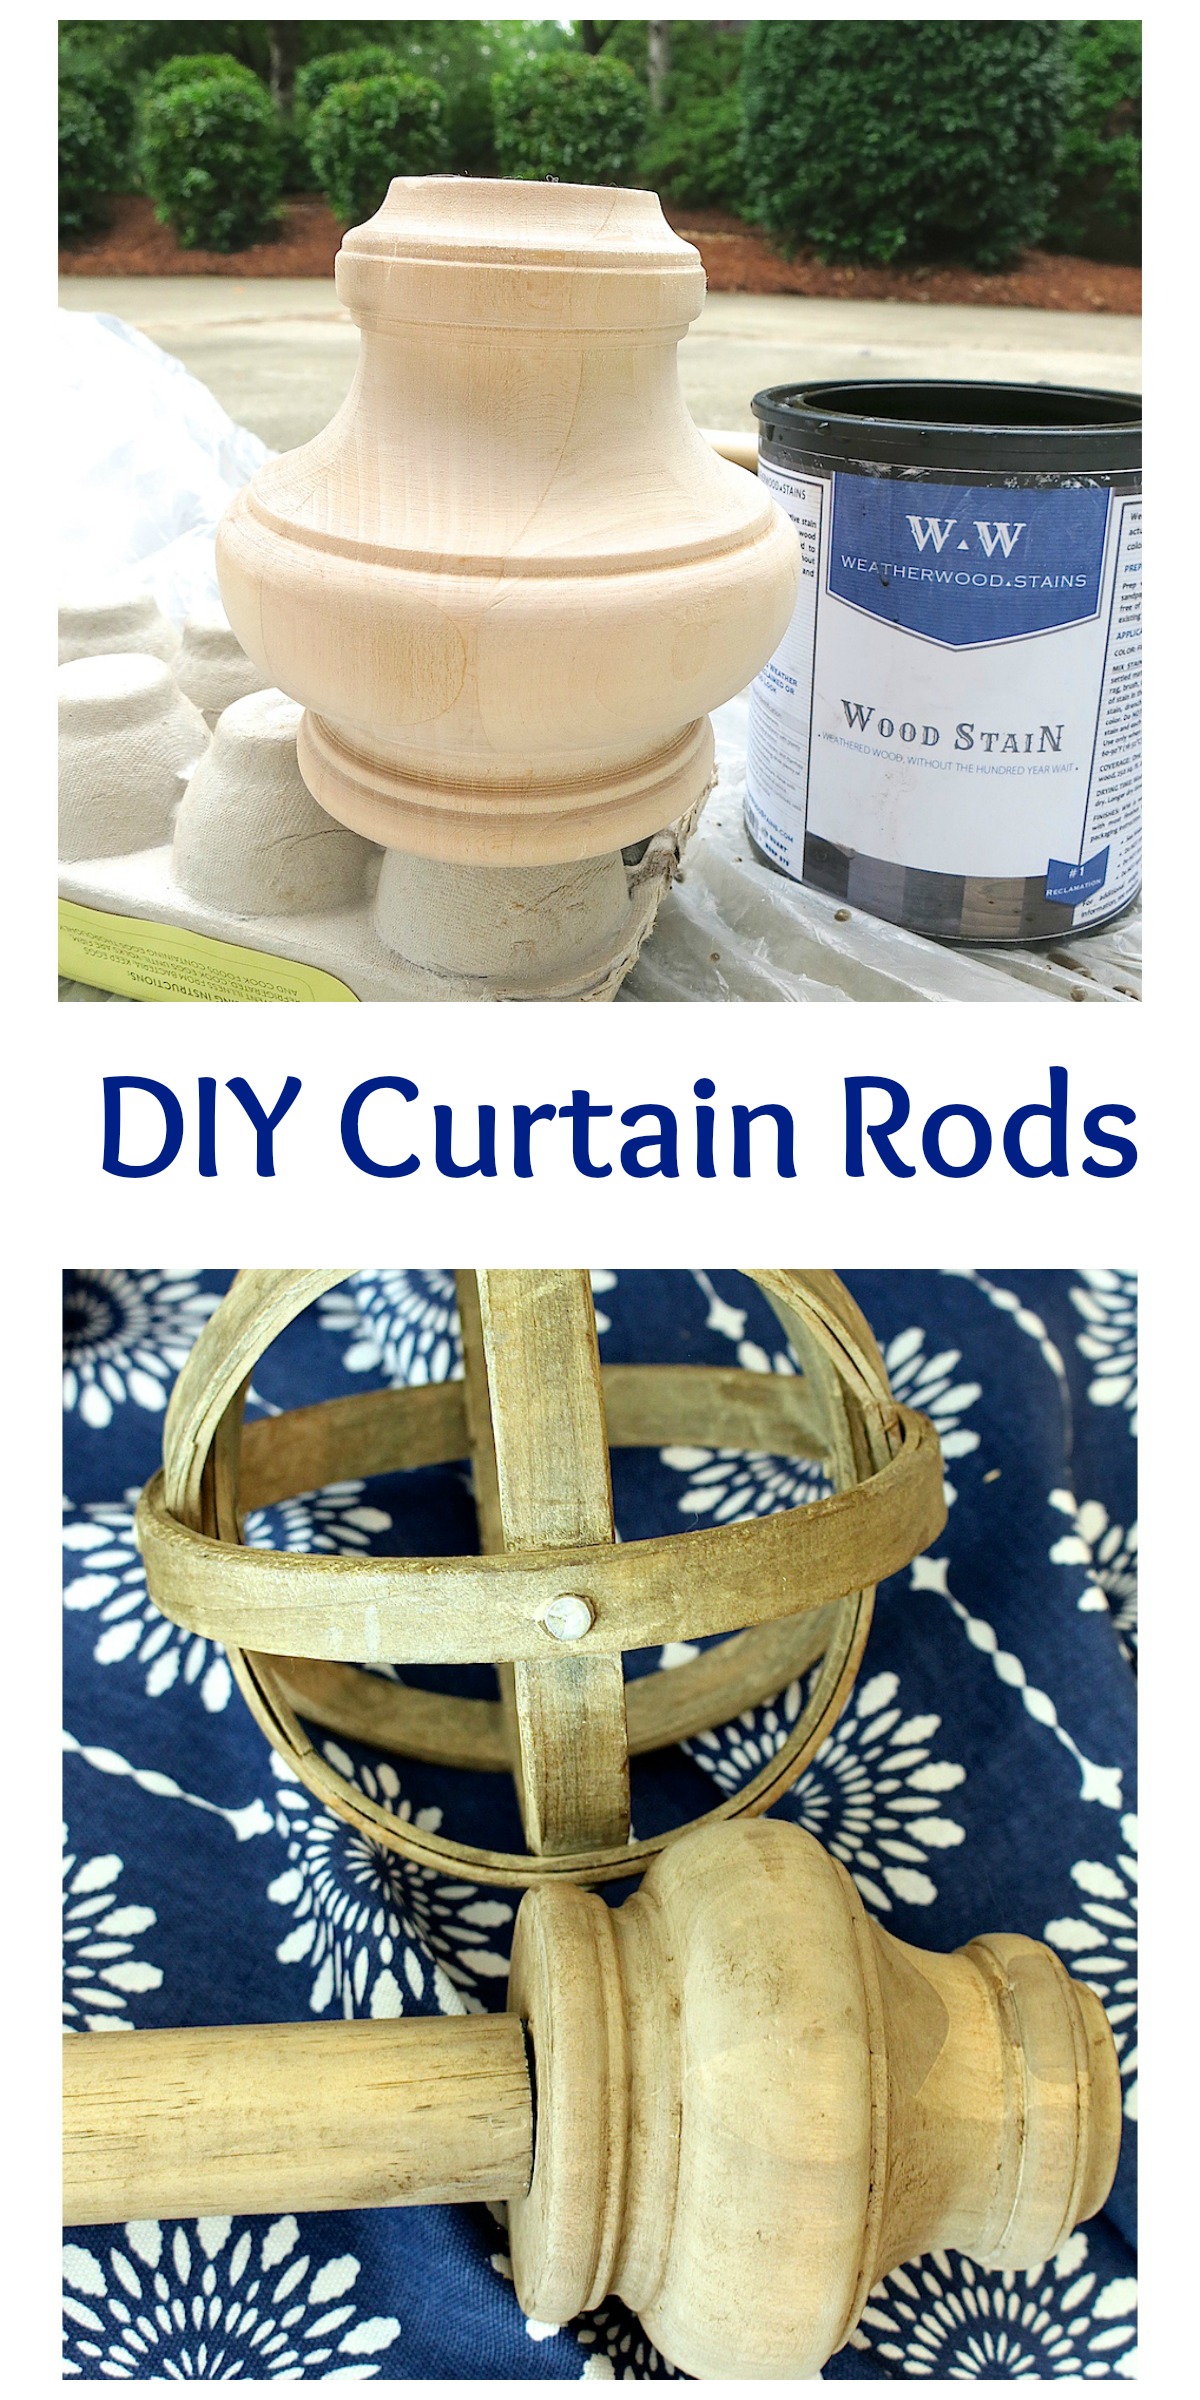
I already had everything I needed for this project. The problem was digging it up from my garage. I also needed Jennifer onboard to help me, which she readily agreed to. I remembered that awhile back I had purchased two wooden feet for furniture and thought that they would be great chunky statements for the end of the rods. And by rods I mean a 48 inch broom handle that I would cut in half. I told you it was DIY 🙂
We gathered the necessary materials and got to work:
- Weatherwood #1 Reclamation Stain
- Broom handle
- Wooden rod ends
- 80 grit sanding block
- Rod holders
 Whenever we stain or paint something like this, we use styrofoam or egg crates to hold the item up for easier staining or painting. It works great for furniture handles too.
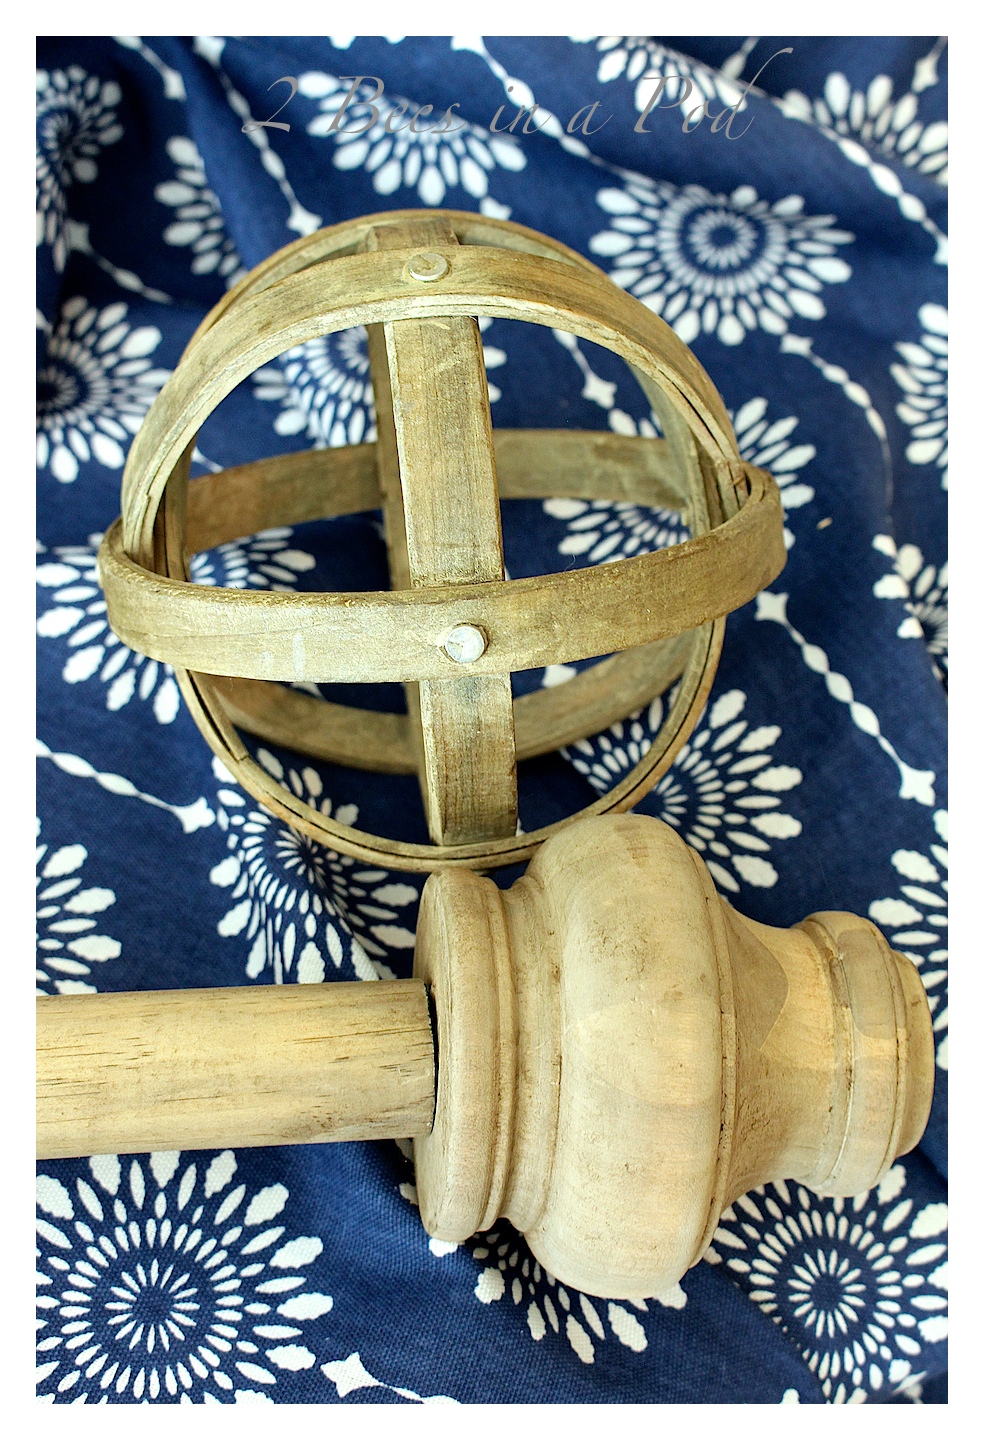
 This is the finished piece…
 This orb was inspiration piece – they match perfectly…
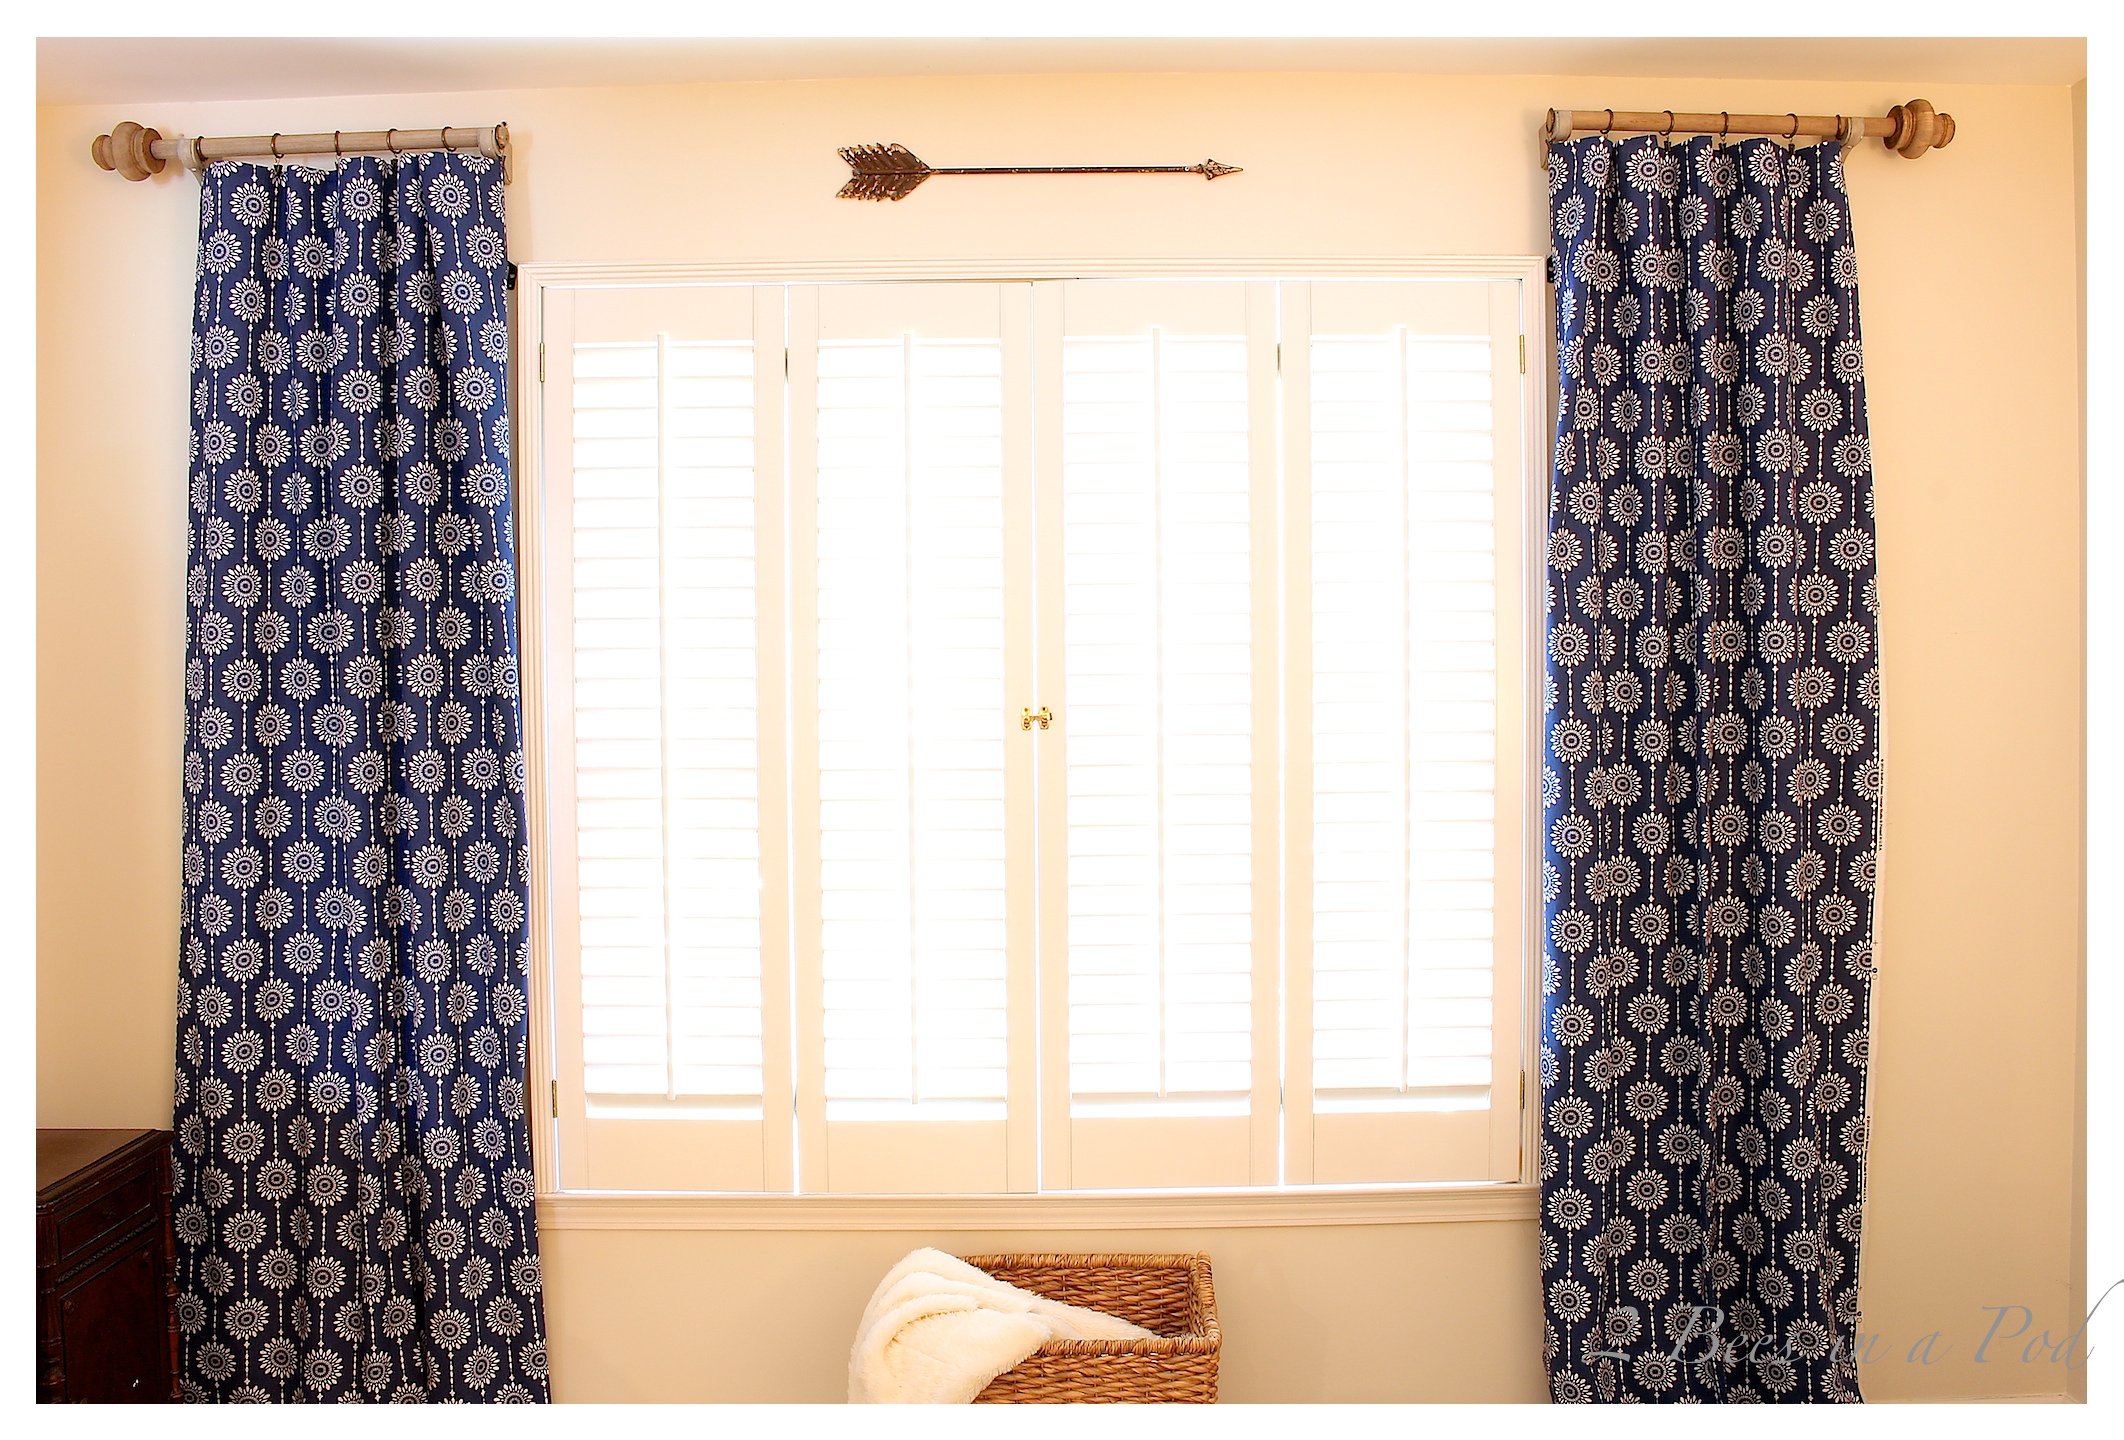
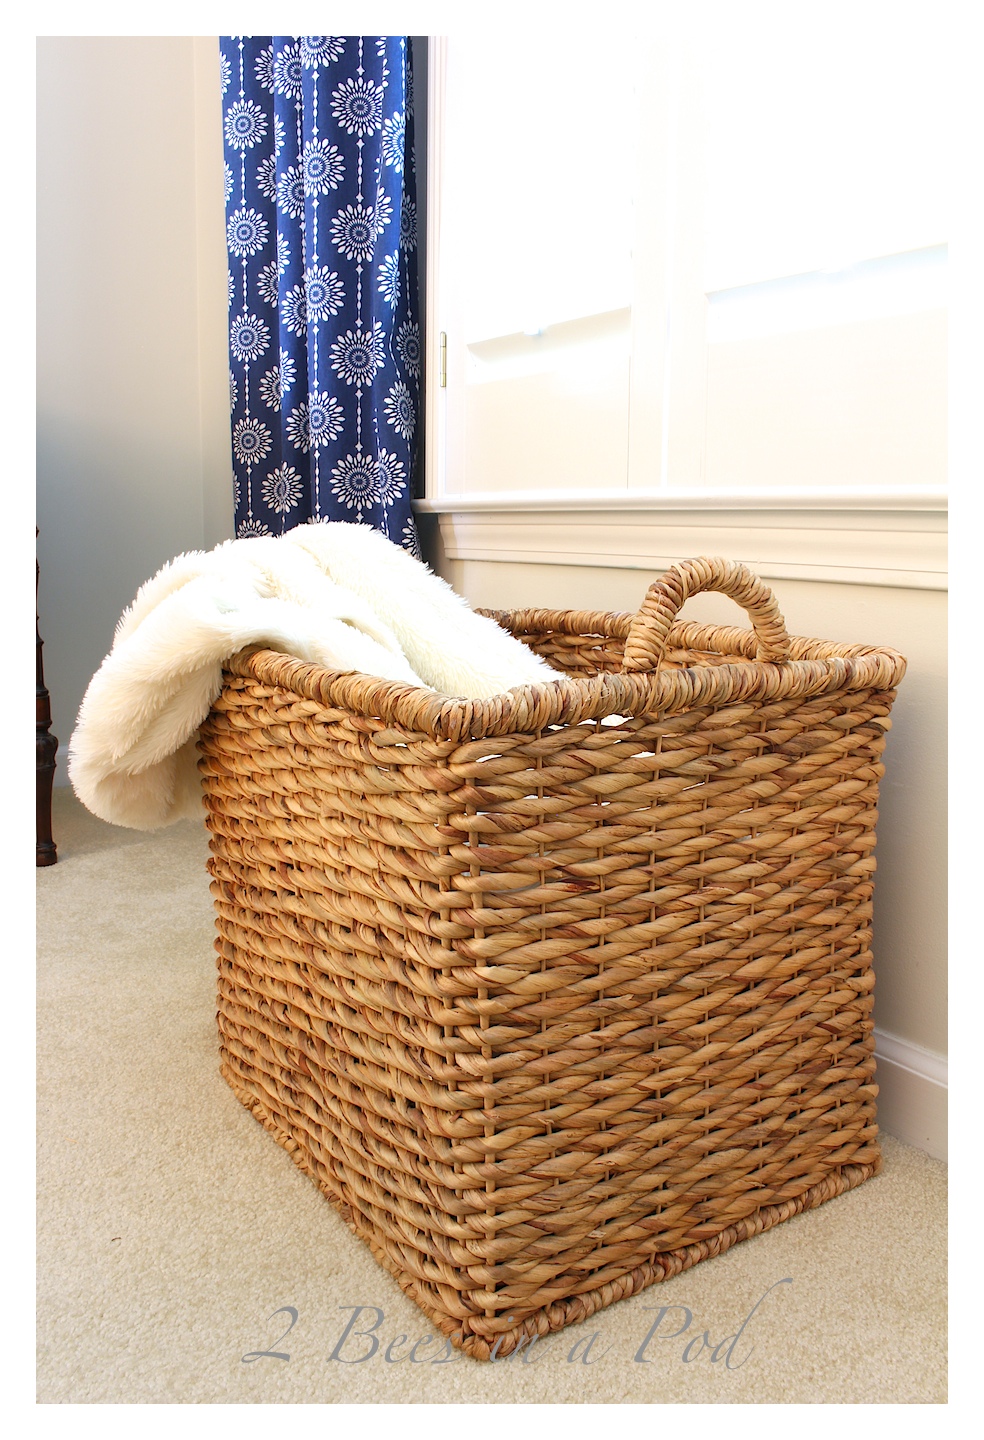
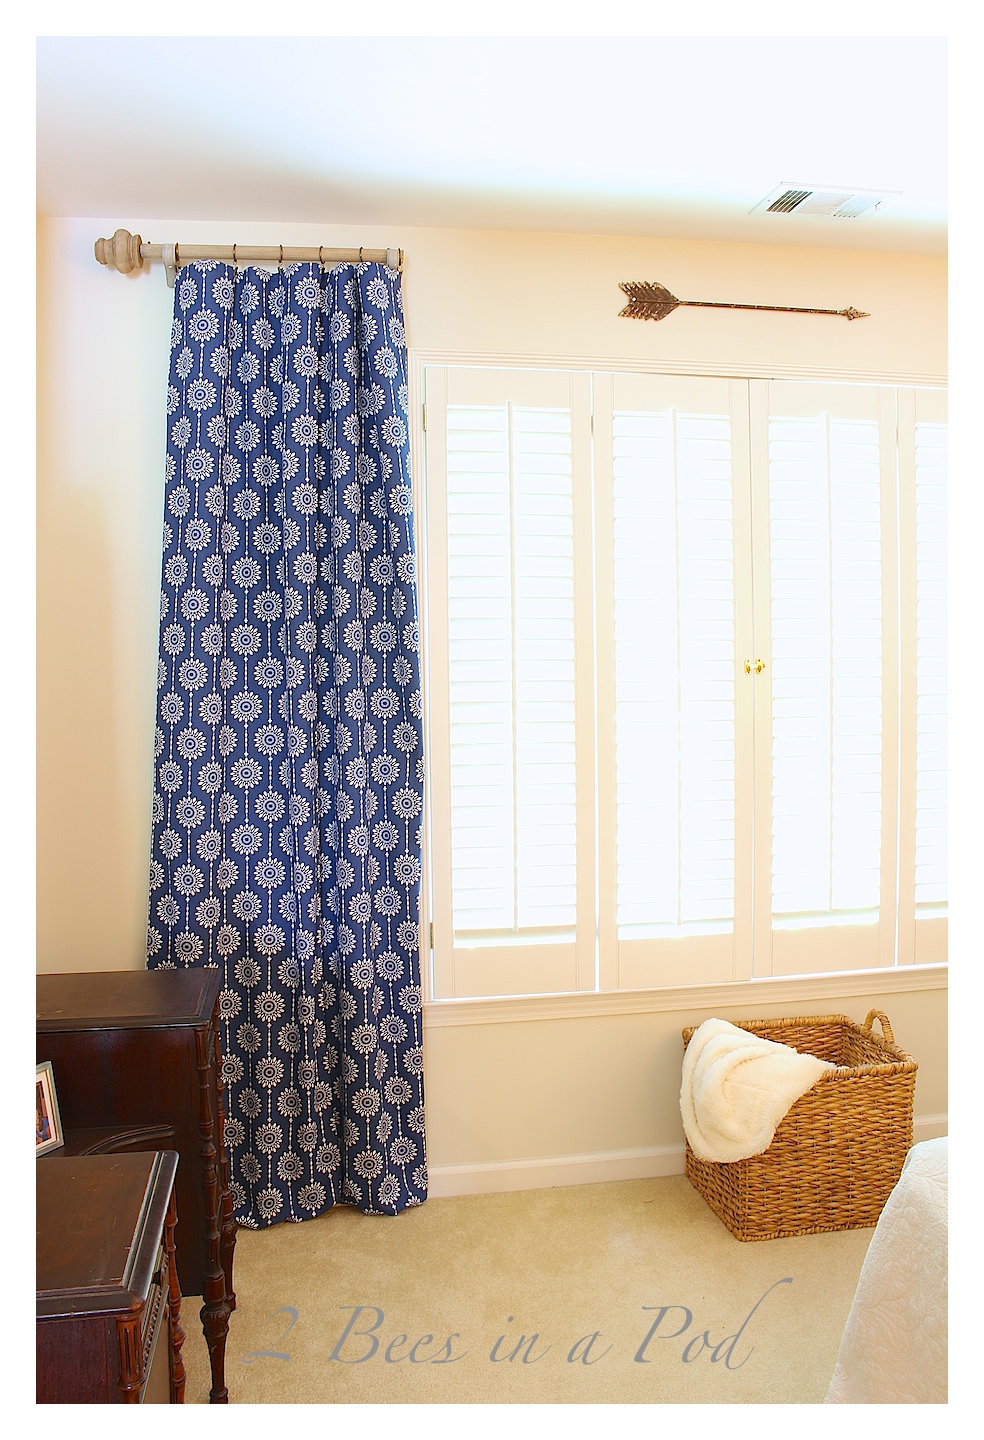
 Here’s what they look like hung in the guest room. I love the look.
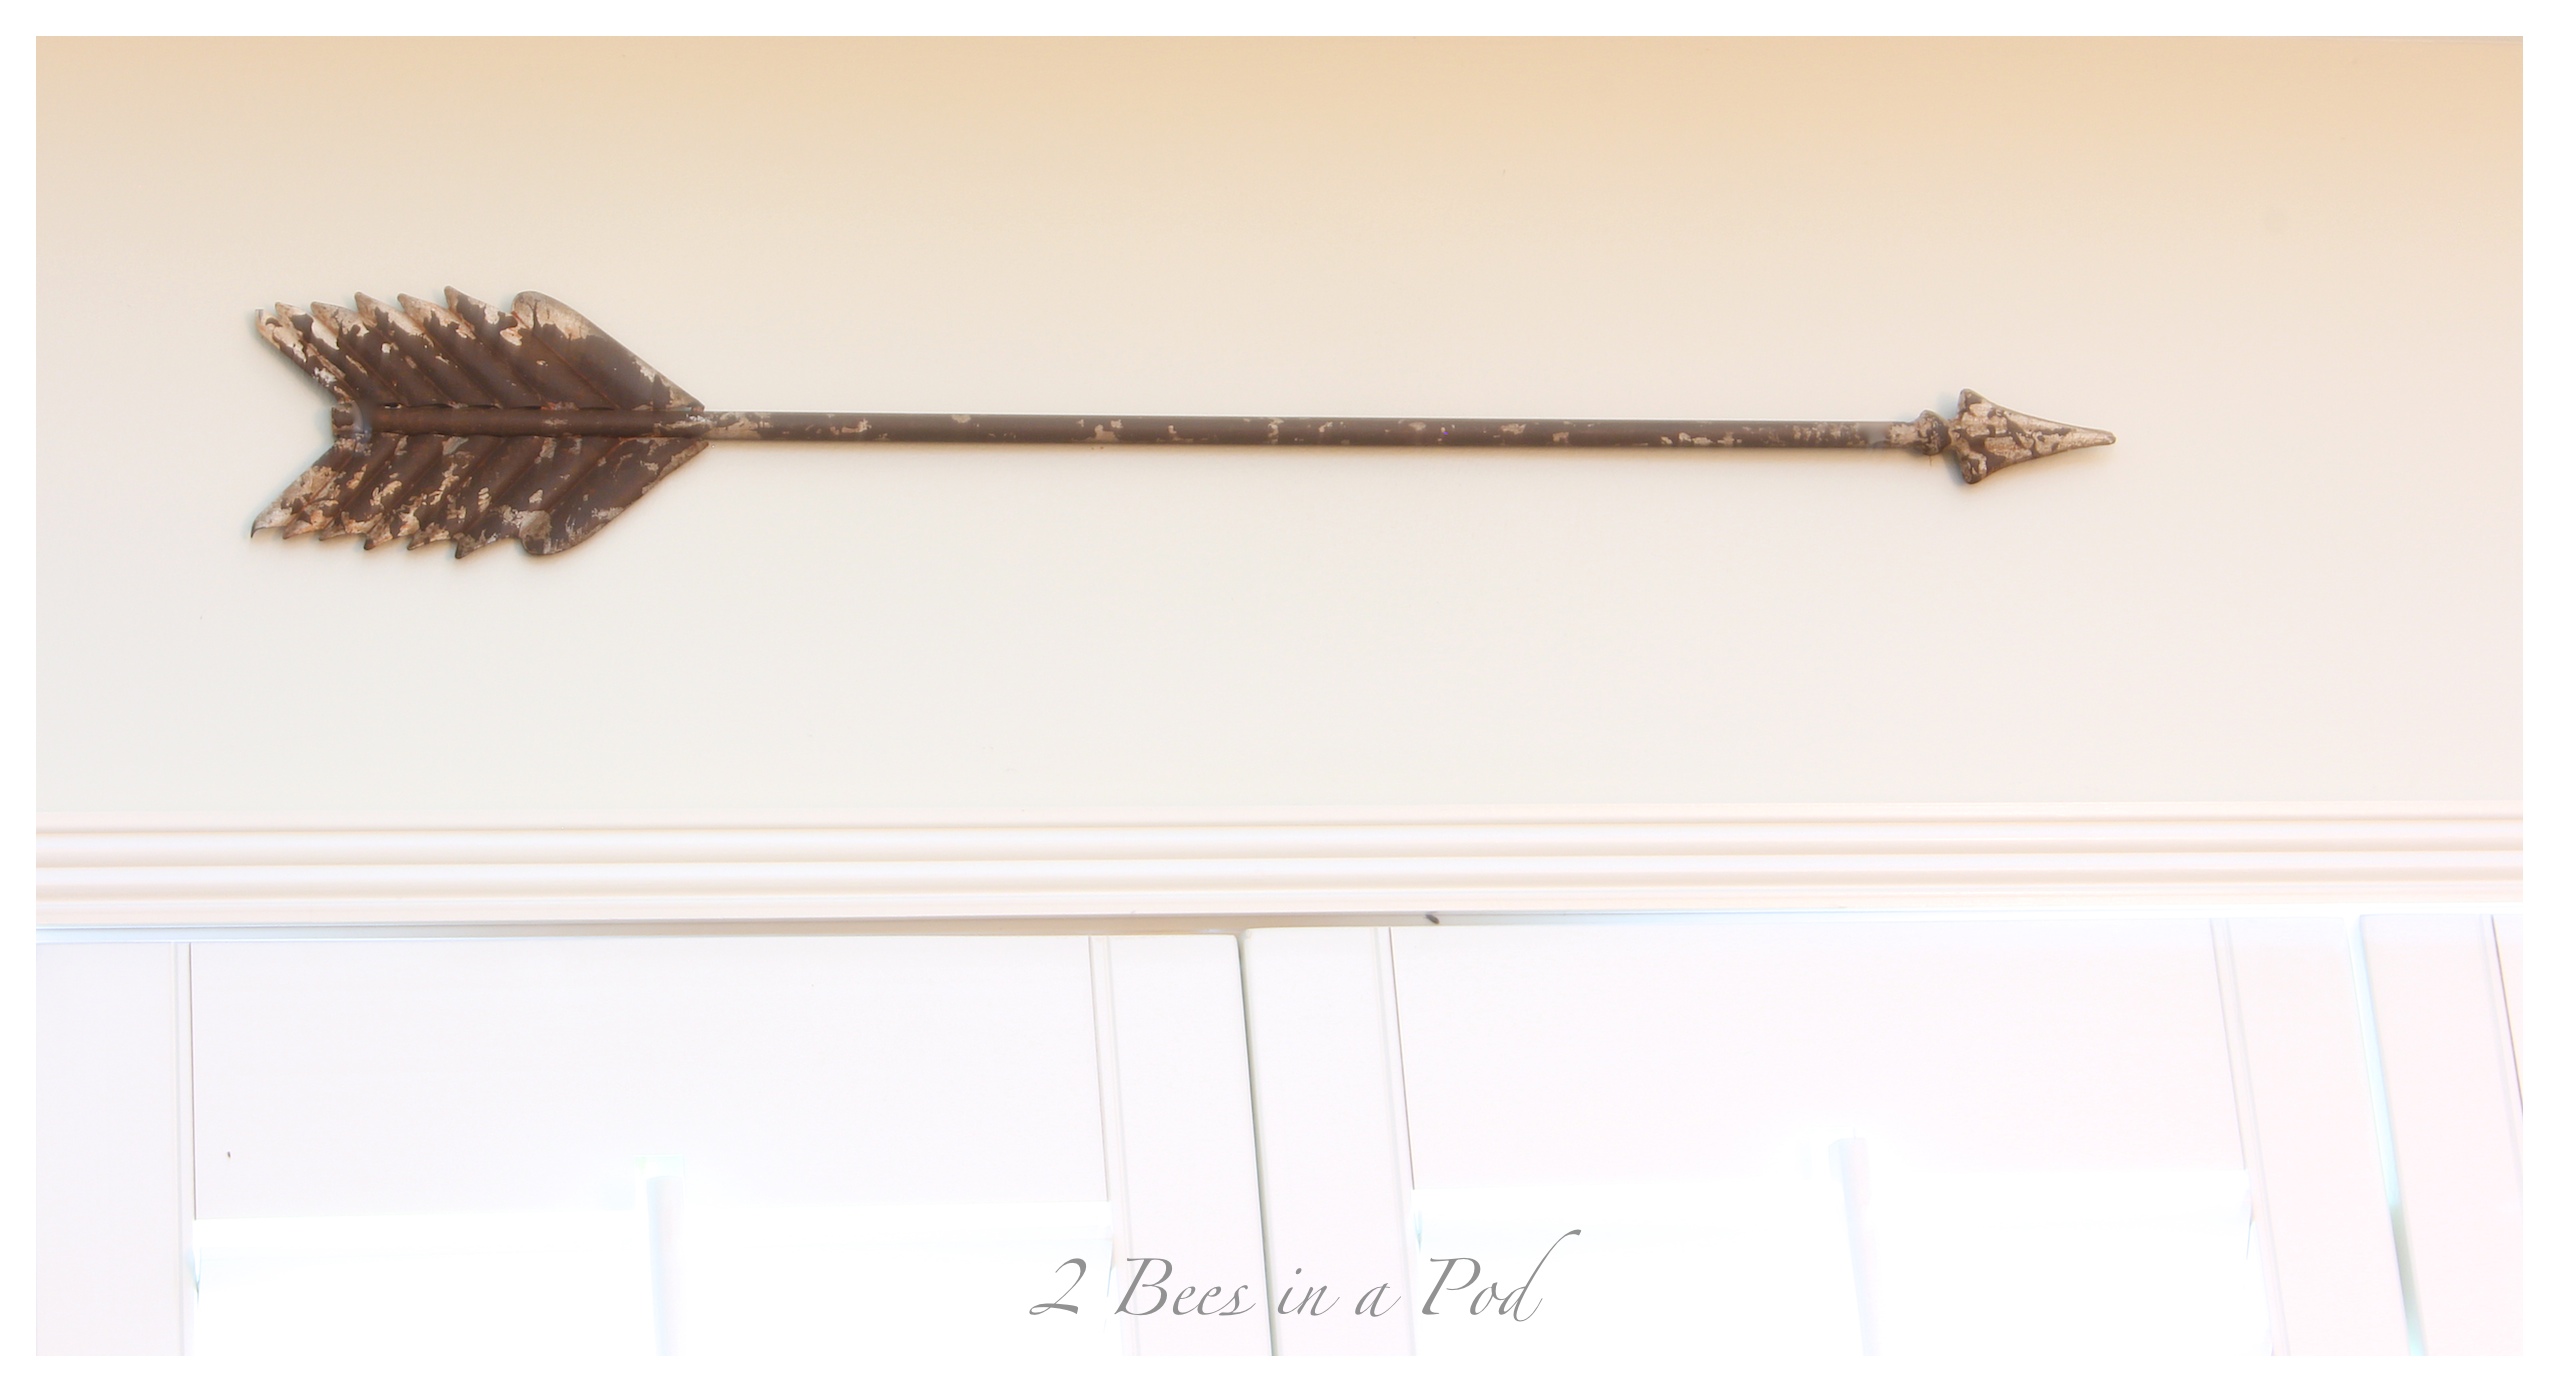
 I bought a few of these arrows several months ago from Painted Fox…
 The guest room makeover is off to a great start. I can’t wait to show you the other things we are working on. What do you think of the DIY Curtain Rods?
We were fortunate to work with this amazing group of bloggers. Please visit each of them and see the projects that they created using Weatherwood Stain!
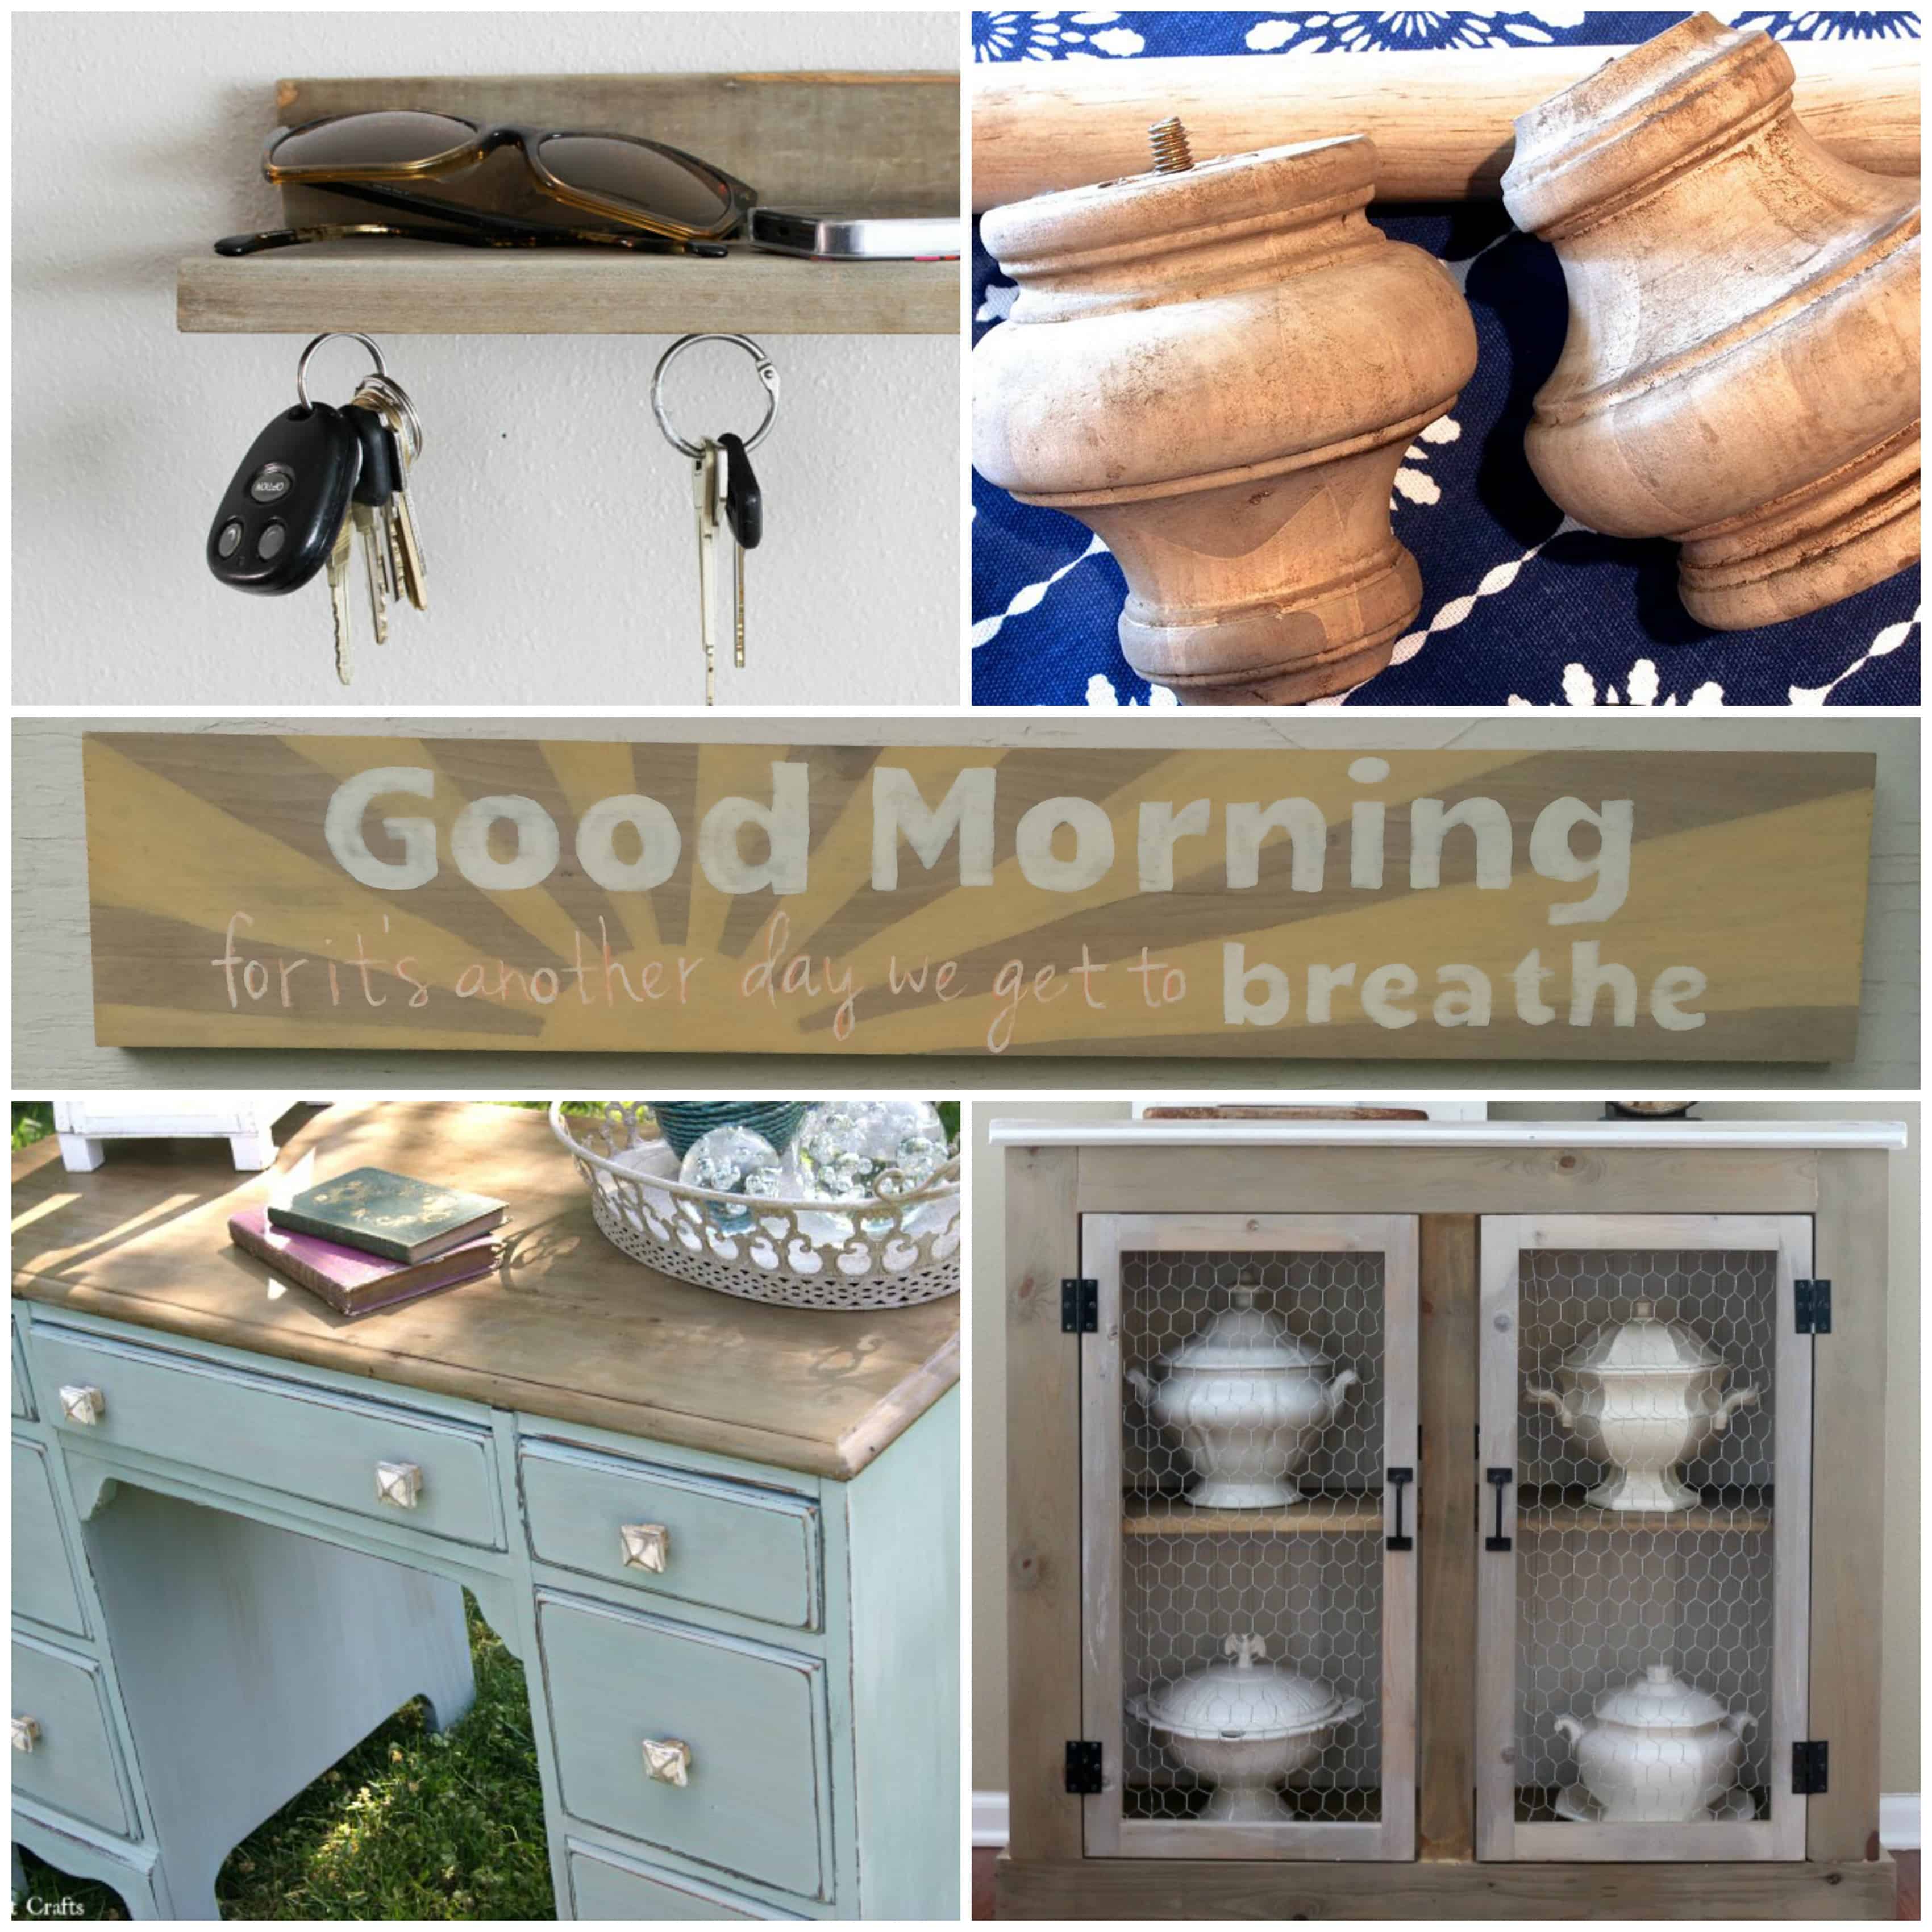 Barn Wood Magnetic Key Holder With Shelf- Hawthorne & Main
DIY Curtain Rod- 2 Bees In A Pod
DIY Hand Painted Sign- Refresh Living
Coastal Desk Makeover-Canary Street Crafts
Stained Cabinet- The Crowned Goat
Disclosure: We were compensated with product from Weatherwood Stains for this post. All opinions stated are entirely our own.
This project looks amazing ladies very creative! I can’t wait to see the finished guest room. July never looked so good 🙂 Hugs, CoCo
Hey CoCo – thanks so very much! We are checking off the to-do list little by little! So excited with how it is turning out 🙂
This turned out so great. I love how the stain aged your finials. Can’t wait to see the rest of your guest room!
Hey Amy – You are so sweet – thank you so very much! The room should be complete within the next couple of weeks!
I love how these turned out! The furniture feet turned finials are genius! I have a coffee table I am eager to try that stain on, I hope it turns out as well as your rods. May I ask where you found the brackets and are they wood too? I recently drove by one of our local town museums and they were putting all of their wooden curtain rods, finials, and rings on the curb! They are gorgeous and now mine but I need brackets and like the look of yours. Thanks!
Hi Ann – Thank you so much! I had the brackets in the garage, leftover from a previous home. The are wood too. I haven’t seen any raw wood brackets at the big box stores. I know that Martha Stewart has brackets at Home Depot. You may have luck at a thrift store or a local hardware store. With your coffee table, just be sure that ALL of the old finish and stain have been completely sanded off or this stain will not work. We can’t wait to see how it turns out!!
PS – congrats on the curbside haul 🙂
Very impressive……love the look. I have a couple of projects that I want to try this stain on. Thanks for sharing and have a great Wednesday.
This is a high compliment coming from you Bonbon! Thank you so very much! Let us know what you try the stain on…have a great day!
Holy cleverness! That stuff is great!
I love the weathered look and your “rods” are adorable! Really great fabric too! I can’t wait to see the rest of the room 🙂
Hey Karen…thank you! This definitely felt like a McGuyver project for sure 🙂 We are just thrilled that it turned out. Stay tuned for more guest room updates!
Vicki, I love your weathered wood drapery rods, they turned out fantastic and look beautiful in your guest room with the pretty blue drapes. Can’t wait to see the rest. Love it. Lisa
Hi Lisa – Thank you so very much! We are working on the guest room a little bit at a time. We will be sharing more over the next couple of weeks!
Love your curtain rods and the glimpse of the guest room!! Can’t wait to see the reveal 🙂
Thanks Angie – this was definitely a fun project. We can’t wait for the room to be done!
Vicki these look great!! I love how the curtain rod turned out.. it looks like something you would find in Restoration Hardware. I really love those curtains too; where did you find them?
Thanks so much Sydney! This was such a fun project and we love how the stain turned the wood into a barn wood finish. I (Vicki) made the curtains from an end of the bolt remnant!
Ladies, your curtain rods look perfectly aged, and they sure do match that orb! Nice job!
Thanks so very much Jenny! We were impressed with how well the match is 🙂
My husband and I slept in our guestroom for a few nights while we redid our bedroom, and I had the same feeling! We’ve been slowly working at the decor ever since. With the projects I’ve seen going into yours, I can’t imagine it’s not beautiful!
Hi Staci – It’s surprising, right? I thought our guest room looked pretty cozy and cute until I saw it through different eyes. I’m hoping to have the guest room complete my next week 🙂
CLEVER! Girl, you crushed that challenge! I canNOT believe you even thought to make a curtain rod. I am so impressed! Thank you so much for giving Weatherwood a try! Looking forward to seeing what other amazing things you come up with!
xox
Becca
Thank you so very much Becca! We love to be creative and use fun items in our homes. Your stain was the perfect medium to use on our curtain rod project. Thank you so much for the opportunity!
Vicki and Jennifer –
You two are so clever! I would have never thought to use furniture feet and a broomstick to make curtain rods! what a great economical way to decorate! Thank you for sharing on Dream. Create. Inspire. Link!
Cat
I do not understand about the orbs. Are they keeping the curtains on……everything looks so welcoming.