DIY Weathered Wood Memo Board
Please note that this post contains affiliate links. As an Amazon Associate, Rewards Style influencer and Jane Influencer, we earn from qualifying purchases and any sales made through such links will reward us a small commission – at no extra cost for you.
Hey y’all…I hope you were able to enjoy some downtime this weekend and enjoy the 4th. I am so fortunate to have stretched out the holiday weekend all the way through to last night. The weekend was action packed with family and friends. We had so much fun going to a music concert, fireworks, shopping, antiquing and hosting our annual 4th of July dinner party at our home. A wonderful time was had by all and memories were made to last a lifetime…I feel so blessed!
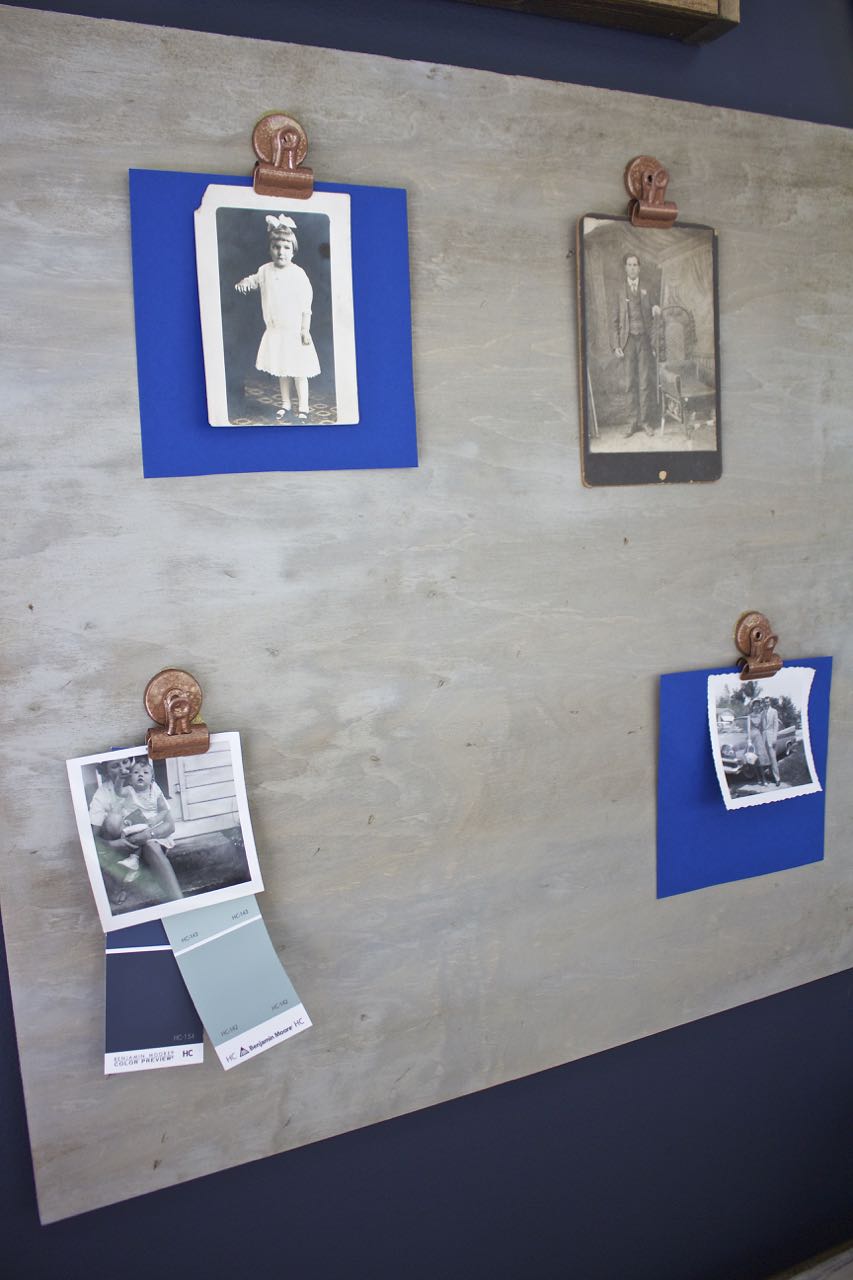
Now, it’s time for me to get back to work and continue on the progress that I’ve made here at the lake. Just before the holiday I created a new office workspace area for myself. Space is at a premium here at the house, but I managed to pull it off and I will show it to you tomorrow. In the meantime, I needed to create something where I could see design inspiration and family photos at a glance. I chose to create a DIY Weathered Wood Memo Board to hang right above my desk.
This was a very simple and inexpensive project to make.
Materials Used:
- 24 inch square piece of thin plywood. This was cut for me at Home Depot and cost $5.00
- Metal clips with flat backs. Mine were purchased at Dollar Tree.
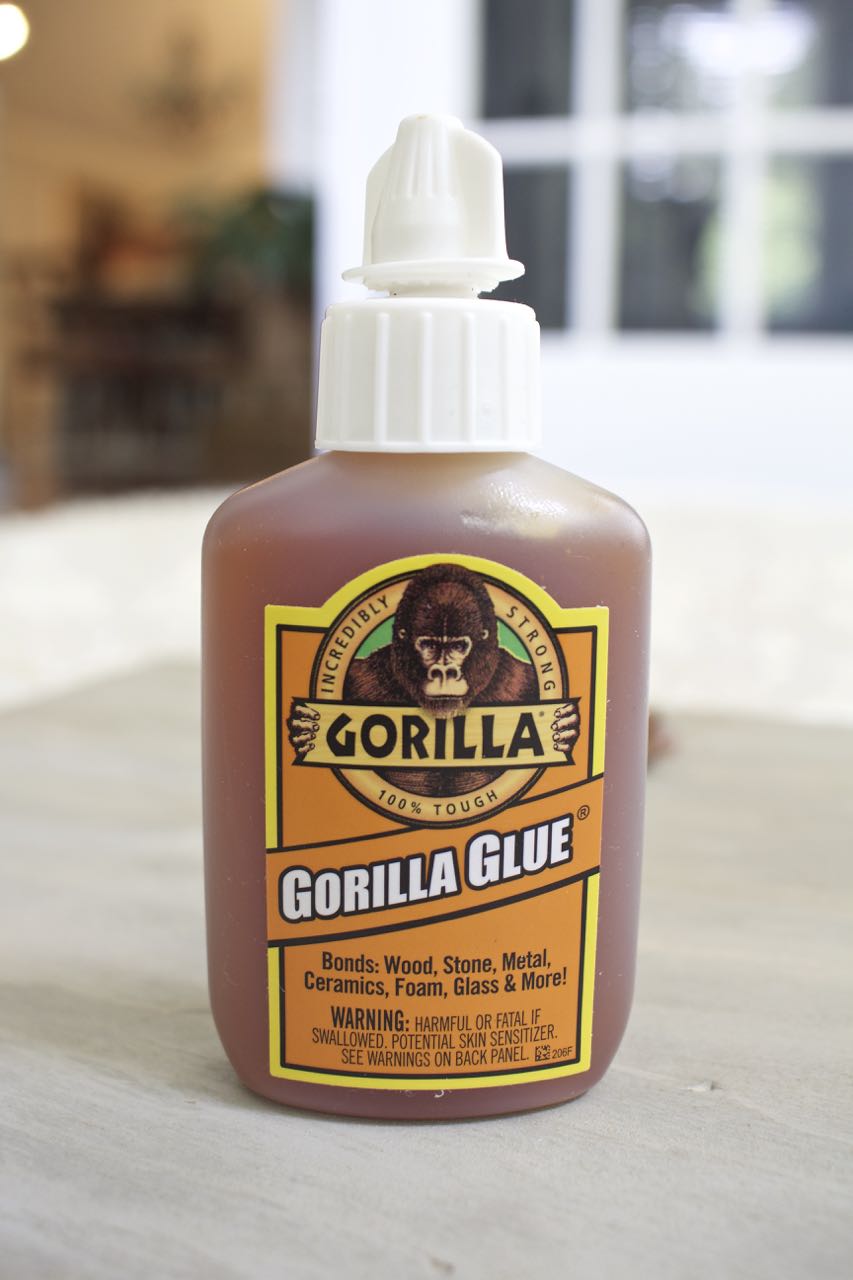
- Gorilla Glue for the clips.
- Stain – mine was leftover from previous projects.
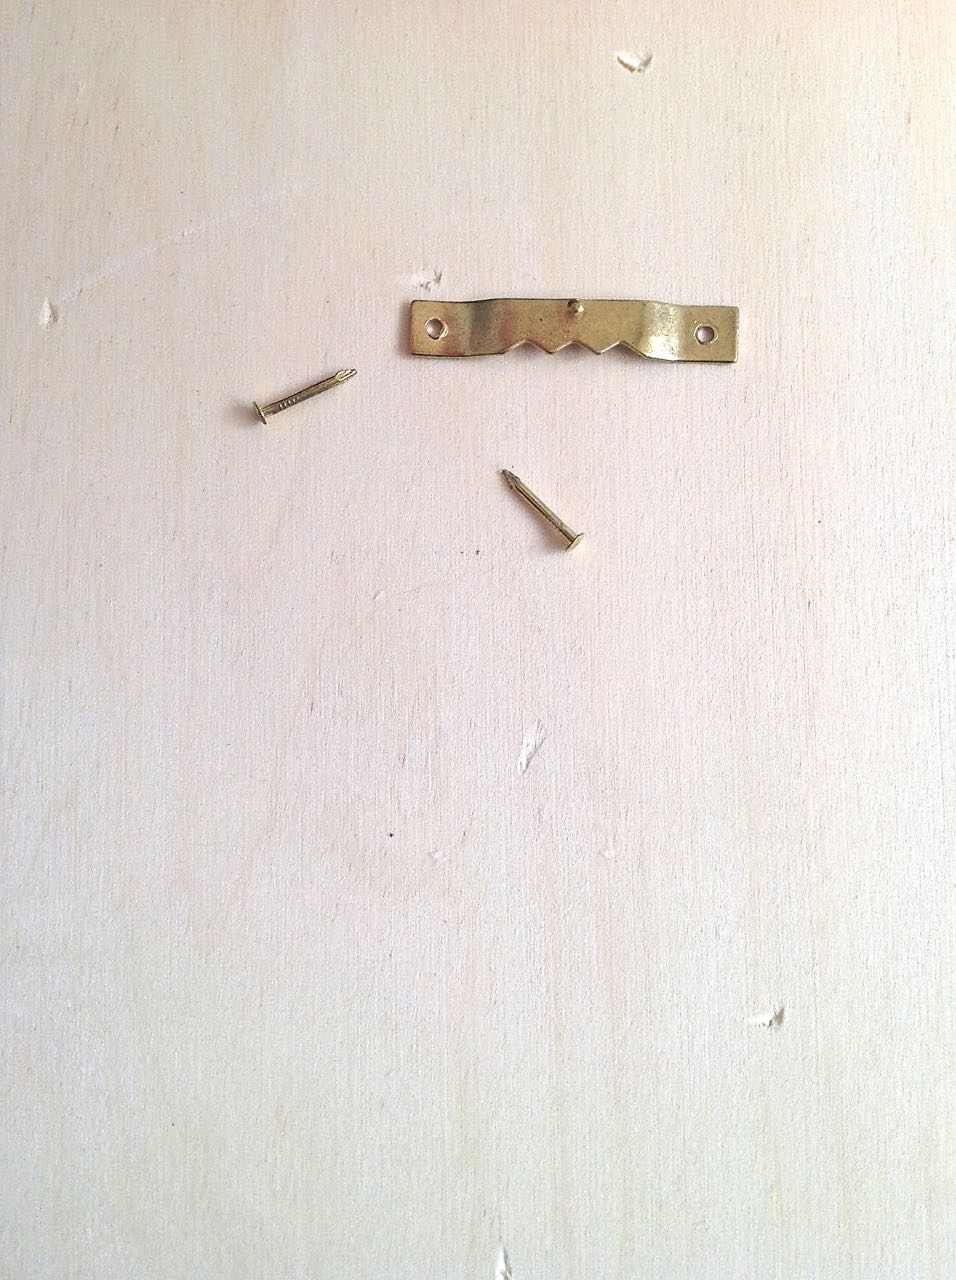
- Picture hanger – from my stash
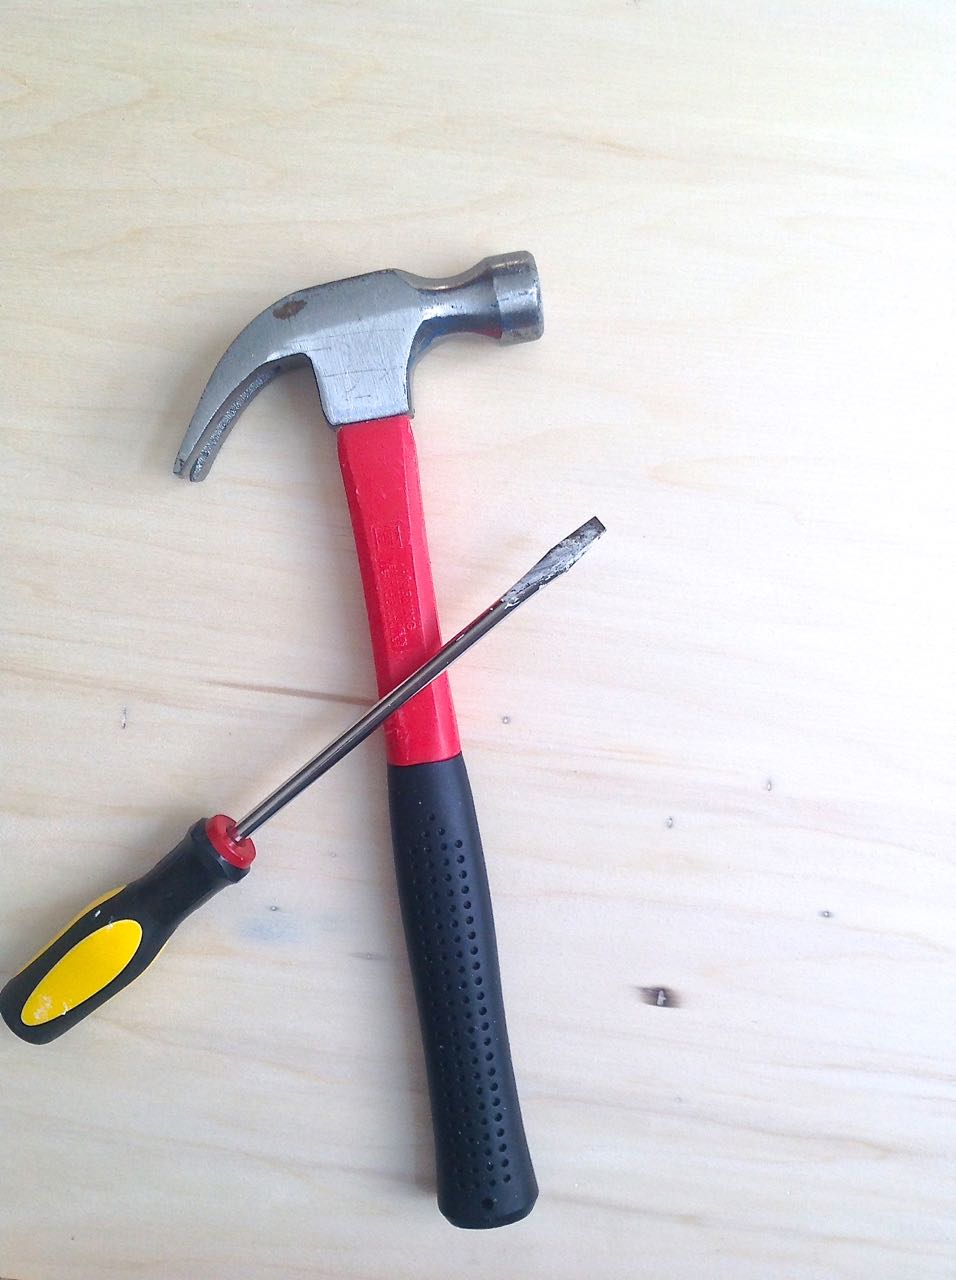
- Hammer
- Screwdriver
I added the picture hanger before I stained the front of the board so as not to mar the new finish.
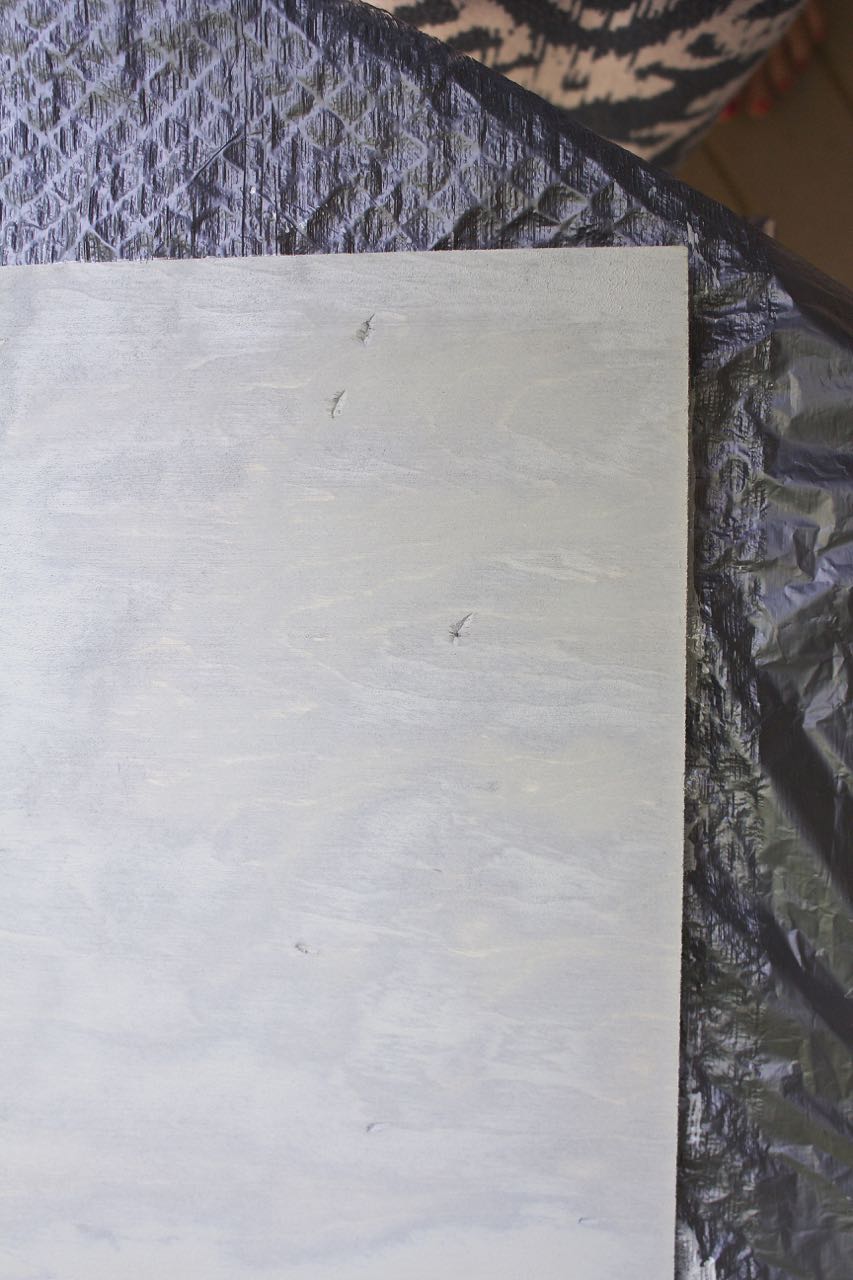
I wanted to add a little bit of dimension to my board. Using the screwdriver and hammer I created little divots and dents in the wood. I personally feel that this adds character to the wood.

I used my new favorite stain in the Sunbleached finish. I also used this stain for the Nautical Serving Tray that I made. It gives a beautiful, rustic patina.

I felt really fortunate that I had the good sense to purchase these clips several weeks ago. They were only $1.00 a pair. At the time I didn’t have a need or a project in mind. Typically I talk myself out of such purchases…and then kick myself down the road. You know what I mean? Invariably a couple of weeks later a new project is dreamed up and I’m left shouting out “Why didn’t I buy ______?. They would have been perfect for this project!” I’ve lost count as to how many times this has happened to me 🙂
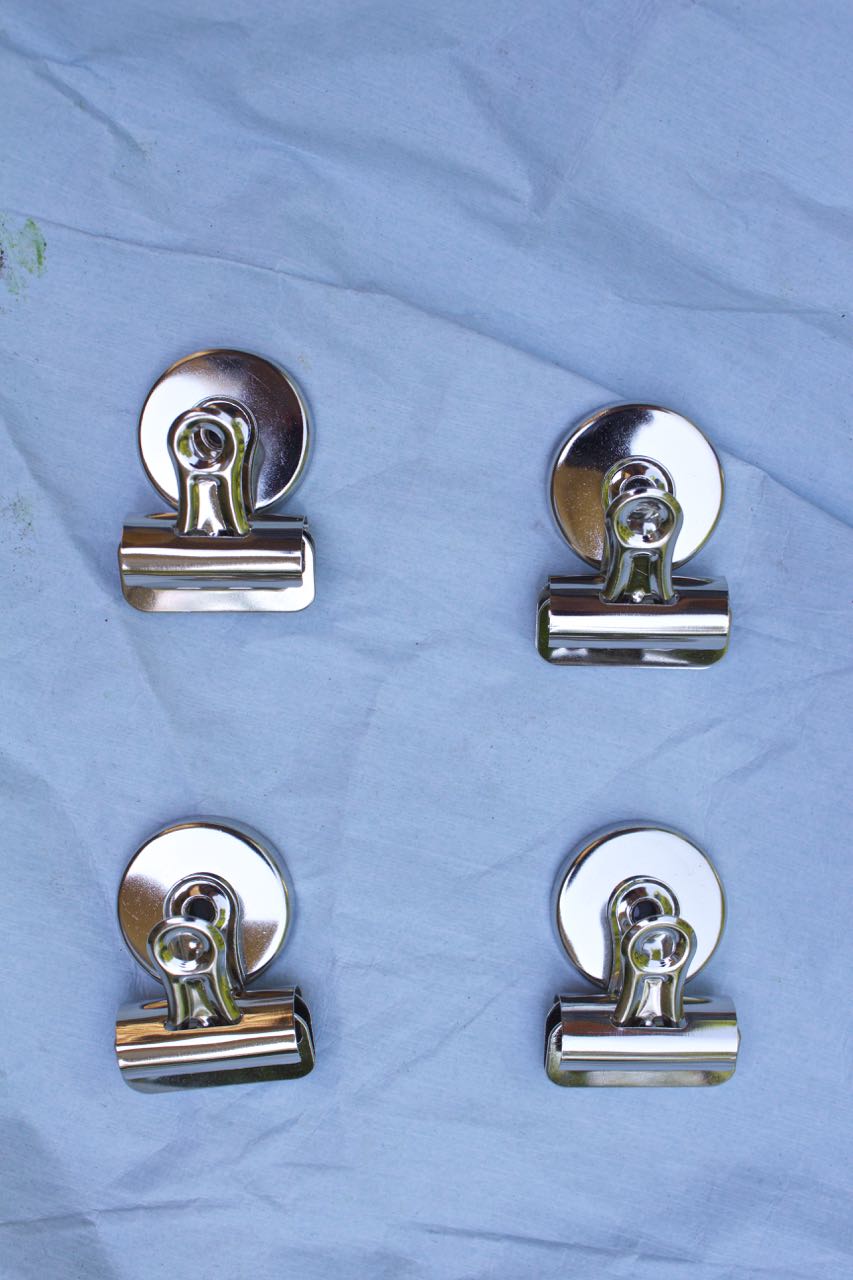
Because these clips were too bright and shiny for my personal taste, I decided to give them a mini makeover. I used some leftover hammered copper spray paint.
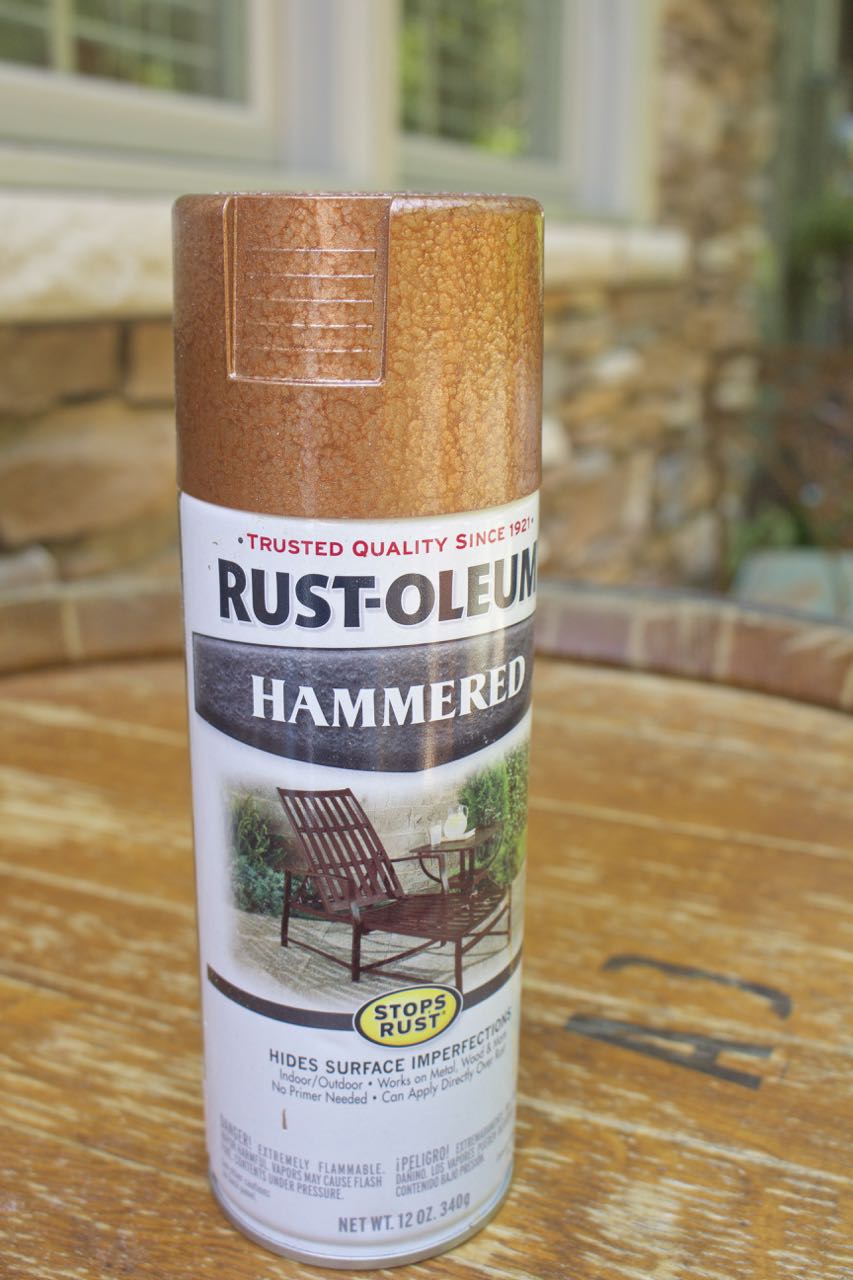
After one quick spray, I achieved this look…

I used Gorilla Glue to adhere the clips to my board.
I already know that this memo board is going to get a lot of use. I love vintage black and white photos. This picture is of my mother and I when I was a baby. You can say it…I was pretty cute LOL!

You’ll need to check in tomorrow to see what the memo board looks like now.
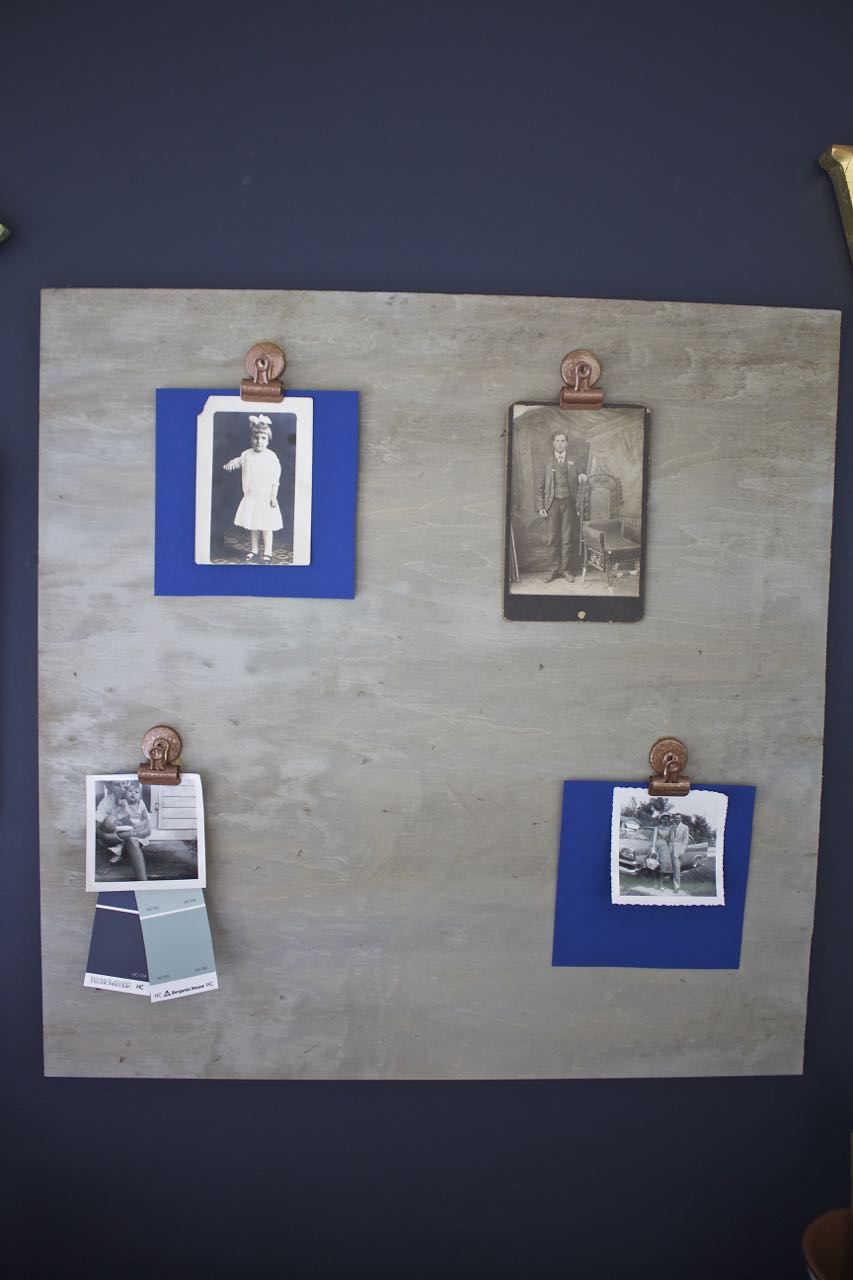
These are all family photos – some date back to as far as 1882!
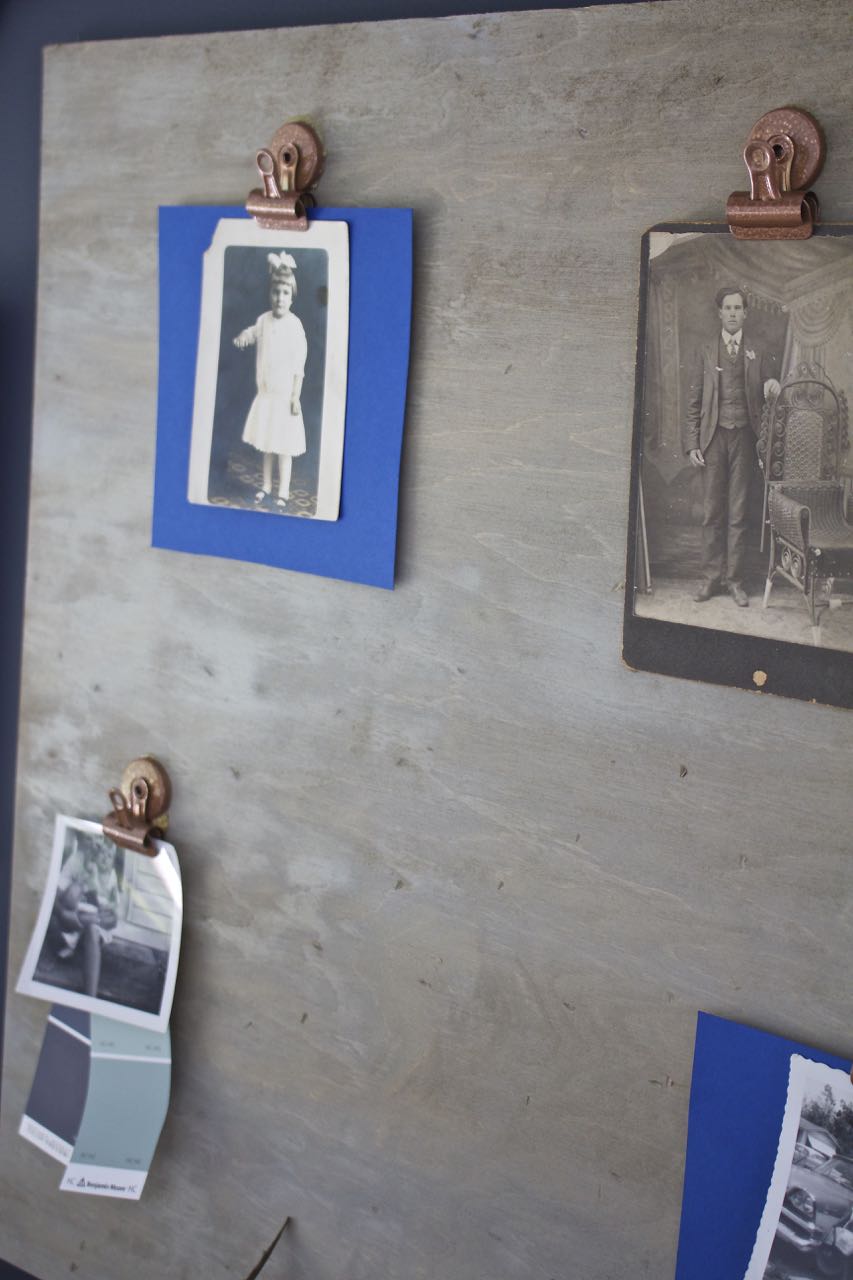
I know this board will get a lot of use and it will be a great place to collect inspirational photos, articles, clippings, fabric and more.
Be sure to come back tomorrow to see my new workspace!
XO~Vicki
Be sure to Pin this to your favorite Pinterest Board…


Can’t wait to see the newly completed workspace! I have to say that after seeing your nautical tray blog and trying the sunbleached stain myself, I am also in love with this new stain option. Thanks for expanding my horizons! Bambi
Great rustic look.
This is so creative! Love the finishes and stain you chose. It’s perfect for your lakeside living vibe. Hugs, CoCo