DIY Bottlebrush Christmas Tree Snow Globe Ornaments
Please note that this post contains affiliate links. As an Amazon Associate, Rewards Style influencer and Jane Influencer, we earn from qualifying purchases and any sales made through such links will reward us a small commission – at no extra cost for you.
Everything you ever wanted to know on how to DIY bottlebrush Christmas tree snow globe ornaments.
Last year was the first full Christmas season that Honey Bee and I celebrated in our home. All of my beloved holiday trimmings were packed away in a storage unit and I had to get creative with my Christmas decor. Well, this Christmas season is no different. Although we have made final decisions about our permanent living arrangements we have avoided dealing with our giant storage unit. Last week we ventured into the Big City to visit said storage unit and Honey Bee truly tried to make my Christmas decoration hopes and dreams come true. Sadly, those holiday boxes are well packed and way in the back of the unit – never to see the light of day until they are permanently moved out of storage. So, time for me to get creative again. 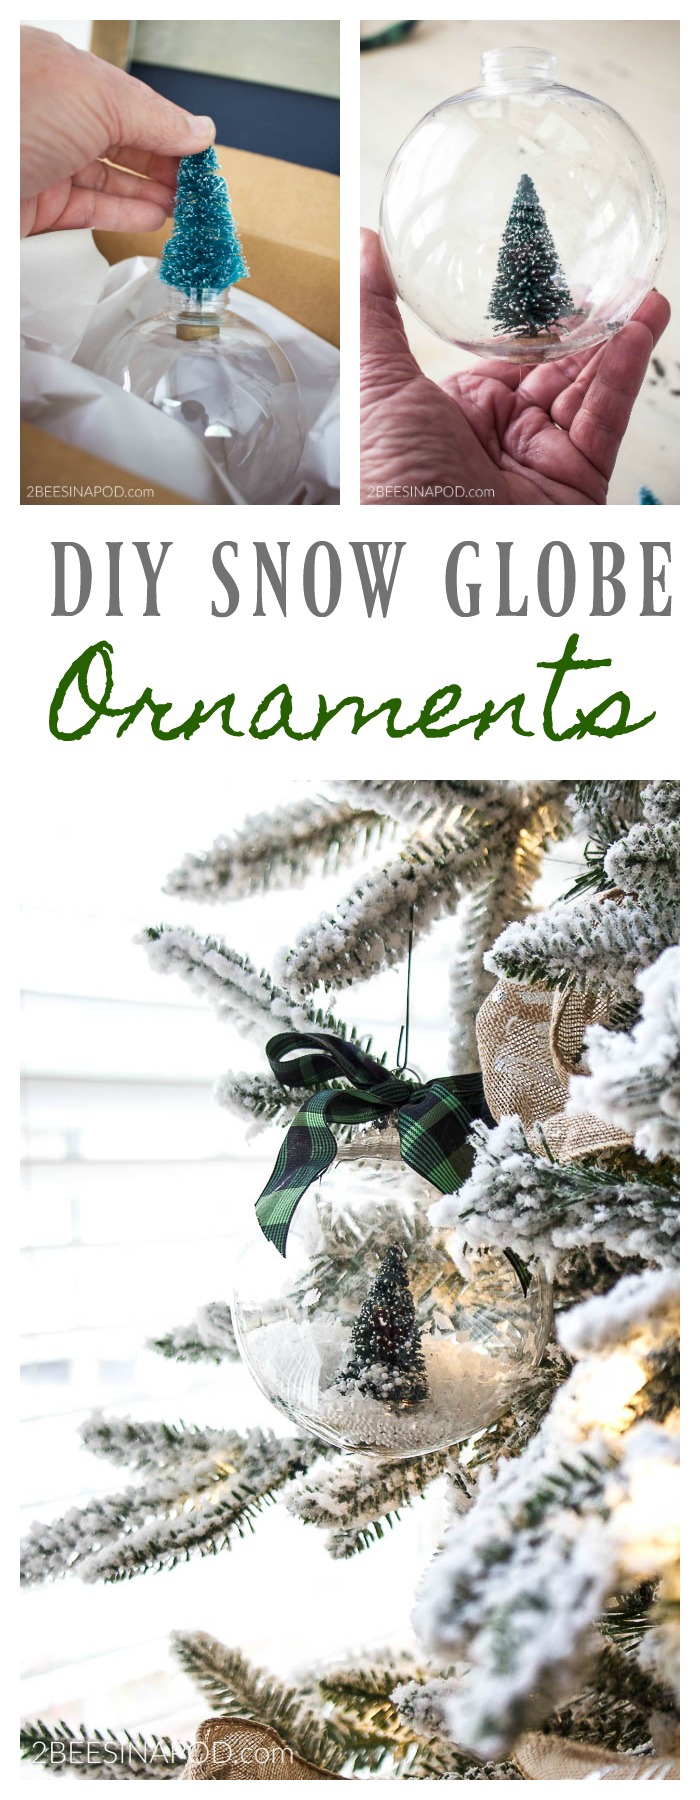
On a recent visit to the Dollar Tree store I found all of the necessary items to make DIY Bottlebrush Christmas Tree Snow Globe Ornaments. This project was way easier than I thought it was going to be. Let’s get started!
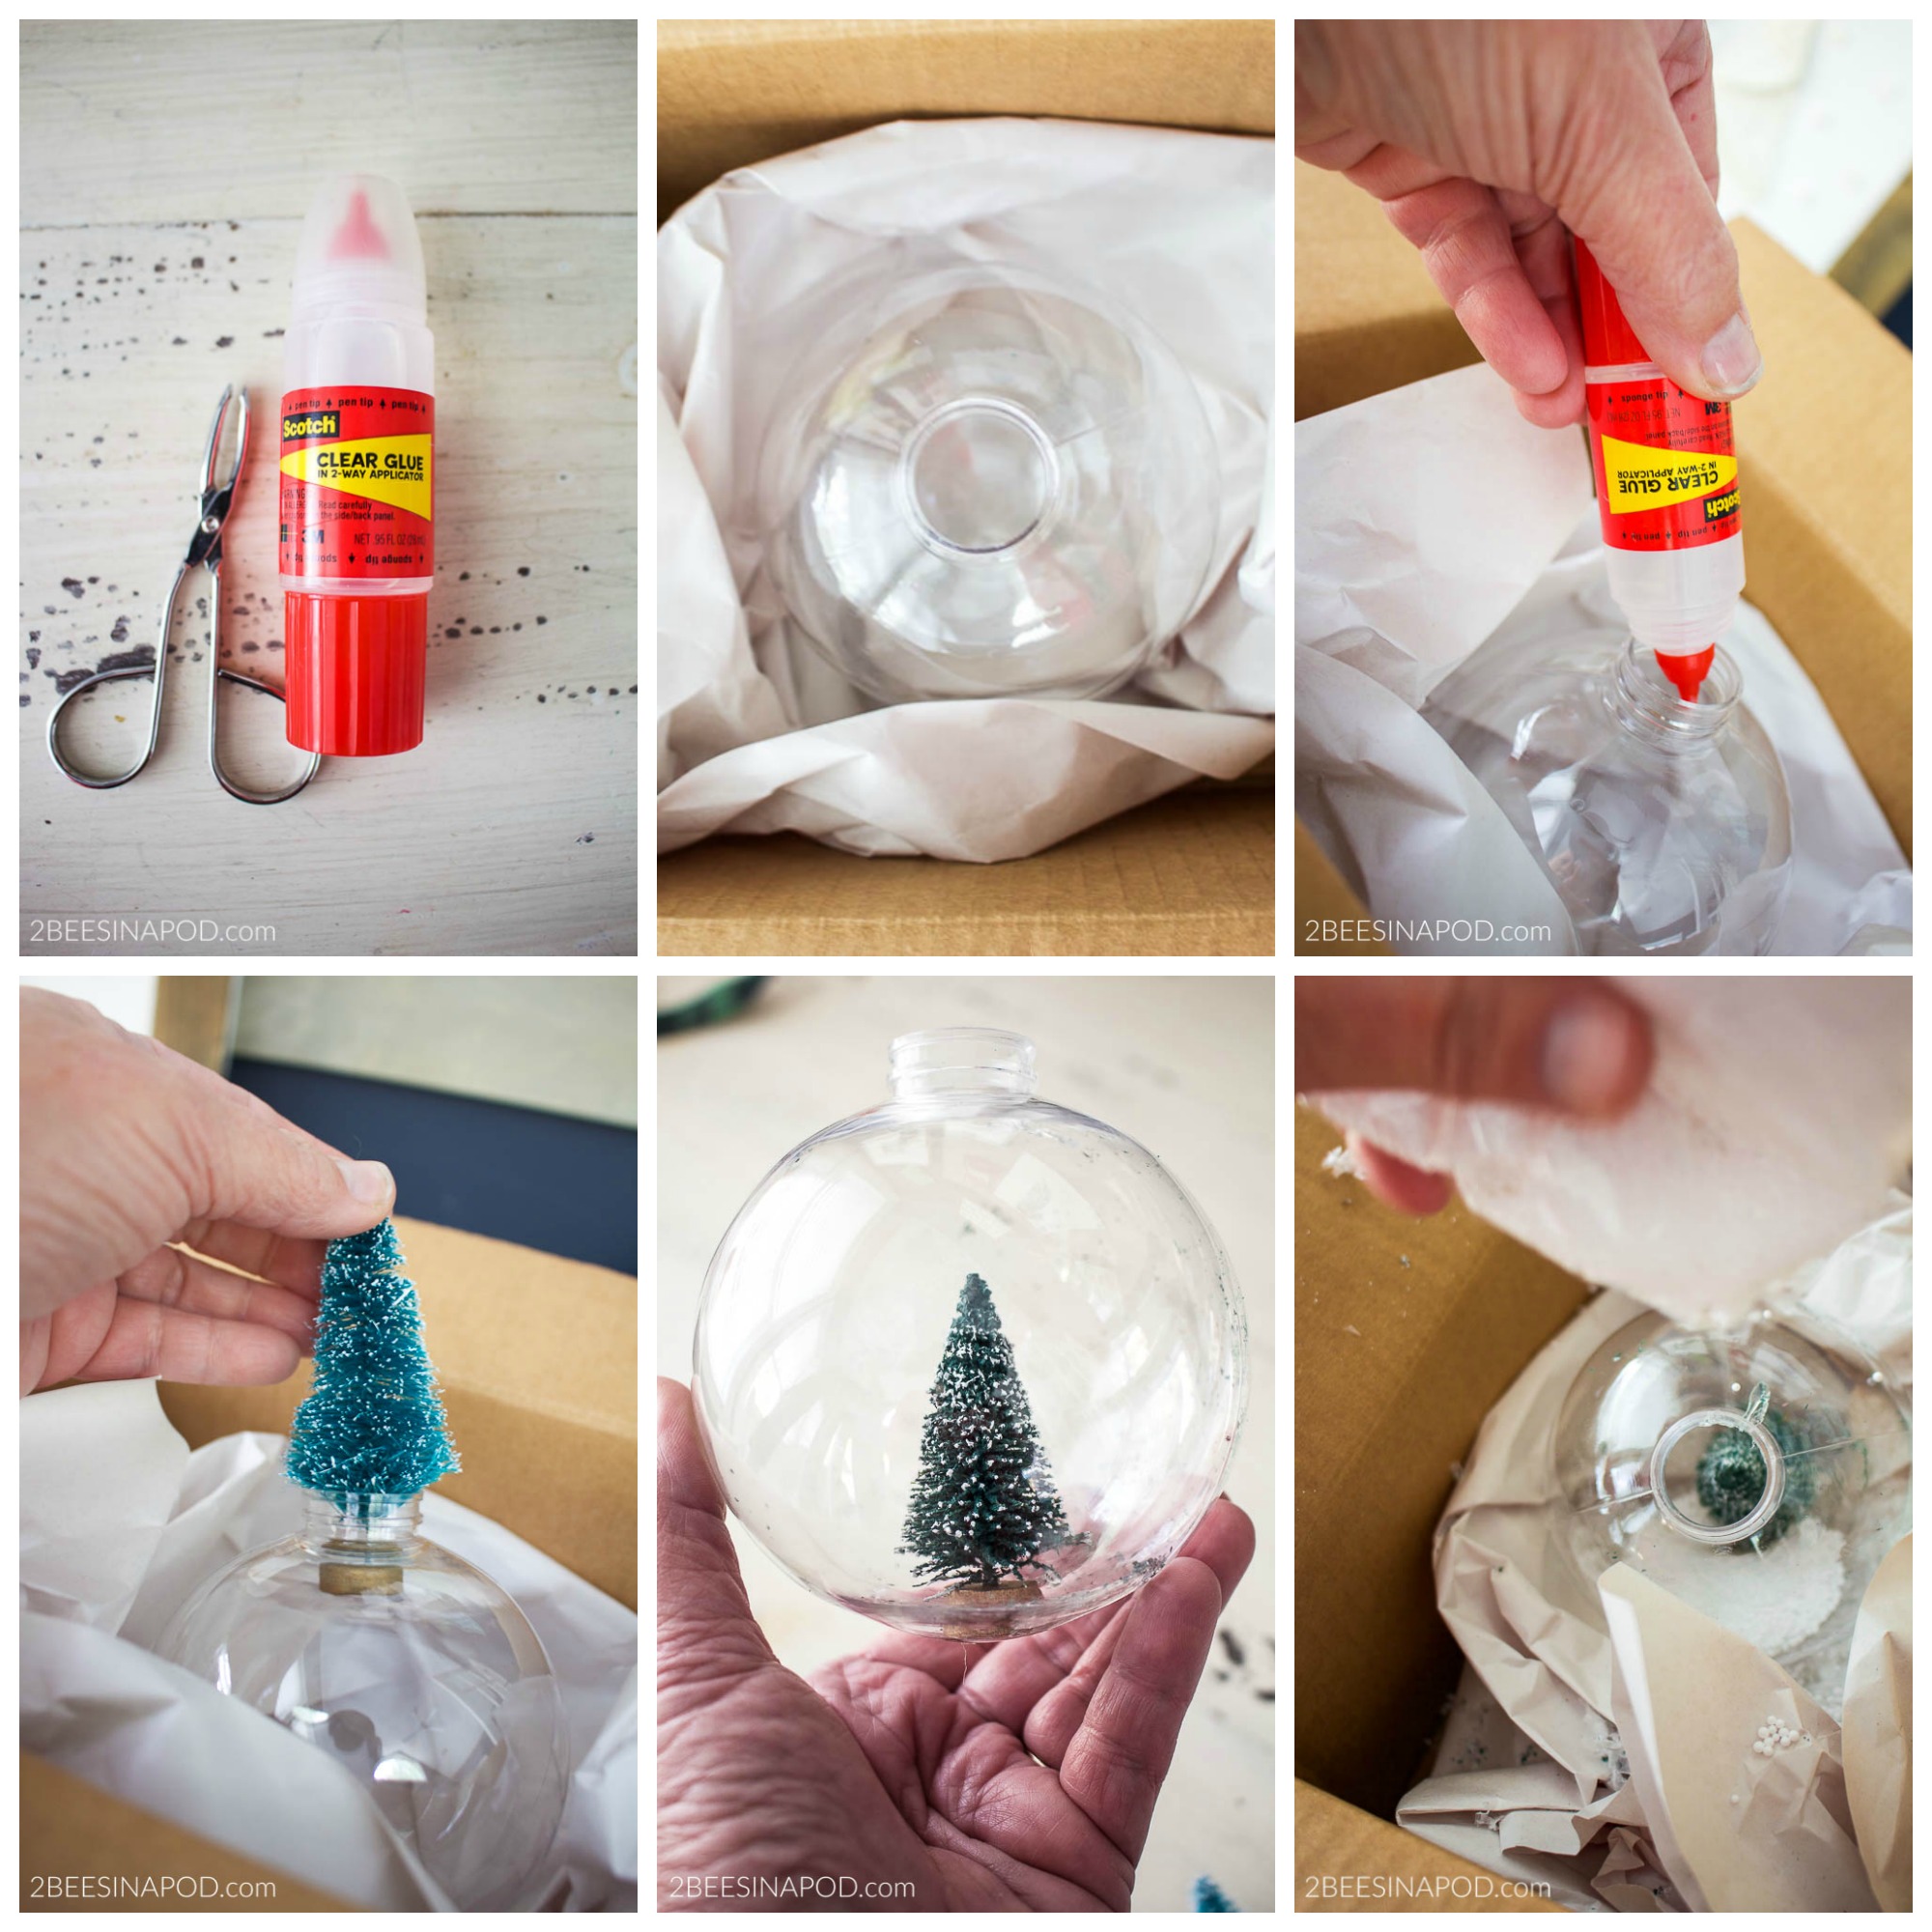
Materials needed:
- plastic round globe ornament with a wide opening. I found THESE ORNAMENTS. They’re great because they come apart for better ease or adding larger decorations.
- faux snow.
- bottlebrush tree or mini tree. Here’s a great deal on BOTTLEBRUSH TREES
- clear glue
- tweezers
- ribbon or other embellishments (optional)
- a box and paper to stabilize ornament

Tutorial
- Gather together needed materials.
- Carefully remove the ornament holder and set aside. You will need it later.
- Stabilize ornament inside of the box.
- Carefully add glue to the inside,bottom center of the ornament.
- Squeeze and guide the tree inside of the ornament opening. Use the tweezers at the top of the tree to hold into place. Press the base of the tree onto the glue. Carefully remove the tweezers. Let glue dry.
- After the glue is dry, add as much faux snow as you like.
- Glue the ornament holder back on top.
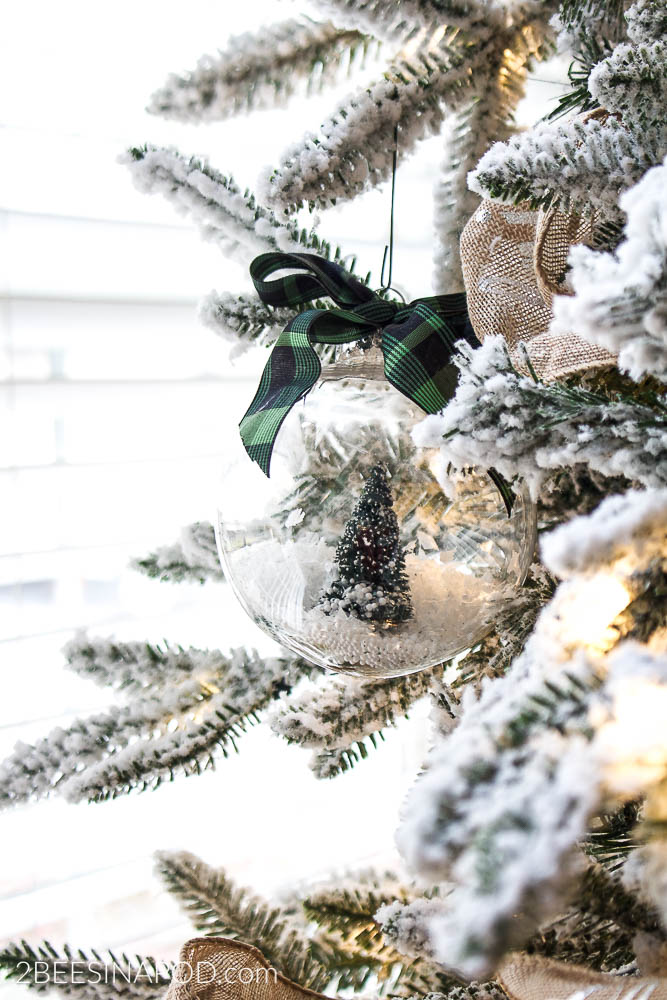
- Embellish with ribbon.
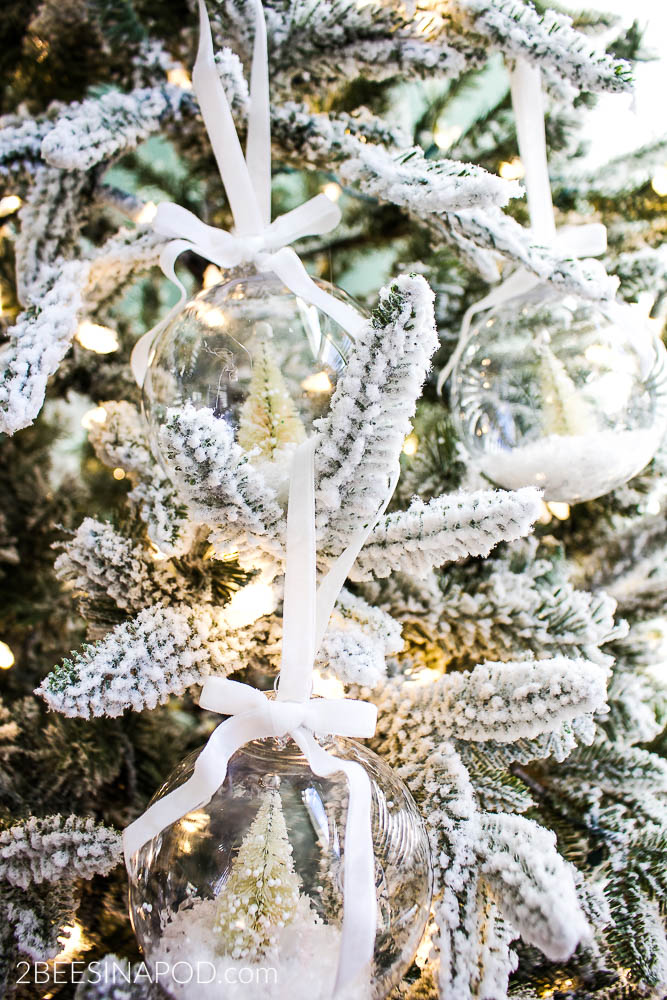
These snow globe ornaments look so pretty under the lights. You would never know that the globes are plastic.
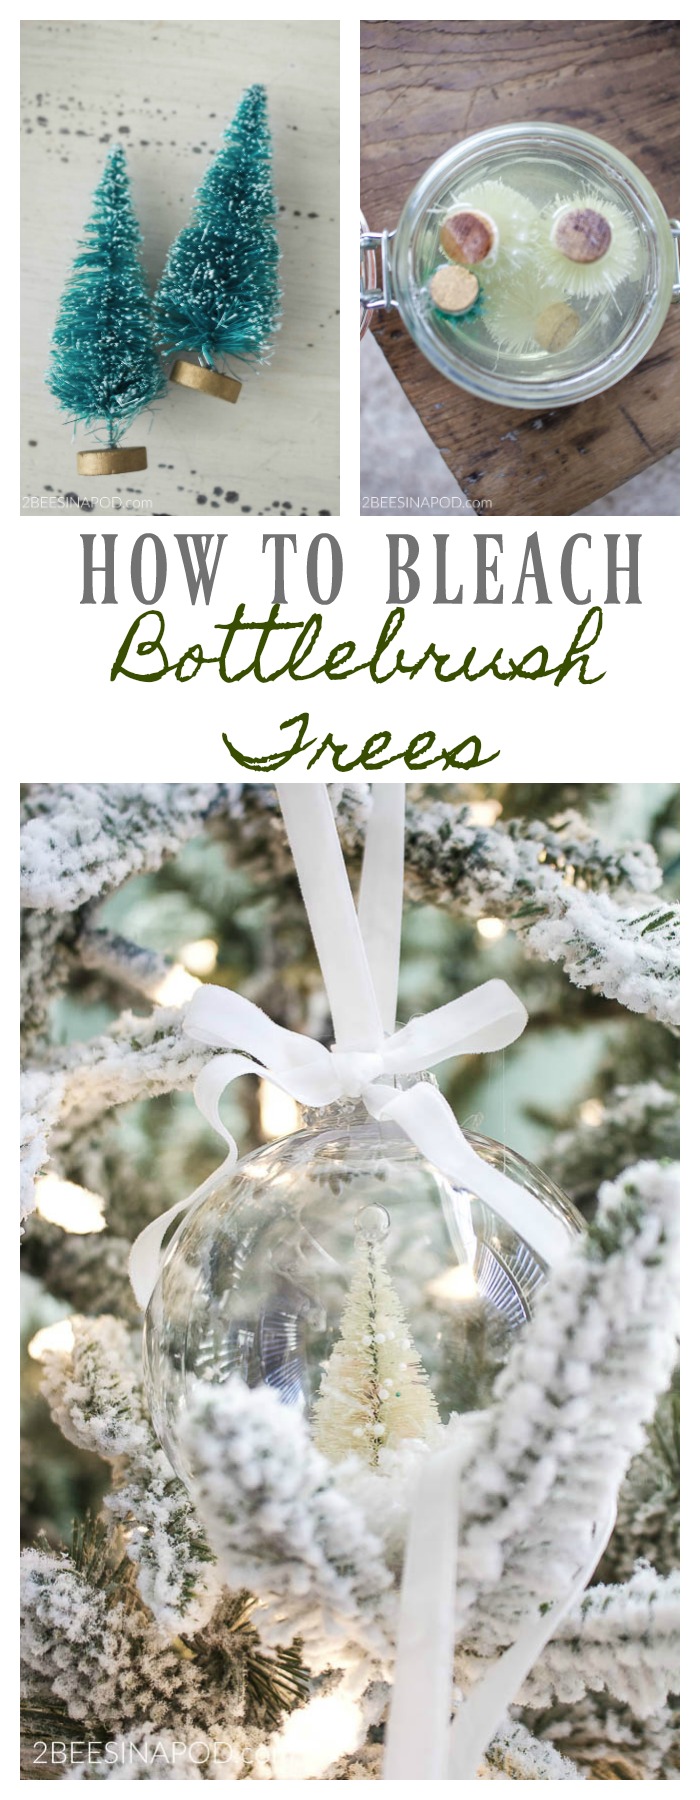
I have always love the beautiful mini white bottlebrush trees too. The problem for me though is that they are difficult to find and when I have found them, they are very expensive. Well guess what? You can bleach the bottlebrush trees! Keep in mind that they must be the bottlebrush variety for this to work. You know how some of the mini trees are harder and more woodsy? They will not work with this method.
How to bleach a mini bottlebrush tree
- Rinse bottlebrush tree
- Fill a small 4 ounce jar with bleach
- Add bottle brush trees upside
- Pay close attention as the trees in this tutorial were totally bleached in 3 minutes!
- Carefully remove from bleach and completely rinse with warm water and dish soap.
- Lightly pat dry with paper towels.
- Completely air dry

As an example, I added a mini woodsy tree to the mix above. It never turned white. The green color oozed off of the tree like paint, and the tree turned mint green. These DIY Bottlebrush Christmas Tree Snow Globe Ornaments were created the exact same was as the above ornament.
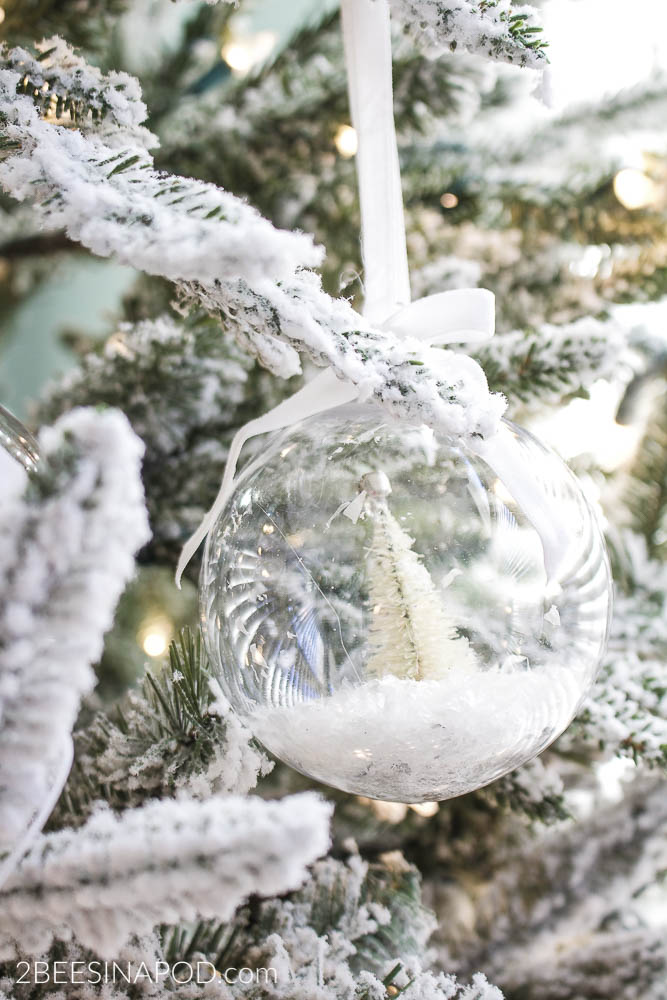
A little silver bell was added to the top of each white tree for further embellishment. 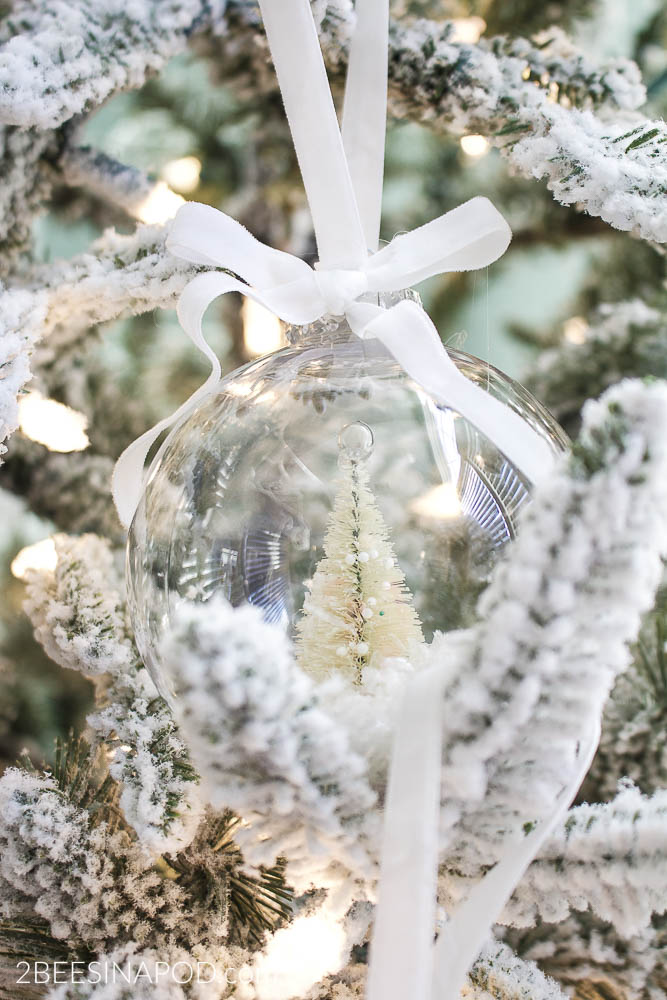
So while I’m disappointed that I don’t have my Christmas boxes from storage again this year, I am very happy to create pretty new things that I love and that are budget friendly! Are you creating any new ornaments or Christmas decor this year?

You don’t want to miss tomorrow – Jenn will be sharing her beautiful kitchen and she has it all decked out for Christmas!
Don’t forget to Pin this to your favorite Pinterest board!
Until tomorrow,


I don’t know how I missed this post, Vicki! This ornament is so stunning. You know the little white one is my favorite and I can’t wait to see the rest of your flocked tree. Love all the ideas you guys have been creating this season. They’re all so pretty! Hugs, Coco
Where did you find the plaid ribbon? I love it!
These are so cute and would love to make these with my daughter’s Daisy troop for the nursing home we are visiting this Christmas. Are the linked ornaments the ones pictured? I’m confused as to how the ornaments that are fillable that you linked work for this project. Wouldn’t the tree sit right on the line where it connects? And then since the top is not removable, how would you add the snow inside?